Flipper Zero · Volume 3
Flipper Zero Volume 3 — Firmware Ecosystem & Pairing
Official, Momentum, Xtreme, Unleashed, RogueMaster — install, recovery, BLE re-pair, and module-firmware pairing
3.1 About this Volume
The firmware ecosystem is where the Flipper goes from being “the device” to being “the platform”. This volume covers all five major firmwares worth running on production hardware, the install paths, the recovery procedure when you brick one, the BLE re-pair 3-step (the most-asked support question), and — critically — the module firmware pairing matrix: when you swap a Flipper firmware, which on-module firmwares stay compatible, which need to be reflashed, and which combinations refuse to talk.
3.2 The Five Firmwares Worth Running
Table 1 — 2. The Five Firmwares Worth Running
| Firmware | Maintainer | Reach | Best for |
|---|---|---|---|
| Official (OFW) | Flipper Devices | Official, signed, regional restrictions enforced | Stock device, compatibility baseline |
| Momentum | Next-Flip team (continuation of Xtreme) | Largest JS module surface, region-unlocked, most active | Default for development |
| Unleashed | UberGuidoZ et al. | Region-unlocked, IR external GPIO, Sub-GHz extras | Field RF work where you need every protocol |
| RogueMaster | RogueMaster | Bleeding-edge feature dump, includes “withModules” drivers | Trying out new community FAPs first |
| Xtreme | Xtreme team | Predecessor to Momentum; mostly merged forward | Legacy / specific Xtreme-only FAPs |
Recommendation rule of thumb: Momentum mainline as primary, Official as a secondary compatibility target you keep on a spare SD card. Unleashed is worth installing if you do IR-blaster work or sub-GHz field testing where you need every region’s protocol catalog. RogueMaster is for “I want to try the community’s newest” — flash it, exercise it, decide if it’s stable enough to keep around.
3.2.1 What “region unlocked” means
OFW enforces sub-GHz TX restrictions on regional bands, NFC card emulation restrictions on certain card types, and RegionData files that control 433.05–434.79 vs 868.0–868.6 etc. Custom firmwares either remove the regional check entirely or ship a “WORLD” RegionData file that exposes all the bands.
The legal restriction does not go away because the firmware allows the transmission. Regulators care about the signal hitting the air, not what code permitted it. See
_shared/legal_ethics.mdand §lab-rules in Vol 1.
3.3 Anatomy of a Firmware Install Bundle
Every firmware install bundle (the .tgz or .dfu blob qFlipper handles)
contains:
update.fuf— manifest naming the bundle (firmware name, version, changelog ref).firmware.dfu— the M4 application image, in the standard ST DFU container. This is what gets flashed to the application core.radio.bin(sometimes) — a packaged BLE wireless stack image. Triggers a FUS-mediated wireless-stack reflash. Bumping this is what causes the BLE re-pair requirement (§7).resources.tar— assets (animations, dolphin sprite art, language packs, default settings) that get unpacked to/ext/dolphin/,/ext/animations/,/ext/apps_data/.- Optional asset packs (Momentum-flavored) — a directory tree under
/ext/asset_packs/that the firmware can swap between at runtime.
Internal flash holds only firmware.dfu + radio.bin. Everything else
lives on microSD.
3.4 Install Workflow
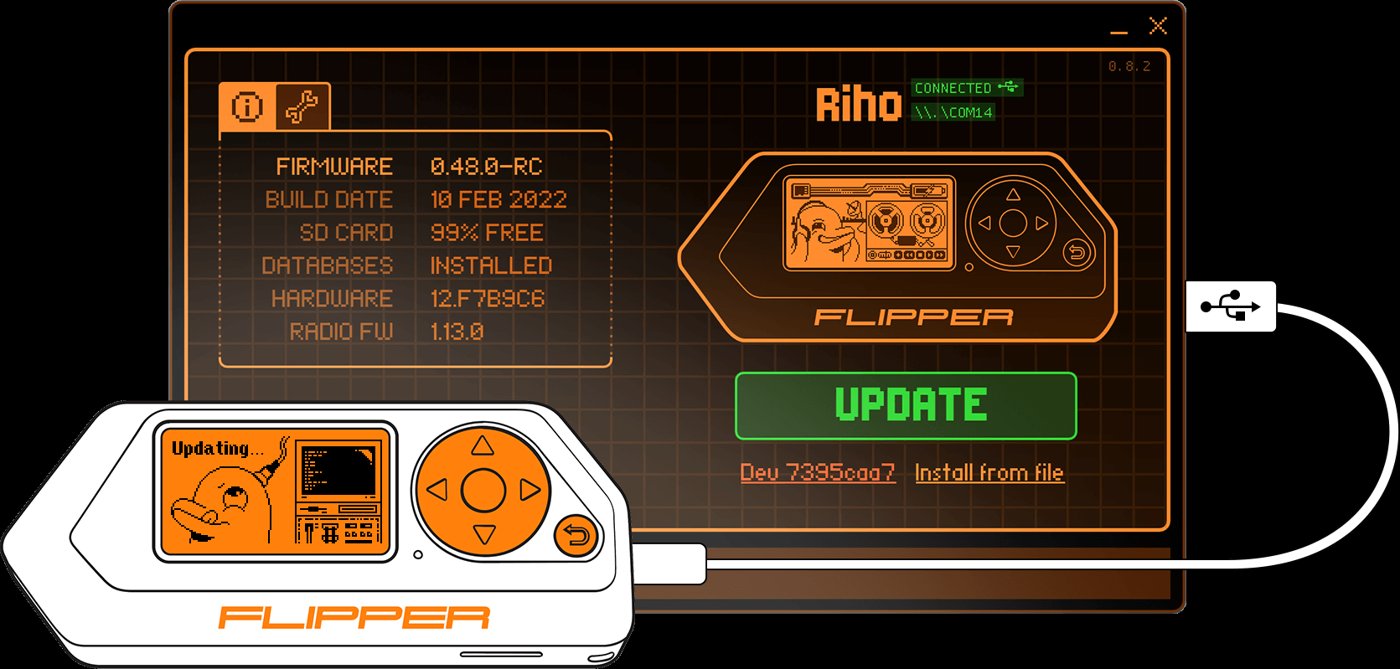
3.4.1 First-time install (preferred path: qFlipper)
- Plug Flipper into a PC via USB-C.
- Open qFlipper (Windows / macOS / Linux) — repo at
flipperdevices/qFlipper.1 Cross-platform Qt/C++ app. - qFlipper auto-detects the Flipper, reads its current firmware version,
and offers an install pane. Pick “Install from file” and select the
.tgz. - qFlipper pushes the bundle to the SD over the protobuf RPC (USB-CDC), then reboots the Flipper into a stripped updater image that swaps the M4 firmware.
- Reboot. New firmware boots.
3.4.2 Web Updater (browser-based, USB only)
https://lab.flipper.net/ — same protocol over WebUSB. Works in
Chrome/Edge. No install needed. Same UI semantics as qFlipper.
3.4.3 Mobile App update (over BLE)
The Flipper Mobile App (Android / iOS) can install firmware over BLE. Slower than qFlipper — ~5–10 minutes for a full install vs. ~1 minute over USB. Useful in the field.
3.4.4 Manual SD card update
If the Flipper still boots and the SD card is mountable on a PC, you can
just drop the update.tgz extracted to /ext/update/ and trigger
“Settings → Storage → Install from update.fuf” on the device.
3.5 Multi-Firmware Switching from One SD
Three workable patterns:
- Multi-bundle staging in
/ext/update/— keepmntm-013.tgzandunleashed-080.tgzandofw-1.4.tgzin subdirectories. Use the on-device “Install from update” UI to swap. Each install replaces the firmware; data on the rest of the SD is preserved. - One SD card per firmware — ten-second swap with the SD-card tool. Most reliable, but requires extra cards. Names them physically.
- Hybrid — primary card has Momentum + the day’s working data; secondary card has Official for compatibility tests.
Important: firmware lives in internal flash, not on the SD card. Swapping the SD doesn’t change the firmware that’s running. You always have to install via the in-app updater (or qFlipper) — the SD-swap is only useful for data isolation and for staging multiple bundles.
3.6 DFU Recovery (Bricked Device)
If the device won’t boot, the in-app updater fails, and qFlipper says “can’t connect” — this is your path.
3.6.1 Entering DFU
- Power off (hold BACK ~10 s).
- Hold LEFT + BACK while plugging in USB.
- Device enumerates as STM32 ROM bootloader: USB VID 0x0483, PID 0xDF11.
- qFlipper sees it and offers “Repair”.
3.6.2 What “Repair” does, in order
- FUS-delete — wipes the wireless-stack region and FUS itself.
- FUS-install — installs a known-good FUS image.
- BLE-stack-install — installs the matching BLE stack via the freshly installed FUS.
- Main FW install — flashes the M4 application.
- SD resource extract — repopulates
/ext/from the resources.tar.
3.6.3 Bailing out
If you press LEFT+BACK and don’t actually want to flash, hold BACK ~10 seconds to escape DFU. Device reboots into normal firmware (if any is intact). This is useful when you trip into DFU accidentally.
3.6.4 PIN reset
Forgot your screen-lock PIN? Recovery flashes wipe /int/.dolphin_state
which contains the PIN, so a Repair effectively resets it. There’s no
quicker way without the PIN.
3.7 The BLE Re-pair 3-Step
After any firmware change that bumps the BLE stack (i.e., any update
that ships a new radio.bin), you have to re-pair the device with the
Mobile App and any computer that was paired over BLE. Skipping any
step leaves the pairing in a half-broken state.
1. ON THE PHONE:
   Settings → Bluetooth → Find your Flipper → tap (i) → "Forget This Device"
   (Android: long-press → Unpair)

2. ON THE FLIPPER:
   Settings → Bluetooth → Forget all paired devices
   (Some firmwares: Settings → System → Reset → BLE only)

3. RE-PAIR FRESH:
   Open the Mobile App → it'll prompt to find the Flipper → confirm the
   pairing PIN that pops up on the Flipper screen
Why this is needed: the BLE link key is derived from a stack-internal identity that changes when the stack is reflashed. The phone caches the old key; the Flipper has the new key; pairing fails silently (“connecting…connecting…” forever). Forcing both sides to forget + re-derive fixes it.
3.8 Module-Firmware Pairing Matrix
This is the matrix Vol 1 promised. When you change the Flipper firmware, which on-module firmwares stay compatible? When does the module need to be reflashed?
3.8.1 Module-firmware-vs-Flipper-firmware compatibility
Table 2 — 8.1 Module-firmware-vs-Flipper-firmware compatibility
| Module | Stock module FW | Reflash needed if Flipper FW changes? | Compatible with which Flipper FWs? |
|---|---|---|---|
| Official WiFi Devboard (ESP32-S2) | Black Magic Probe | No (FW lives on the ESP32) | Any — stock board acts as SWD probe over USB-C |
| WiFi Devboard reflashed to Marauder | Marauder | No | Any — needs Marauder companion FAP on Flipper side |
| WiFi Devboard reflashed to FlipperHTTP | FlipperHTTP | No | Any — needs FlipperHTTP-aware FAPs |
| Video Game Module (RP2040) | VGM stock UF2 | Sometimes — see §VGM-pairing | OFW + Momentum (default), RogueMaster (RGB) |
| NRF24 module | (no firmware — bare radio) | N/A | Any |
| External CC1101 amp | (no firmware — bare radio) | N/A | Momentum / Unleashed / RogueMaster auto-detect; OFW manual |
| Game Over (Ruckus) | Custom Marauder fork | No (FW on ESP32-S3) | OFW + any custom — needs Marauder FAP |
| AWOK Dual Touch V3 | (ships blank — user flashes) | No (each ESP independently) | Any — needs Marauder + Marauder Dev Board Pro binaries |
| Mayhem v2 | Marauder | No | Any |
| Apex 5 (ESP32-C5) | Marauder + custom Apex5 firmware | No | Any |
The pattern: modules with their own MCU run their own firmware independently. Reflashing the Flipper does not affect the on-module firmware. The Flipper-side change you usually need is just installing the right companion FAP for the new firmware.
3.8.2 Video Game Module specifics
The VGM is the one module where Flipper-side firmware can require module- side reflash. Specifically:
- Stock OFW — works with default VGM UF2.
- Momentum mainline — comes with its own RGB-aware VGM UF2. Use the “Apps → GPIO → VGM → Install RGB Firmware” path; once installed it stays installed across Flipper firmware swaps.
- RogueMaster — same as Momentum.
- Custom Pico SDK builds (DOOM, Air Mouse, custom games) — flash via the VGM Tool FAP or by holding BOOT and dragging the UF2 over USB. These are independent of the Flipper firmware.
The “stock UF2” is the one that gets restored when you run the VGM Tool’s “Install Firmware” without specifying a custom UF2 — it’ll overwrite your custom Pico project unless you decline.
3.8.3 Wi-Fi module FAP-side compatibility
Companion FAPs live on the Flipper SD. The dependency direction is:
- The companion FAP is built against a specific Flipper SDK API version. Bumping the Flipper firmware can break a companion FAP if the SDK changes.
- The companion FAP talks to the on-module firmware over UART at a defined baud rate / command set. Bumping the on-module firmware can break the companion FAP if the command set changes.
In practice: when you bump Flipper firmware, rebuild or refetch your companion FAPs from the same firmware’s app catalog, not from a different firmware’s catalog. Momentum, RogueMaster, Unleashed each have their own FAP repos.
3.9 Region & Regulatory Bypass
OFW enforces sub-GHz TX restrictions per region via:
- A provisioning file at
/int/.region_datashipped with the OFW bundle, set to your shipping country. - A runtime check at TX time against the active band.
Custom firmwares either:
- Skip the runtime check entirely (Momentum, Unleashed, RogueMaster), or
- Ship a “WORLD”
.region_data(some Unleashed builds), or - Add a hidden “MNTM Settings → Protocols → Disable Region” toggle (Momentum).
The errors you’ll see when a transmission is blocked:
- “TX prohibited” pop-up on the protocol screen → regional check fired. Switch firmware or change region setting.
- Sub-GHz scan finds nothing → check that the chosen frequency is in your active region’s allowed band; OFW won’t even RX outside the region.
3.10 Asset Packs (Momentum-flavored)
Momentum supports loadable asset packs that swap animations, fonts,
icons, and the dolphin sprite at runtime. Drop a pack under
/ext/asset_packs/<name>/, then Settings → Asset Packs → pick it. Three
or four packs in rotation is fine; ten will slow boot a bit.
3.11 JS Runtime — what each firmware exposes
Momentum has the largest JS module surface; OFW has a more limited one; Unleashed is in between; RogueMaster tracks Momentum closely. Vol 7 §JS covers the per-module API. Quick summary:
Table 3 — covers the per-module API. Quick summary
| Module | OFW | Momentum | Unleashed | RogueMaster |
|---|---|---|---|---|
event_loop, gui, submenu, dialog | ✓ | ✓ | ✓ | ✓ |
storage | ✓ | ✓ | ✓ | ✓ |
subghz | partial | ✓ full | ✓ | ✓ |
i2c, spi, serial, gpio | ✓ | ✓ | ✓ | ✓ |
notification | ✓ | ✓ | ✓ | ✓ |
keyboard, usb | ✓ | ✓ | ✓ | ✓ |
usbdisk | — | ✓ | partial | ✓ |
ble, bt | partial | ✓ | partial | partial |
vgm (IMU access) | — | ✓ | — | ✓ |
3.12 Recommended Rotation
A pragmatic loadout for serious work:
- Daily driver: Momentum mainline.
- Spare SD with OFW for compatibility regression tests when a FAP misbehaves.
- Spare SD with Unleashed for IR-blaster sessions that need external GPIO carrier routing.
- Every 1–2 months, refresh:
qFlipper → Update. - Every Flipper FW update, redo the BLE re-pair 3-step without thinking about whether you need to. It’s ~30 seconds and prevents the weird “phone won’t connect” troubleshooting you’d otherwise blame on the app.
3.13 Troubleshooting Quick Reference
Table 4 — 13. Troubleshooting Quick Reference
| Symptom | Likely cause | Fix |
|---|---|---|
| Mobile App can’t connect after FW update | BLE link key stale | §7 BLE re-pair 3-step |
| qFlipper “Repair” button greyed out | Device not in DFU | Power off, hold LEFT+BACK while connecting USB |
| FAP says “API version mismatch” | FAP built for older firmware | Rebuild FAP with current SDK or download new build from current firmware’s catalog |
| VGM black screen on HDMI | DVI signal rejected by display | Try a different display — old 1080p or capture stick |
| Sub-GHz “TX prohibited” | OFW regional check | Switch to Momentum or change region in Settings |
| Marauder companion FAP “no UART” | Wrong on-module FW or baud mismatch | Reflash module-side FW; verify baud (typically 115200) |
| Flipper Mobile App stuck on “Synchronizing” | SD pulled mid-write | Reboot Flipper; if persistent, fsck the SD on a PC |
| BLE re-pair fails repeatedly | App + device both have stale identity | Forget on phone, Forget All on Flipper, reboot phone, then re-pair |
3.14 What’s next
Vol 4 — Sub-GHz CC1101 deep dive. Register-level operation, the protocol catalog Flipper firmware supports, modulation modes, when external amp + tuned antenna lifts you from a 5–10 m radio to a 70–150 m radio, and where HackRF wins.
Comments (0)