iCopy-X · Volume 7
iCopy-X — Operating Modes, Part 1: Auto Copy, Scan Tag, Read LF, Read HF, Sniff Traffic
The five field-facing modes you'll spend ninety-five percent of your time inside — what the screen shows, what the silicon is doing, and what to do when it stops
7.1 Where this volume sits in the series
This is the first of the two operating-modes volumes. Vol 1 framed the iCopy-X as a portable, push-button Proxmark3 wrapped in a vendor-built application layer; Vols 2 through 6 covered the hardware and the card-technology landscape. This volume opens the device’s menu and walks the first five modes — the ones an operator uses every day on an engagement. Vol 8 covers the remaining modes (Simulation LF / HF, PC-Mode, and the diagnostic + housekeeping items).
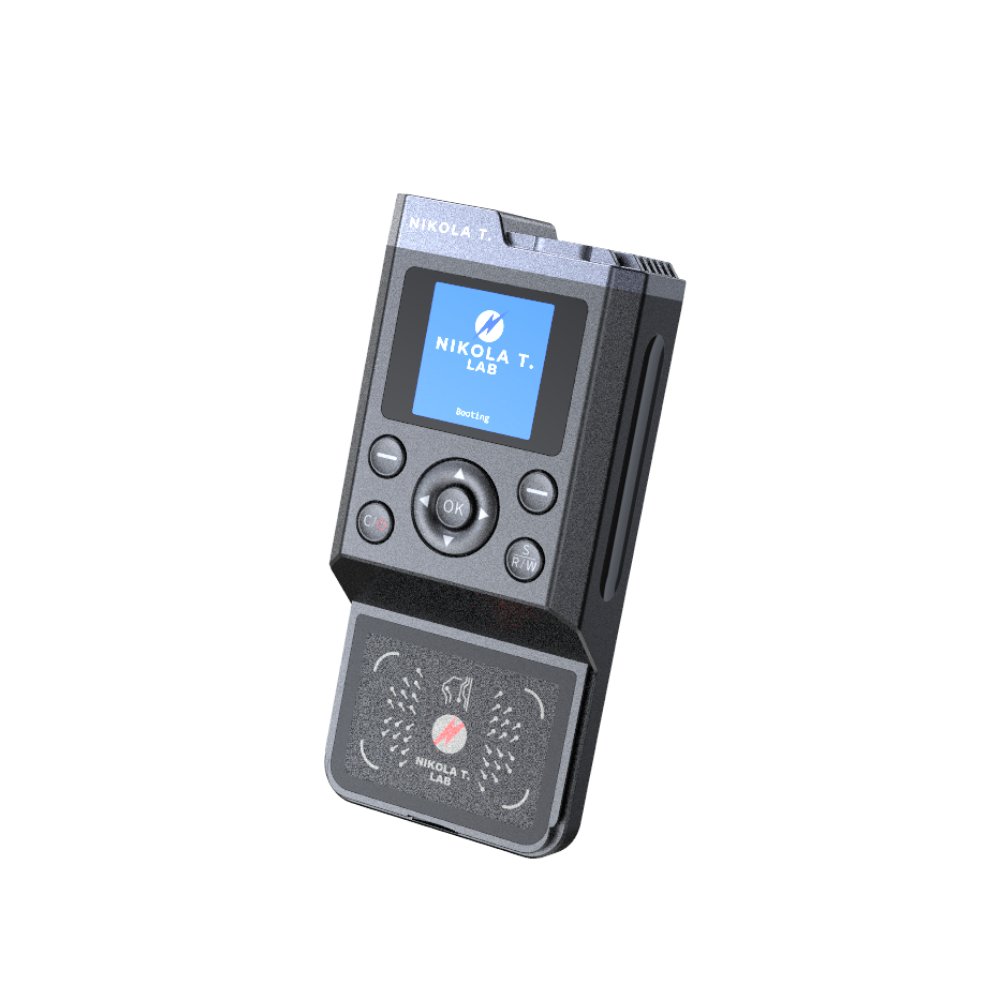
The main menu on the iCopy-X is two pages of five items each, navigated with the up/down arrows and the OK button. Page 1/2 lists Auto Copy, Scan Tag, Read Tag, Sniff Traffic, Simulation. Page 2/2 lists PC-Mode, Backlight, Diagnosis, Volume, About. The S/R/W dedicated key on the lower-right of the keypad is a one-button shortcut to Auto Copy from anywhere in the UI — including from inside another mode mid-operation, which is the fastest way to abort and restart a clone. The power / cancel key on the lower-left aborts the current operation and returns to the previous menu level; long-press three seconds toggles power; long-press fifteen seconds forces a reset on the rare occasion that the Linux application layer hangs.
Throughout this volume, the term “the antenna” means the dual LF + HF coil PCB on the bottom face of the device — the area marked with the red and blue placement-zone overlays on the transparent badge cover. The red zone is the 125 kHz LF coil, biased toward the upper half of the placement area; the blue zone is the 13.56 MHz HF coil, biased toward the lower half. Full-size ISO/IEC 7810 ID-1 cards (the credit-card form factor) cover both zones, so placement is forgiving. Keyfob-format tags are smaller than the placement area and need to be positioned over the appropriate zone for the technology being read — LF keyfobs to the red, HF keyfobs to the blue. The transparent cover has a friction surface that holds a keyfob in place while the device is being walked around an office, which matters more than it sounds — a slipping fob inside an Auto Clone read-write cycle costs a retry, and a retry in front of a client who is being shown a demonstration costs more than the operator wants to spend on credibility.
The silicon underneath every mode in this volume is the same: an AT91SAM7S512 ARM7TDMI microcontroller (256 KB SRAM, 512 KB flash, running the Proxmark3-derived firmware that drives the RF state machines), paired with a Xilinx Spartan-3 XC3S100E FPGA (100K-gate equivalent, configured at boot with one of the canonical Proxmark3 bitstreams — the LF bitstream for 125/134 kHz work, the HF bitstream for 13.56 MHz, swapped on the fly when the operator changes modes). A separate STM32F103 handles the housekeeping — keypad scanning, the 240×240 RGB LCD, the audio prompts, and the serial bridge that lets the NanoPi NEO application layer issue commands to the PM3 stack. The mode menu is rendered by Linux on the NanoPi; the actual RFID work is done by the AT91SAM7S512 and the Spartan-3 FPGA on the dedicated daughter-board. When this volume talks about “the device reading the card,” that’s the FPGA modulating the carrier and demodulating the response; when it talks about “the device deciding what to do next,” that’s Linux on the NanoPi running the application logic that decides which PM3 command to issue next. Two distinct processors, two distinct jobs, one user-facing experience.
The whole stack — application logic, PM3 firmware, FPGA bitstream — is what the per-device IPK firmware update bundle delivers (Vol 10 §4). Mode behaviour can and does change with firmware revisions; the descriptions in this volume are current as of the iCopy-X 2.0 firmware family. Where behaviour has changed substantively between firmware revisions in the recent past, the relevant subsection calls that out.
7.2 Mode 1 — Auto Copy
Auto Copy is the headline feature of the iCopy-X and the mode the marketing copy is built around. It is also, by an enormous margin, the mode the operator will spend the most time in. The user manual lists it first on the menu; the dedicated S/R/W key bypasses the menu entirely to launch it; the device’s value proposition stands or falls on whether Auto Copy completes successfully on a real card held against the antenna in a real hallway. Most of the time it does. The cases where it doesn’t are what makes the other modes worth having on the same device.
7.2.1 What the mode does in one paragraph
Auto Copy is a state machine that walks a card through four phases — detect, identify, read, write — without operator intervention beyond holding two cards (the source, then the blank) against the antenna in sequence. The detect phase pings the LF carrier and the HF carrier in alternation until something on the antenna responds; the identify phase narrows that response down to a specific tag family (HID Prox, EM4XX, MIFARE Classic 1K, iCLASS Legacy, and so on); the read phase pulls the cloneable bits off the card, using whichever protocol and keys that family requires; the write phase asks the operator to swap in a compatible blank, then programs the blank with the data just read and verifies that the blank reads back identically. The screen prompts the operator at each transition between phases; the operator’s input is reduced to swapping cards and pressing OK to confirm.
7.2.2 The user-facing workflow
The canonical Auto Copy sequence, as documented in the Lab401 user manual and reproduced consistently across firmware revisions:
-
Place the source card. Hold the card to be cloned against the antenna placement area. Use the appropriate red (LF) or blue (HF) zone for keyfobs; full-size ID-1 cards span both zones and the device will detect them either way.
-
Launch Auto Copy. Either press the dedicated
S/R/Wkey, or arrow down to “Auto Copy” on Page 1/2 of the main menu and press OK. The screen shows a “Scanning…” status with an animated indicator. -
Wait for the “Read successful!” prompt. The device cycles through the detect → identify → read phases, then displays the detected technology (e.g., “HID Prox,” “MIFARE Classic 1K,” “iCLASS Legacy”) and the recovered identity data — UID, facility code, card number, and sector dump where applicable. Audio prompts accompany each phase transition; the volume is configurable from menu item 9 (Volume).
-
Remove the source card. Place the blank. When the read completes, the device prompts the operator to remove the source card and present an appropriate blank. For LF tags the blank will almost always be a T5577. For HF the blank type depends on the source: MIFARE Classic Gen1a / Gen2 / Gen2a for MIFARE clones, iCLASS-compatible blanks for iCLASS Legacy, etc. Vol 9 covers the blank-card ecosystem in detail.
-
Press
S/R/Wagain to write. The device programs the blank with the data captured in phase 3, then re-reads the blank to verify byte-for-byte equivalence. The screen shows “Write and verify successful!” when the operation completes cleanly. -
Done. The cloned card is ready for use. Total elapsed time depends on the technology — see the time-budget table in §2.6 — but for a clean HID Prox-to-T5577 clone the entire sequence is under fifteen seconds, including the operator’s card-swap.
The press-OK confirmation between phases is intentional: it gives the operator a moment to verify the device identified the right technology before committing to a write. An operator who is paying attention will catch the rare case where the device misidentified an unfamiliar card and is about to write the wrong data to the blank — useful when the source card is something unusual, less critical when the source is the operator’s own access badge in a known facility.
7.2.3 The internal decision tree
Under the application-layer “Auto Copy” wrapper, the device runs a deterministic decision tree against the card on the antenna. The tree is the load-bearing intellectual property of the iCopy-X firmware — it is what differentiates a Lab401 device from a $30 AliExpress duplicator that runs only the leftmost branch. The decision tree at a high level:
[1] Detect band — LF carrier first, then HF, alternating until response
    ↓
[2] Identify tag family within the responding band
    ↓
[3] If LF — branch by modulation (ASK / FSK / PSK) and bitrate
       ↓
       Pull the modulation pattern that matches the manufacturer's
       encoding (Wiegand 26 for legacy HID Prox; ioProx XSF; Indala;
       EM4100; AWID; ...) into a normalised internal representation.
       Outcome: the cloneable identity bits, ready for T5577 write.
    ↓
[3'] If HF — branch by ISO standard (14443A / 14443B / 15693 / PICOPASS)
       ↓
       For ISO 14443A:
         If MIFARE Classic 1K/4K — try default-key dictionary against
         each sector. If any sectors fail, present the user with the
         four-option menu (§2.5).
         If MIFARE Ultralight / C / EV1 / NTAG — dump pages.
         If unknown 14443A — read UID only and offer UID-only clone.
       For ISO 14443B — read what the protocol allows; identify mostly
         used for inventory rather than clone.
       For ISO 15693 (iCODE SLI / SLIX) — page-read the unencrypted
         pages; SLIX with privacy bit set may require Proxmark Mode.
       For PICOPASS (iCLASS family) — try standard key first; iCLASS
         Legacy and Elite with standard key complete here. iCLASS SE /
         SEOS require the iCS Decoder Tool (Vol 6 §5) and bail out
         here without it.
    ↓
[4] Detect appropriate blank when operator swaps cards
    ↓
[5] Write the captured data to the blank using the blank's specific
    magic-write command set (T5577 password block; MIFARE Gen1a UID
    block-0 unlock; iCLASS keyroll write; etc.)
    ↓
[6] Re-read the blank, compare to the captured data, report verify
    success or failure
Each branch in step [3] / [3’] terminates either in a successful capture or in a specific failure mode that the application layer surfaces to the operator. The most common failure mode by a wide margin is “MIFARE Classic with non-default keys” — the four-option menu in §2.5 is the device’s response to that case. Less common but worth noting: “iCLASS SE/SEOS without iCS Decoder” (the encrypted authentication challenge cannot be answered without the decoder add-on); “MIFARE DESFire” (out of scope for the iCopy-X entirely — these cards use AES-128 with per-card diversified keys and there is no field attack); and “card removed mid-read” (the device times out the read and asks the operator to start over).
7.2.4 The four canonical workflows
In practice, the Auto Copy mode resolves to a small number of concrete workflows that an operator sees over and over. Knowing what each one looks like — including the time budget and the screen sequence — turns Auto Copy from a black box into a predictable instrument.
Workflow A — HID Prox to T5577. The single most common iCopy-X workflow. The operator holds a 125 kHz HID Prox card (or a ProxKey II keyfob) against the LF zone; the device displays “HID Prox,” reads the 26-bit Wiegand-format card number and facility code, and prompts for a blank. The operator swaps in a T5577; the device writes the T5577 configuration block to emulate HID Prox modulation, then writes the data blocks with the captured card number. Re-read verifies. Total elapsed time: typically eight to twelve seconds end-to-end. This workflow is fully reliable in firmware 2.0 and has been since the first iCopy-X shipped. It is also the workflow that a $30 AliExpress duplicator can do; the iCopy-X is overkill for this case considered in isolation. The reason the iCopy-X is worth its price is that it handles this workflow AND the other three below; the AliExpress duplicator handles only this one.
Workflow B — MIFARE Classic 1K with default keys to Gen2 blank. The bread-and-butter HF workflow. The operator holds a MIFARE Classic 1K card (a hotel-room key, a typical office-elevator card, a low-end transit pass) against the HF zone; the device displays “MIFARE Classic 1K,” tries the standard default-key dictionary (FFFFFFFFFFFF, A0A1A2A3A4A5, D3F7D3F7D3F7, the dozen-odd well-known defaults) against each of the sixteen sectors, finds them all open, and reads all 64 blocks (1024 bytes) into the device’s memory. The operator swaps in a Magic Gen2 blank; the device unlocks block-0 (the UID block — Gen1a uses a special unlock command sequence, Gen2 supports direct block-0 writes from any reader), writes block-0 with the captured UID and manufacturer bytes, writes the remaining 63 blocks with the captured sector data and the recovered keys, and verifies. Total elapsed time: twenty to thirty-five seconds. The variance comes from the number of sectors that need write attempts before they verify; clean Gen2 blanks usually go on the first try. This workflow is the one that justifies the iCopy-X’s existence over a UID-only duplicator — those cannot handle sector data or recover keys at all.
Workflow C — MIFARE Classic with non-default keys. The interesting case. The operator holds a MIFARE Classic card whose owner has changed at least one sector key away from the well-known defaults; the device tries the dictionary, finds some sectors that fail to authenticate, and surfaces the four-option menu (§2.5 below). The operator picks one of the four — typically “Sniff” if a genuine reader is available within walking distance, or “PC-Mode” if a laptop with the supplied USB cable is on hand, or “Enter” if the operator has the keys from a previous engagement, or “Force” if a UID-and-readable-sectors clone is acceptable for the use case. Total elapsed time: highly variable. A successful Sniff against a reader runs about two to five minutes per unknown sector key; a PC-Mode hardnested attack against a single unknown key runs about five to ten minutes on a modern i5 laptop; an Enter operation is essentially instantaneous; a Force operation takes the same time as Workflow B for the readable sectors and skips the unreadable ones. Vol 5 covers the underlying attacks in detail; this volume covers how the iCopy-X surfaces them.
Workflow D — iCLASS Legacy / Elite with standard key to iCLASS-compatible blank. The classic HID iCLASS workflow. The operator holds an iCLASS Legacy card (the HID 125-kHz successor that uses 13.56 MHz and PICOPASS silicon) or an iCLASS Elite card with the standard published key against the HF zone; the device displays “iCLASS Legacy” or “iCLASS Elite,” reads the credential block using the well-known HID master key for Legacy or the Elite key the firmware ships with, and prompts for a blank. The operator swaps in an iCLASS-compatible blank (the Lab401 “Advanced” card pack ships these; third-party iCLASS blanks vary in compatibility, see Vol 9); the device writes the credential block and verifies. Total elapsed time: about twenty to thirty seconds. The catch is the iCLASS SE / SEOS family — those use a different authentication protocol (PicoPass to SE migration) that the base iCopy-X cannot answer without the iCS Decoder Tool add-on (Vol 6 §5). With the iCS Decoder attached, Workflow D extends cleanly to SE and SEOS cards; without it, the device bails out at the read phase with an “iCLASS SE/SEOS detected — decoder tool required” message.
7.2.5 The four-option menu — what to do when default keys fail
When Auto Copy encounters a MIFARE Classic card whose sectors do not all yield to the default-key dictionary, the application layer pauses and presents a menu with four options. The user manual lays them out in this order:
-
Sniff — “Go to the reader to sniff keys.” Take the source card to a working reader, place the iCopy-X antenna between them, and sniff the authentication exchange to recover the keys. This is the Mode 4 Sniff Traffic mode (§6 below) invoked inline from within Auto Copy. Requires physical access to a working reader; the reader is what generates the auth challenge the iCopy-X needs to capture.
-
Enter — “Enter known keys manually.” The operator types in keys they already know (from a previous engagement on the same facility, from the building’s facility-management software, from a published default for the card model). The keys are entered hex-by-hex via the arrow keys; the device retries the affected sectors with the entered keys. Fast (under a minute of typing per key) if the operator has the key on hand; useless if they don’t.
-
Force — “Force read to get partial data.” The device skips the unreadable sectors and reads only the sectors whose default keys worked. The resulting clone has the original UID and the readable sectors populated; the unreadable sectors are blank or zeroed. The user manual claims this works for the access-control purposes about 80 percent of the time, on the theory that most facility readers only check specific sectors (often sector 0 plus one or two others) and ignore the rest. In practice the success rate depends entirely on which sectors the reader checks; in modern facility deployments the rate is lower than the manual’s claim and has been trending down as facility-management software has gotten more sophisticated about sector usage.
-
PC-Mode — “Go into PC Mode to perform hardnest.” Drop to PC-Mode (the Mode 6 escape hatch, covered in Vol 8 §3) and run the hardnested attack from the bundled
AUTO-Hardnest.exeWindows tool. This is the most powerful of the four options and the one with the highest success rate against modern MIFARE Classic with non-default keys, including the hardnested-resistantFM11RF08SFudan clones. Requires a Windows 10 laptop with the USB cable connected; the user manual specifies “i3 or above” as the minimum CPU class. Runtime is roughly five to ten minutes per unknown key on a modern laptop; the result is automatically saved back to the device’s key dictionary so subsequent reads of the same card model elsewhere will find the keys cached.
The Lab401 FAQ (page 9 of the user manual) gives explicit guidance on which to choose: prefer PC-Mode if a laptop is available (most powerful); fall back to Sniff if a working reader is available but no laptop (still powerful, slower); use Enter if you have the keys already (instantaneous); use Force as a last resort when none of the above work and a partial clone is acceptable. The four options are not exclusive — an operator can try one, fail, back out, and try another. The recovered keys from Sniff or PC-Mode are persisted to keys/mf1/mf_user_key.dic on the device’s internal microSD, so a successful key recovery on one card improves the dictionary for subsequent reads of similar cards across the rest of an engagement.
7.2.6 Time budget table
The following table captures typical elapsed times for the common Auto Copy workflows under firmware 2.0. Times are wall-clock from the operator pressing S/R/W to the “Write and verify successful!” prompt, including the operator’s source-to-blank card swap.
Table 1 — 2.6 Time budget table
| Workflow | Source card | Blank | Typical time | Variance source |
|---|---|---|---|---|
| A | HID Prox 125 kHz | T5577 | 8–12 s | T5577 write retries on cheap blanks |
| A’ | EM4100 / EM4102 125 kHz | T5577 | 6–10 s | Slightly faster than HID — simpler protocol |
| A” | Indala / AWID / ioProx | T5577 | 8–15 s | Format-specific decoding overhead |
| B | MIFARE Classic 1K default keys | Magic Gen2 | 20–35 s | Number of dictionary keys tried per sector |
| B’ | MIFARE Classic 4K default keys | Magic Gen2 4K | 35–60 s | More sectors → linearly more time |
| B” | MIFARE Ultralight / NTAG | UL / NTAG blank | 10–18 s | Fewer pages → faster |
| C | MIFARE Classic 1K + Sniff (one unknown key) | Magic Gen2 | 3–6 min | Sniff sample count needed for solve |
| C’ | MIFARE Classic 1K + PC-Mode hardnested | Magic Gen2 | 6–12 min | Laptop CPU + nonce-pair count |
| C” | MIFARE Classic 1K + Sniff (all 16 keys unknown) | Magic Gen2 | 20–40 min | Reader-side rate-limiting; sample fatigue |
| D | iCLASS Legacy + standard key | iCLASS blank | 20–30 s | Lab401 blanks predictable; third-party varies |
| D’ | iCLASS SE/SEOS + iCS Decoder | SE/SEOS blank | 45–75 s | Decoder-side cryptographic operations |
The variance in C / C’ / C” is the real-world load-bearing factor. An engagement where the operator expects to encounter exclusively default-key MIFARE Classic cards can be planned around twenty-second-per-card budgets. An engagement where the operator expects non-default keys requires planning for multi-minute-per-card budgets, plus the logistics of having a working reader on hand (for Sniff) or a laptop on hand (for PC-Mode). The pre-engagement checklist in Vol 12 §4 treats this explicitly.
7.2.7 Common Auto Copy gotchas
Card not detected at all. Most often a placement-zone mismatch — the operator is holding an HF card over the red LF zone, or vice versa. The device alternates LF and HF carrier polls; a keyfob held only over the wrong zone will sometimes be detected and sometimes not, depending on how far the fob sits from the correct zone. Recentre the card over the appropriate zone and retry. If the card still doesn’t detect, check the card’s nominal frequency against the badge support table from the device’s vendor page — exotic LF formats (Cotag, Honeywell NexWatch with newer revisions, some Paradox variants) may not be in the device’s identify dictionary even though the card is RF-active.
“Read successful!” but the card data is obviously wrong. Rare in firmware 2.0 but documented in older revisions on a handful of card families where the identify phase resolved the wrong protocol. The fix is to drop to manual Read LF / Read HF (§4, §5 below) and verify the bit-level data before writing to a blank.
Blank not detected or “Write failed.” Several causes ordered by frequency: the blank is the wrong type (e.g., an iCLASS blank presented to a MIFARE Classic write — the device tries Gen2 unlock and the iCLASS PICOPASS chip doesn’t respond); the blank is a previously-written card whose configuration block is locked (T5577 with a password-locked config is the classic case — Vol 9 §3 covers password-recovery for T5577); the blank is a counterfeit “magic” card whose write behaviour is non-standard (the cheap AliExpress Gen2a clones with broken sector-trailer write semantics are a recurring problem). The fix is to try a different blank from a known-good source, ideally Lab401’s “Genuine” packs.
The four-option menu appears and none of the options work. The card may be MIFARE Plus in security-level-3 mode (AES-encrypted, AES-key required — the iCopy-X cannot handle this without the keys), or MIFARE DESFire EV1/EV2/EV3 (explicitly out of scope per the vendor’s documentation — these cards use AES-128 with per-card diversified keys and there is no field-recoverable attack). The device will flag MIFARE DESFire correctly in the identify phase and refuse to attempt cloning. MIFARE Plus may be misidentified as MIFARE Classic on some firmware revisions; the giveaway is that Sniff and PC-Mode hardnested both fail because the Crypto1 cipher isn’t the one being used.
Auto Copy times out mid-read. The card was moved off the antenna or the antenna’s coupling dropped below the threshold mid-read. Hold the card still, ensure the placement zone is correct, and retry. On metal-backed badge holders (extremely common in corporate environments — the operator’s lanyard fob is in a metal-clipped plastic holder), the metal detunes the antenna; removing the card from the holder for the read often resolves the issue.
7.2.8 When to use Auto Copy versus another mode
Auto Copy is the right choice in the field, on a live engagement, when the source card is reasonably-mainstream and the goal is a working physical clone. It is the wrong choice in three specific scenarios:
- When the operator does not know what the card is — use Scan Tag (§3) first to identify the technology before committing to Auto Copy. Saves time on exotic cards that Auto Copy would fail on, and saves a blank-card from a bad write.
- When the operator wants the raw data without a clone — use Read LF / Read HF (§4, §5) to capture the raw bit stream and sector data to microSD without writing to a blank. The right mode for forensic capture, for investigating an unfamiliar card format, or for staging a clone to be written later.
- When the operator already knows the source card has non-default MIFARE Classic keys — drop directly to Sniff (§6) or PC-Mode (Vol 8 §3) instead of letting Auto Copy fail through the default-key dictionary first. Saves the time the dictionary attempt would have consumed.
Outside these three cases, Auto Copy is the default. An operator who finds themselves reaching for the other modes routinely should ask whether the card population they’re working against is unusual; on a normal mid-market commercial engagement, the supermajority of cards will Auto Copy cleanly on the first try.
7.3 Mode 2 — Scan Tag
Scan Tag is the simplest mode on the device and the fastest to complete. Its purpose is identification, not cloning — the operator wants to know what a card is before deciding how to handle it. The mode runs the detect → identify phases of the Auto Copy state machine and then stops; no read, no write, no blank required. The screen displays the detected technology, the UID, the manufacturer or vendor-specific bytes the identify phase decoded, and any quick metadata the firmware can pull without authentication.
7.3.1 The workflow
The Scan Tag workflow is the simplest of the five modes covered in this volume:
- Arrow down to “Scan Tag” on Page 1/2 of the main menu, press OK.
- Place the card on the appropriate placement zone.
- The device displays the detected technology and metadata within one to three seconds.
- Press the power / cancel key to return to the main menu.
The displayed information depends on the technology. For HID Prox, the screen shows the format (“HID Prox,” “HID Indala,” “HID iCLASS Legacy”), the UID, the facility code, and the card number. For MIFARE Classic, the screen shows “MIFARE Classic 1K” or “MIFARE Classic 4K,” the 4-byte or 7-byte UID, the manufacturer byte, and whether any of the default-key dictionary entries matched a sector (the device does try a quick check of sector 0 with the standard defaults during Scan; if sector 0 opens with a default key, the screen flags it as “Default keys: yes,” which is a strong signal that the rest of the card will also use defaults and that an immediate Auto Copy will succeed). For iCLASS, the screen shows the family (“iCLASS Legacy,” “iCLASS SE detected,” “iCLASS SEOS detected”), the CSN (Card Serial Number — the equivalent of UID), and whether the iCS Decoder Tool is required. For ISO 15693 iCODE, the screen shows the UID and the IC manufacturer code.
7.3.2 What the silicon is doing
Under the hood, Scan Tag runs exactly the same detect and identify phases as Auto Copy. The AT91SAM7S512 fires the LF carrier and listens for ASK / FSK / PSK responses in the standard modulation patterns; if nothing responds within the LF timeout, the FPGA bitstream switches to the HF variant and the carrier moves to 13.56 MHz to look for ISO 14443A / 14443B / 15693 / PICOPASS responses. The Spartan-3 FPGA does the modulation and demodulation; the AT91 does the protocol-level decoding (Wiegand format parsing for HID; ATQA + SAK + UID interpretation for ISO 14443A; the equivalent ATQB exchange for 14443B; PICOPASS ICfg block read for iCLASS-family identification). The application layer on the NanoPi NEO consumes the AT91’s identification report over the serial bridge and renders it to the LCD.
What Scan Tag does NOT do that Auto Copy does: it doesn’t attempt to read sector data, it doesn’t try default-key dictionaries (except the quick sector-0 sanity check for MIFARE Classic mentioned above), it doesn’t attempt key recovery, and it doesn’t engage the write subsystem. This is what makes it fast — there is no possible operator-facing branch beyond “identified” or “not identified,” and the operator’s decision tree after the scan completes is much simpler than after an Auto Copy attempt.
7.3.3 When to use Scan Tag
The two canonical use cases are pre-engagement reconnaissance and unfamiliar-card triage.
For pre-engagement reconnaissance, the operator scans a known-good card from the target facility before launching a full Auto Copy run. The scan confirms the card technology, which lets the operator verify they have the right blank-card stock on hand. An operator who arrives at a Lab401-supplied-MIFARE-Magic-Gen2-stocked engagement only to discover the facility runs iCLASS SE has a problem; a thirty-second Scan Tag of a sample card in advance catches this.
For unfamiliar-card triage, the operator encounters a card whose technology is not immediately obvious from external markings and wants to know what it is before committing to Auto Copy. The classic case is a hotel keycard with no vendor markings, a corporate visitor pass from a building the operator has not worked before, or an unknown card found during a physical-pentest engagement where the legitimate scope explicitly authorises handling unknown badges. Scan Tag answers “what is this card?” in two seconds; Auto Copy would either answer the same question in the same time or fail with a less-informative error.
A secondary use case is verifying a clone. After an Auto Copy completes and writes a blank, the operator can Scan Tag the freshly-written blank to confirm the cloned card identifies the same as the original — a sanity check that catches the rare case where Auto Copy’s verify pass missed a discrepancy. This is belt-and-suspenders for high-stakes clones; for routine work the verify pass inside Auto Copy is sufficient.
7.3.4 Common Scan Tag gotchas
“No card detected.” Same root causes as the Auto Copy “card not detected” case — wrong placement zone, metal in the badge holder, an exotic format outside the identify dictionary. Same fixes: recentre the card, remove from holder, check the badge support table.
The technology identification looks wrong. Rare. The most common cause is two cards stacked together — the operator has a hotel keycard and a transit pass in the same pocket sleeve, both within range of the antenna, and the device is detecting whichever responds first. Hold one card at a time.
“Default keys: yes” but Auto Copy fails. Edge case: the device’s quick sector-0 check found defaults, but subsequent sectors use non-defaults. The Scan result is technically accurate (sector 0 defaults are present) but operationally misleading (the card is NOT fully default-keyed). The fix is to run Auto Copy and handle the four-option menu when it appears.
7.4 Mode 3a — Read Tag, LF branch
The Read Tag menu item on the iCopy-X is a single entry that branches at runtime into LF or HF behaviour depending on what’s on the antenna. The user manual lists it as one mode, but the operator’s experience differs enough between the two bands to be worth treating separately. This section covers the LF branch; §5 covers the HF branch.
7.4.1 What the mode does
Read Tag LF is what Auto Copy’s detect + identify + read phases produce, presented to the operator as raw data instead of being immediately handed off to a write phase. The output is the decoded card content (facility code, card number, format-specific fields) plus the raw bit stream as captured from the antenna. Both can be saved to the microSD card; the raw bit stream is the more interesting half for engineering work, because it captures exactly what the FPGA demodulated before the AT91’s protocol decoder normalised it.
This is the mode the operator uses when Auto Copy LF fails or produces an obviously-wrong result, and the operator wants to investigate. It is also the mode for engineering exercises — capturing the raw modulation of an unusual card format to feed into the Proxmark Mode for custom analysis (Vol 8 §3), or saving a card to microSD for later replay or for offline analysis on a laptop.
7.4.2 The user-facing workflow
- Arrow down to “Read Tag” on Page 1/2 of the main menu, press OK.
- Place the LF card on the red zone of the antenna placement area.
- The device runs the LF detection and identification phases. If a known format is identified, the screen displays the decoded data (facility code, card number, format-specific bits). If the format is not recognised but a coherent bit stream is captured, the screen displays the raw bit stream and a “Save to microSD?” prompt.
- Confirm save or cancel. If saved, the file lands in the device’s internal storage under a path that the user manual specifies as
dumps/lf/, with a filename based on the timestamp.
7.4.3 What the silicon is doing
The LF read uses the FPGA’s LF bitstream — a configuration that produces a 125 kHz (or 134 kHz for HITAG-family tags) carrier and demodulates the ASK, FSK, or PSK return modulation from the tag. The Spartan-3 captures the modulation as a stream of timing-encoded bits and hands them to the AT91 over the parallel bus. The AT91 runs the canonical Proxmark3 LF decoder logic — try-each-known-format against the bit stream, looking for a match by header bits, parity bits, and Manchester / biphase decode coherence. Successful matches produce the decoded format string; raw bit streams without a format match are surfaced as hex dumps for the operator to investigate.
The LF protocol decoders covered in firmware 2.0 are the same set listed in the device’s vendor table: EM Marin (EM4100, EM4102, EM4200), HID Prox (Wiegand 26 standard format and the longer Corporate 1000 / 35-bit / 37-bit format variants), HID Indala, AWID, ioProx, G-Prox, SecuraKey, Viking FDI, Pyramid, FDX-B animal-ID tags, Gallagher, Jablotron, Keri, Nedap, Noralsy, PAC/Stanley, Paradox, Presco, Visa2000, HITAG (124 kHz variant — different carrier from the rest), Nexwatch, EM4305 (unencrypted), and T5577 (the universal blank chip, which is also readable as a configured card after it has been written). Vol 4 covers each of these families in detail; this section covers how the iCopy-X surfaces them.
7.4.4 Common Read LF gotchas
Raw bit stream captured but no format match. Most common cause: an exotic format not in the firmware’s decoder dictionary. The raw bit stream is still useful — it can be saved to microSD and analysed in Proxmark Mode (Vol 8 §3) or transferred to a laptop for offline analysis with the open-source Proxmark3 client. A less common cause is a partial / corrupted read; the bit stream will have parity errors or inconsistent Manchester edges. Re-reading usually resolves the partial-read case; format-not-in-dictionary requires offline analysis.
Wrong format identified. Rare but happens. The classic case is a Paradox card misidentified as a generic Manchester format because the device’s identify phase resolved a weaker signature match first. The fix is to drop to Proxmark Mode and run the format-specific PM3 commands manually (lf paradox demod, lf hid demod, etc.) to confirm.
Read fails near electronic noise sources. LF reads are unusually sensitive to switching power supplies (CFL ballasts, LED driver supplies, USB chargers), CRT monitors (rare in 2026), and motor-driven equipment (refrigerator compressors, garage door openers actuating). Moving five feet away from the noise source usually resolves the issue.
7.4.5 When to use Read LF instead of Auto Copy LF
Read LF is the right choice when the operator wants the decoded data without writing a clone (forensic capture, engagement-documentation evidence), when Auto Copy LF has produced a result the operator does not trust (sanity check via raw bit stream), or when the card is an exotic format that the operator suspects Auto Copy will fail on (a one-off legacy access-control card from a building the operator has never worked before; an animal-ID FDX-B tag found during an unrelated engagement). For routine HID Prox / EM4100 / Indala clones, Auto Copy is faster and the right choice.
7.5 Mode 3b — Read Tag, HF branch
The HF branch of Read Tag is the more capable and the more variable of the two. The LF branch identifies and decodes a relatively constrained set of access-control formats; the HF branch has to cover ISO 14443A, ISO 14443B, ISO 15693, and PICOPASS, each with their own sub-families and protocol nuances. The mode is correspondingly more useful and more likely to be the right tool when the operator needs more than what Auto Copy gives.
7.5.1 What the mode does
Read Tag HF runs the detect + identify phases against an HF card and then dives into a full read of whatever the protocol allows — sector data for MIFARE Classic, page data for MIFARE Ultralight / NTAG, credential blocks for iCLASS, inventory data for ISO 15693, and ATQB-based metadata for ISO 14443B. The mode accepts the same four-option menu as Auto Copy when MIFARE Classic non-default keys block sector reads (§2.5); the difference is that Read Tag HF stops at the read and does not proceed to write. The operator gets the data, can save it to microSD, and decides separately whether and how to write to a blank.
7.5.2 The user-facing workflow
- Arrow down to “Read Tag” on Page 1/2 of the main menu, press OK.
- Place the HF card on the blue zone of the antenna placement area.
- The device runs the HF detection and identification phases. If MIFARE Classic and default keys work, the device reads all sectors and displays the dump summary. If the device falls into the four-option menu, the operator picks an option and the read proceeds accordingly.
- The completed read can be saved to microSD with a “Save dump?” prompt; the file lands under
dumps/hf/with a timestamp-based filename. For MIFARE the format is the canonical.binblock dump (compatible with Proxmark3 client load commands); for iCLASS the format is the equivalent PICOPASS block dump.
7.5.3 What the silicon is doing
The HF read uses the FPGA’s HF bitstream — 13.56 MHz carrier, the appropriate Type A / Type B / 15693 / iCLASS modulation patterns. The Spartan-3 handles the carrier and the bit-level modulation; the AT91 handles the protocol layer above it (ISO 14443 ATQA/SAK/anticollision/SELECT; ISO 15693 inventory and read commands; PICOPASS ICfg reads and iCLASS / iCLASS Legacy key authentication exchanges). The application layer manages the four-option menu and the microSD file handling.
The supported HF formats in firmware 2.0:
- MIFARE Classic 1K / 4K — 4-byte UID and 7-byte UID variants. Full sector dumps with key recovery via the four-option menu.
- MIFARE Ultralight / Ultralight C / Ultralight EV1 — page dumps; UL-C and EV1 require authentication for the upper pages, which Read Tag HF handles when the device’s key dictionary contains the relevant key (typically the manufacturer default for UL-C; per-card password for EV1).
- NTAG family (NTAG213 / 215 / 216) — page dumps with NDEF parsing where applicable.
- iCLASS Legacy / Elite — credential block reads with the standard published HID master key (Legacy) or the published Elite key (Elite); custom Elite keys are out of scope per the vendor’s “iCLASS Elite with Custom Keys” exclusion.
- iCLASS SE / SEOS — requires the iCS Decoder Tool (Vol 6 §5); without it, the device identifies the card and bails out.
- ISO 14443B — UID and CRC-protected metadata; the protocol is primarily used for inventory tagging and government ID applications, not access control, so the clone path is limited.
- ISO 15693 — iCODE SLI / SLIX (Partial) — UID and unencrypted pages. The “Partial” notation in the vendor table reflects that SLIX with the privacy bit set requires a key to read past the inventory pages; in that case, Read Tag HF surfaces what it can without the privacy key and flags the locked pages as inaccessible.
- FeliCa, Legic, SRI512, Topaz — listed in the device’s RFID protocol type catalogue but with varying degrees of completeness. FeliCa reads UID and accessible system codes; Legic reads UID; SRI512 reads the available memory pages; Topaz reads the limited static memory of NFC Forum Type 1 tags.
7.5.4 Cross-link to Vol 5 and Vol 6
The MIFARE family details — what Crypto1 is, why the darkside attack works, how nested attacks chain off recovered keys, what the hardnested variant defeats — are covered in Vol 5. Read Tag HF surfaces those attacks through the four-option menu; the volume on the iCopy-X side covers how the menu maps to the underlying attack, not the cryptography itself. The iCLASS family details — PICOPASS silicon, the HID master key history, the Legacy → SE / SEOS migration, the role of the iCS Decoder Tool — are covered in Vol 6. The same separation applies: Read Tag HF surfaces what the iCopy-X can read with or without the decoder; Vol 6 explains why the decoder is needed and what it does.
7.5.5 Common Read HF gotchas
Read completes but the dump file is short. Possible causes: MIFARE Classic with sector reads that failed silently because the device’s progress display rounded; MIFARE Ultralight with locked pages that returned zeros instead of NAK; ISO 15693 with the privacy bit set and only the public pages readable. Inspect the dump file on a laptop with a hex editor to confirm what’s actually present; the iCopy-X’s on-device summary does not always make the distinction obvious.
“Authentication failed” on a sector that should be defaults. Often a counterfeit MIFARE Classic clone with non-standard sector-trailer behaviour — the sector reads with the default key A but writes with key B require a different key, and the device’s check failed before completing. Try Auto Copy with the Force option (§2.5 option 3) and accept that the resulting clone may be partial.
iCLASS read produces “encrypted - decoder tool required.” The card is iCLASS SE or SEOS and the iCS Decoder Tool is not attached or not licensed. Vol 6 §5 covers the decoder’s licensing model — bound to the device serial number, sold separately at around €200, available only from Lab401 and a small number of authorised resellers.
7.5.6 When to use Read HF instead of Auto Copy HF
Same logic as the LF case: Read HF is the right choice when the operator wants the data without the clone, when Auto Copy HF has produced an obviously-wrong result, or when the operator is investigating an unfamiliar HF format. The additional case for HF specifically is when the operator wants to perform key recovery first and write later — the four-option menu invoked from Read Tag HF surfaces the same Sniff / Enter / Force / PC-Mode workflow as Auto Copy, but stops at the read and writes the recovered keys to the device’s dictionary without committing to a blank-card write. This is useful in engagement scenarios where the operator wants to capture and document a card without leaving a physical clone artifact on the engagement site.
7.6 Mode 4 — Sniff Traffic
Sniff Traffic is the mode that turns the iCopy-X from a card duplicator into an attack platform. It captures the over-the-air authentication exchange between a card and a working reader, then runs the Crypto1 attack against the captured exchange to recover the MIFARE Classic sector keys. The recovered keys are written to the device’s key dictionary and become available to all subsequent Auto Copy / Read Tag operations on that engagement and beyond. It is the mode that makes the iCopy-X a viable answer for the “non-default keys” cases that Auto Copy alone cannot complete.
7.6.1 What the mode does in detail
The Crypto1 attack on MIFARE Classic exploits the cipher’s weaknesses across two distinct algorithmic paths, depending on what the operator already knows. The first is the darkside attack (Nicolas T. Courtois, 2009) — given a card and no known keys at all, the attack repeatedly sends crafted authentication requests to the card, observes the card’s parity-bit leakage in its responses, and back-solves for one sector key. The second is the nested attack (de Koning Gans / Hoepman / Garcia, 2008) — given one known sector key, the attack initiates authentication on that sector, then attempts authentication on an unknown sector and uses the predictable PRNG state from the first auth to recover the second. Nested is faster than darkside and the typical path is: darkside once to get a first key, then nested to walk the rest of the card. Each subsequent sector key takes seconds-to-tens-of-seconds with nested versus minutes with darkside.
Sniff Traffic on the iCopy-X is specifically the reader-side capture variant. Instead of running darkside or nested directly against the card, the iCopy-X places itself between the card and a working reader (a building’s access control reader that the operator has authorised access to) and captures the legitimate authentication exchange that happens when the card is swiped. The captured exchange contains the encrypted nonces and the card’s responses; the iCopy-X then runs the Crypto1 analysis offline against those captured nonces to extract the keys. This is faster than darkside-from-cold because the legitimate reader is doing the cryptographic heavy lifting that the iCopy-X would otherwise have to drive, and the iCopy-X is just observing.
7.6.2 The user-facing workflow
The sniff workflow has more moving parts than the other modes — it requires both a card and a working reader simultaneously within range of the iCopy-X antenna, which is physically awkward in many real-world deployment scenarios.
- Arrow down to “Sniff Traffic” on Page 1/2 of the main menu, press OK. The device prepares the FPGA bitstream for passive HF monitoring.
- Remove the antenna protective cover. Position the iCopy-X antenna between the legitimate reader and the card to be analysed. Distance matters: roughly 1–3 cm from the reader’s antenna, roughly 1–3 cm from the card, with the card and the reader on opposite sides of the iCopy-X. This is the geometric constraint that makes sniff awkward; many readers are wall-mounted and the operator needs to hold the iCopy-X parallel to the wall while swiping the card across the iCopy-X’s opposite face.
- Press start (left select button per the user manual). The device begins listening.
- Swipe the card across the reader. The legitimate authentication exchange happens at normal speed — the reader challenges the card, the card responds, the reader makes its access decision. The iCopy-X is invisibly capturing the exchange in passive monitoring mode; the reader does not know the iCopy-X is there because the iCopy-X is not transmitting.
- If the first swipe does not produce a clean capture (the iCopy-X’s screen displays the sample count and a quality indicator), adjust the geometry and swipe again. Multiple swipes at slightly different positions usually produce a complete capture within four to six attempts.
- Press finish (right select button) when the screen indicates sufficient data. The iCopy-X runs the Crypto1 analysis on the captured nonces; the screen displays the recovered keys as they’re solved. Keys are automatically written to the device’s
keys/mf1/mf_user_key.dicdictionary file on the microSD. - Optionally save the raw trace to microSD via the “SAVE” option on the result screen; the file lands in
traces/and can be loaded into a Proxmark3 client on a laptop for offline analysis or for re-analysis with future improvements to the attack code.
The user manual is explicit about the physical-positioning awkwardness in step 2: “You may need to continually adjust the distance between the three (Reader, iCopy-X, Token), and swipe the token multiple times at different distances to get a good data dump.” This is the operationally tricky part of the mode; the captures are not always clean on the first attempt, and the operator’s geometry sense matters.
7.6.3 What the silicon is doing
In Sniff mode the FPGA is configured for passive HF monitoring — the 13.56 MHz carrier is observed but not transmitted. The Spartan-3 demodulates whatever is on the air, capturing both the reader-to-card direction (the reader’s modulated commands on top of the reader’s own carrier) and the card-to-reader direction (the card’s load modulation as seen at the iCopy-X’s antenna position). The AT91 runs the protocol-level parser that identifies the MIFARE authentication exchange — the 0x60 / 0x61 AUTH commands, the encrypted-nonce response, the encrypted card challenge — and accumulates the captured nonces in RAM. When the operator presses finish, the AT91 hands the captured nonce set to the application layer on the NanoPi NEO, which runs the actual Crypto1 attack code (the mfkey64 / mfkey32 analysis from the canonical Proxmark3 codebase) and returns the recovered keys. The keys are persisted to the microSD via the standard filesystem.
The reason the iCopy-X has to be physically positioned between the reader and the card is RF geometry: the iCopy-X’s antenna needs to be in the near field of both the reader’s stronger transmit signal (which carries the reader-to-card commands) and the card’s weaker load-modulation return signal (which is the card-to-reader direction). The reader’s signal can be picked up from further away because it’s actively transmitting; the card’s load modulation is much weaker and requires the antenna to be within a few centimetres of the card.
7.6.4 The three attack-class breakdown
Sniff Traffic on the iCopy-X invokes the appropriate Crypto1 attack variant based on what the captured exchange contains:
Standard nested. When the captured exchange includes a successful authentication of one sector that the iCopy-X has the key for (typically because that key matches one in the device’s dictionary), the attack runs in “nested” mode against the subsequent sectors. This is the fast path — captures resolve in seconds to a couple of minutes per unknown key. The iCopy-X’s dictionary growing across an engagement makes this faster over time: the first card from a facility might require darkside-from-cold, but subsequent cards from the same facility benefit from the keys recovered on the first card.
Darkside-style from-cold. When no key is known and the captured exchange is from a card that does not respond to any of the device’s dictionary keys, the attack falls back to the darkside-style analysis. This is slower (minutes per key) and requires more samples. The iCopy-X will prompt for additional swipes if the captured sample count is insufficient.
Hardnested. A more sophisticated attack required against MIFARE Classic clones with hardened PRNG state (notably the FM11RF08S “Fudan static-encrypted nonce” clones that have become common in Chinese-manufactured access-control deployments since 2020). Hardnested is computationally heavier than nested — it runs as a parallelised CPU-bound search across a million-plus nonce pairs. The iCopy-X’s NanoPi NEO can run hardnested but at a much slower rate than a desktop CPU; the user manual explicitly recommends using PC-Mode and the bundled AUTO-Hardnest.exe Windows tool for hardnested attacks against modern clones. Sniff Traffic captures the data; PC-Mode runs the heavyweight analysis.
7.6.5 Time-to-keys budget
Table 2 — 6.5 Time-to-keys budget
| Scenario | Attack class | Typical time | Sample count |
|---|---|---|---|
| One known key, recover remaining 15 sectors | Nested | 2–5 min | 1–2 swipes |
| Zero known keys, default-key card | Dictionary check (no sniff needed) | < 30 s | n/a |
| Zero known keys, single non-default sector | Darkside | 3–8 min | 3–6 swipes |
| Zero known keys, all 16 sectors non-default | Darkside + nested chain | 15–35 min | 8–15 swipes |
| FM11RF08S Fudan clone (hardnested required) | Hardnested via PC-Mode | 30 min – 2 hr per key | 1 swipe per sniff |
| ISO 14443B card (out of attack scope) | n/a — Sniff cannot recover | n/a | n/a |
| MIFARE Plus SL3 (AES) | n/a — Crypto1 doesn’t apply | n/a | n/a |
| MIFARE DESFire (AES, diversified) | n/a — explicitly unsupported | n/a | n/a |
The wall-clock times include the operator’s physical-positioning effort across multiple swipes. A patient operator in a quiet hallway with a cooperative reader can hit the lower bound of each range; an operator working around a busy entrance with traffic interrupting their positioning will hit the upper bound or worse.
7.6.6 Common Sniff Traffic gotchas
“Insufficient samples” after many swipes. The most common cause is bad antenna geometry — the iCopy-X’s antenna is too far from one of the two devices in the exchange, or shielded by metal in the wall behind the reader. Adjust position; the user manual’s advice of “continually adjust the distance” is the right operational stance. A less common cause is a reader that is rate-limiting authentication attempts to discourage exactly this attack; the fix is to wait between swipes (twenty to thirty seconds between attempts) so the reader’s anti-fraud heuristics reset.
Sniff completes but no keys recovered. Possible causes: the card is MIFARE Plus or DESFire (the captured exchange uses AES, not Crypto1, so the iCopy-X’s attack code cannot solve it); the card is a hardnested-resistant clone (run via PC-Mode instead); the captured nonces are corrupted (re-capture). The screen typically indicates which case applies — “AES detected, attack not applicable” vs. “Hardnested required” vs. “Sample data invalid.”
Sniff was successful on the test card but the keys don’t unlock the production card. Subtle but important: some access-control deployments use per-card diversified keys, where each individual card has unique keys derived from a master key and the card’s UID. The test card the operator sniffed had its own unique keys; those keys do not transfer to other cards from the same facility. The iCopy-X cannot recover the master key (that would require attacks against the diversification function itself, which is outside Crypto1’s weakness surface), so per-card diversified deployments require per-card sniffing. This is increasingly common in modern MIFARE Plus deployments and is part of why MIFARE Plus is considered the secure successor to MIFARE Classic.
The reader detects the sniff attempt. Rare but possible. Sniff is fundamentally passive — the iCopy-X is not transmitting during capture — but some enterprise-grade readers monitor their own RF environment for anomalies and can flag “unusual signal patterns” near the reader. The mitigation is operational: time the sniff to coincide with legitimate use of the reader (an actual employee swiping their card), so the captured exchange is part of normal traffic that the reader expects.
7.6.7 When to use Sniff Traffic instead of PC-Mode
The four-option menu inside Auto Copy and Read Tag HF gives the operator a choice between Sniff and PC-Mode for the same goal — recovering MIFARE Classic keys. The decision logic:
- Choose Sniff when: a working reader is physically accessible to position the iCopy-X next to, no laptop is on hand or the engagement protocol does not permit laptop deployment in the field, the operator has time for the multi-swipe physical workflow, or the cards are MIFARE Classic 1K / 4K with a small number of non-default sectors (nested chains cleanly).
- Choose PC-Mode when: a Windows 10 laptop is on hand and the engagement permits it, the cards are FM11RF08S Fudan clones (hardnested required), or the operator wants the fastest possible time-to-keys (laptop hardnested is faster than on-device sniff for difficult cards).
In practice the modes are complementary, not alternatives. A common workflow on a complex engagement is: Sniff Traffic to capture the exchange and recover what nested can recover; if any sectors remain unsolved, save the trace to microSD, attach the iCopy-X to a laptop, drop to PC-Mode, and run hardnested against the residual sectors using the saved trace as input.
7.7 Cross-mode patterns
The five modes covered in this volume — Auto Copy, Scan Tag, Read LF, Read HF, Sniff Traffic — are not isolated. They share a common state machine internally and a common file-output convention on the microSD card; the operator’s job is to know which mode to enter for which task and how the modes chain together when a task isn’t satisfied by a single mode invocation.
7.7.1 The “Auto Copy failed — what now?” decision graph
The most common cross-mode decision the operator makes is what to do when Auto Copy bails out before completing. The decision graph:
Auto Copy launched, did it complete?
    ↓
   Yes — done.
    ↓
   No — what was the failure?
        ↓
        "Card not detected" — placement issue. Re-centre on the
        appropriate placement zone (red LF, blue HF). If still no
        detection, try Scan Tag — the more permissive identify
        phase may help. If Scan Tag also fails, the card is either
        an exotic format outside the firmware's dictionary or has
        non-functional RFID silicon.
        ↓
        "Identified but read failed" — likely MIFARE non-default
        keys or iCLASS SE/SEOS without decoder. Drop to Read Tag
        and engage the four-option menu (Sniff / Enter / Force /
        PC-Mode). For SE/SEOS, you need the iCS Decoder Tool
        (Vol 6 §5).
        ↓
        "Read OK but write failed" — blank issue. Try a different
        blank from a known-good source. If multiple blanks fail,
        the source card data may have a UID conflict with the
        blank's preset UID, or the blank may be password-locked
        (T5577 password recovery — Vol 9 §3).
        ↓
        "Wrote and verify failed" — the data on the blank does
        not match the source. Try again with a fresh blank. If
        the second blank also fails, the source card has a write
        format the firmware misidentified (rare); drop to Read LF
        or Read HF, capture the raw data, then drop to Proxmark
        Mode (Vol 8 §3) and write manually with the format-specific
        PM3 commands.
The graph terminates either in a successful clone, a documented failure mode that requires a different tool (Proxmark3 RDV4 in a lab, for instance, when the card is something the iCopy-X cannot handle in any mode), or an acknowledgement that the card cannot be cloned with the iCopy-X’s capabilities — a result that itself is operationally useful, because the operator knows to stop trying and to escalate the engagement plan.
7.7.2 The microSD file outputs
Every mode that produces output writes to the iCopy-X’s internal microSD card. The file structure on the device’s “U disk” (the user-accessible portion of the microSD, exposed when the device is in PC-Mode) follows a consistent convention:
Table 3 — Every mode that produces output writes to the iCopy-X's internal microSD card. The file structure on the device's "U disk" (the user-accessible portion of the microSD, exposed when the device is in PC-Mode) follows a consistent convention
| Output type | Path | Format | Source mode |
|---|---|---|---|
| LF raw bit stream and decoded data | dumps/lf/lf_<timestamp>.json | JSON with raw bits + decoded fields | Read LF |
| HF MIFARE block dump | dumps/hf/mfc_<UID>_<timestamp>.bin | PM3-compatible binary | Read HF |
| HF iCLASS credential block dump | dumps/hf/icl_<CSN>_<timestamp>.bin | PM3-compatible binary | Read HF |
| MIFARE recovered keys | keys/mf1/mf_user_key.dic | Newline-separated hex keys | Sniff / PC-Mode |
| Sniff trace | traces/trace_<timestamp>.bin | PM3 trace format | Sniff |
| Auto Copy session log | logs/autocopy_<timestamp>.log | Text log of mode invocations | Auto Copy |
The microSD is accessed by connecting the iCopy-X to a host computer via the USB-C cable and entering PC-Mode (covered in Vol 8 §3); the device appears as a removable USB drive. Files can be copied off for offline analysis, archival, or transfer to a laptop running the full Proxmark3 client. The reverse is also useful: the operator can drop a custom mf_user_key.dic onto the device before an engagement, pre-populating the dictionary with keys known to apply at the target facility, which dramatically speeds up the engagement’s first MIFARE Classic reads.
7.7.3 The key dictionary as a persistent engagement artifact
The MIFARE key dictionary on the device’s microSD is the most important persistent artifact across an engagement. Every successful Sniff or PC-Mode key recovery adds keys to the file; every subsequent Auto Copy / Read Tag HF benefits from the expanded dictionary. The user manual’s warning is worth heeding: “the more secret keys stored in the cryptographic library the slower the scanning will be, (1000 keys will take around 100 seconds to scan).” For day-to-day use this is not a problem — engagement-specific dictionaries are typically tens to low hundreds of keys, well under the 1000-key threshold. For a year-long red-team practice that accumulates keys across many engagements, periodic dictionary curation is worthwhile: prune keys that have not been used across the last several engagements, archive the full historical dictionary separately, keep the on-device file lean.
The dictionary is also the right place to seed pre-engagement intelligence. If the operator has access to a target facility’s facility-management software (legitimately, through the client’s IT cooperation), the configured sector keys for the facility’s MIFARE Classic deployment are typically extractable from the software’s configuration export. Loading those keys into the dictionary before the engagement begins turns what would be multi-minute Sniff captures into instantaneous default-key reads, which both speeds up the engagement and produces a cleaner audit trail (because the operator’s actions look like normal default-key reads in the facility’s reader logs, rather than failed-auth retries followed by successful reads).
7.7.4 Mode-selection cheatsheet
The condensed cheatsheet for the five modes covered in this volume:
Table 4 — The condensed cheatsheet for the five modes covered in this volume
| You want to… | Use mode | Why |
|---|---|---|
| Clone a normal card to a blank, in the field | Auto Copy | The whole device’s reason for existing |
| Identify an unknown card before deciding what to do with it | Scan Tag | Fast, no commitment, no blank consumed |
| Capture an LF card’s data for evidence without writing a clone | Read LF | Saves raw + decoded to microSD, no write phase |
| Capture an HF card’s full sector / page dump | Read HF | Same as Read LF but for HF; supports the four-option menu |
| Recover unknown MIFARE Classic keys with a reader present | Sniff Traffic | The on-device key-recovery path |
| Recover keys without a reader present | PC-Mode (Vol 8) | Hardnested needs the laptop CPU |
| Emulate a captured card without writing a blank | Simulation (Vol 8) | The emulation mode for both LF and HF |
| Drop to PM3 command line for anything else | PC-Mode (Vol 8) | The escape hatch for everything the menu doesn’t cover |
For the operator who needs to commit one thing to memory before walking into an engagement: the S/R/W key launches Auto Copy from anywhere. Every other mode lives behind the main menu and the up/down arrows. The S/R/W shortcut is the muscle-memory operation that turns the iCopy-X into a one-handed instrument — hold the card with one hand, press S/R/W with the other thumb, and the most common workflow happens without looking at the menu at all.
7.8 What this volume did not cover
This volume covered the five field-facing modes that occupy the operator’s day-to-day work. Vol 8 covers the remainder of the menu: Simulation (the LF and HF emulation modes — what the iCopy-X does when it pretends to be a card instead of reading or writing one), PC-Mode (the Proxmark3 client escape hatch, including the AUTO-Hardnest.exe workflow and the manual RUN.bat command line), and the housekeeping items (Backlight, Diagnosis, Volume, About). Vol 8 closes the operating-modes coverage; Vol 9 covers the blank-card ecosystem that the write phase in every mode depends on; Vol 10 covers the firmware-update workflow that delivers refinements to all of the modes covered here.
The legal posture that frames every mode in this volume — own the hardware, or have written authorization — is the rule from Vol 12 and from ../_shared/legal_ethics.md. It applies to every Auto Copy, every Scan Tag, every Sniff Traffic, every Read of every card. The iCopy-X does not enforce that rule; the operator does. That is the entire posture of this series and of every other tool in the Hack Tools hub.
Comments (0)