iCopy-X · Volume 8
iCopy-X / iCopy-XS — Operating Modes Part 2: Emulation LF, Emulation HF, Expert / Proxmark Mode, Import / Export
Becoming the card, dropping to the underlying Proxmark3 client, and moving keys and dumps between the device and the outside world
8.1 Where this volume sits
Vol 7 walked the four operating modes that move data into the iCopy-X — Auto Clone (the headline push-button workflow), Scan (technology identification), Read LF and Read HF (manual reads when Auto Clone misclassifies), and Sniff (the MIFARE Classic key-recovery escape hatch). All four are read-side modes: a card sits against the antenna, the device extracts what it can.
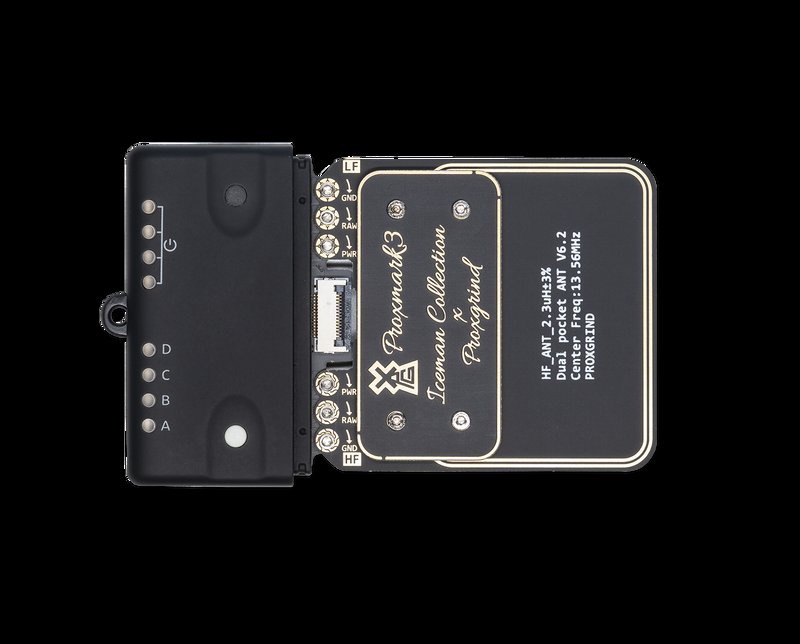
This volume covers the remaining four mode categories. The first two — Emulation LF and Emulation HF — invert the direction: the device becomes the card and presents itself to an external reader. The third — Expert / Proxmark Mode — is the bottom-of-the-stack escape hatch that exposes the underlying Proxmark3 client running on the NanoPi NEO Linux side (Vol 2 §7). The fourth — Import / Export — is the file-movement workflow that lets keys and dumps cross between the device’s microSD card, the USB-mass-storage interface, the operator’s laptop, and other Proxmark3-family tools. Together these modes are what an operator falls back to when Vol 7’s push-button modes do not finish the job, plus the persistence-and-portability layer that makes the device part of a wider workflow rather than an isolated appliance.
The shape of the volume mirrors that. The two emulation modes get the longest treatment because they are the workhorse “I can test this card without burning a blank” capability. Expert Mode gets a substantial treatment because it is the operator’s reassurance that the iCopy-X never forecloses a Proxmark3 capability — anything the underlying silicon can do, Expert Mode exposes — and because the cost of using Expert Mode (laptop tethered, ergonomics of a shell prompt) is high enough that the operator needs to know up front when it is worth it. Import / Export gets a compact but operational treatment with explicit file formats, microSD layout, and the cross-tool exchange paths that matter for working with the Proxmark3 RDV4 (Vol 11 covers the comparison; this volume covers the file interchange between them). The volume closes with a unified decision graph for “when to leave the iCopy-X application UI” — the 90/10 rule that authorised physical-pentest RFID work overwhelmingly stays in the push-button modes, and Expert Mode exists for the 10% that doesn’t.
A reminder on silicon, because emulation is where the silicon stack becomes visible to the operator in a way it isn’t during read-side work. The RFID brain of the iCopy-X is the canonical Proxmark3 pair — an AT91SAM7S512 ARM microcontroller (the Atmel SAM7 family, 512 kB internal flash, 64 kB SRAM, running at ~48 MHz) coupled to a Xilinx Spartan-3 XC3S100E FPGA (Vol 2 §7 for the full hardware tour). The Spartan-3 is the digital RF modem: it generates the LF carrier modulation pattern and the HF subcarrier loads, sampling and shaping the analog front end at line rate. The SAM7 firmware drives the protocol state machine on top of that — ISO 14443A/B framing, ISO 15693 framing, the various LF tag dialects, and crucially for emulation, the timing-precise responses that a reader expects from a real card. The STM32F103 on the main board is housekeeping (LCD, keypad, power management, USB-C bridge to the NanoPi); it is not in the RF data path. When you read or emulate a card on an iCopy-X, the work is done by the SAM7 + Spartan-3 pair exactly as it would be on a Proxmark3 RDV4, and Expert Mode (§4 below) is what makes that lineage visible.
8.2 Mode 6 — Emulation LF
8.2.1 What it does, mechanically
Emulation LF puts the iCopy-X into a state where the LF coil ceases to be a receiver of an external reader’s interrogation field and becomes a responder that mimics a captured tag. From the perspective of any standard LF reader brought near the device, the iCopy-X is indistinguishable from a real EM4100 / HID Prox / Indala / AWID / ioProx / Viking / HITAG card. The reader energises its field, the iCopy-X’s LF coil picks up the carrier and loads it according to the modulation pattern of the dump being emulated, and the reader sees what it sees from a real card: a sequence of Manchester-encoded or differential-Manchester bits at the protocol’s natural rate, framed correctly for the tag dialect.
Underneath, the work belongs to the SAM7 + Spartan-3 pair. The Spartan-3 generates the load-modulation pattern at 125 kHz against the LF coil, and the SAM7 sequences the bit pattern from the loaded dump according to the tag dialect’s framing rules. For dialects that involve real-time interaction with the reader — HITAG 2’s challenge-response, for example — the SAM7 firmware also has to answer correctly inside the protocol’s timing window. For pure broadcast dialects like EM4100 or unencrypted HID Prox, there is no challenge-response and the device simply loops the saved bit pattern.
The four-button keypad and 1.3-inch LCD on the iCopy-X expose this as a single menu choice — Emulation LF → pick a dump from the saved-dumps list → press OK to start emulating → present the coil to the reader → press a button to stop. The device does not need to be connected to a host computer; the dump is read from microSD, the emulation runs on internal battery, and the LCD shows a small “EMU” indicator and the dump’s identifying string (tag type, UID) so the operator knows which card is being presented.
8.2.2 The standard workflow
The day-to-day shape of an LF emulation session looks like this. The operator has previously captured a card on this device (Auto Clone, Read LF, or a Sniff-then-Read sequence — Vol 7) and saved the dump to the device’s microSD storage. Now, in front of a reader they want to test against, they perform the following sequence:
- From the main menu, navigate to Emulation LF. The device lists the LF dumps currently on the microSD card, with their captured technology and UID shown for each entry.
- Select the dump to emulate. The device confirms the technology family (EM4100, HID Prox H10301 26-bit, Indala 26-bit, etc.) and loads the bit pattern into the SAM7’s emulation buffer.
- Press OK to start emulation. The LCD switches to the EMU display: a static indicator showing the tag type and the UID, plus a small animated icon to show that the LF carrier-modulation engine is active.
- Present the iCopy-X to the target reader. The LF coil is on the back face of the device, so the back is brought up to the reader’s face. The orientation matters more than for a real card (§2.4 below); the operator usually has to angle the device so its coil axis aligns with the reader’s coil axis.
- The reader sees the emulated card. If it succeeds, the reader beeps / unlocks / does whatever it does on a successful read. If it fails, the operator adjusts orientation, distance, and angle until it succeeds — or until the operator concludes the reader is not accepting this emulation (§2.5 below).
- Press the back button (or a button-combo, depending on firmware) to stop emulation. The device returns to the menu.
The whole sequence is instantaneous once the dump is loaded — there is no compute-heavy preparation, no key recovery, no cryptographic warm-up. The hard work happened during the capture; emulation is just replaying it.
8.2.3 Use cases that justify emulation rather than cloning
The first question an operator new to the iCopy-X asks about emulation is “why not just clone the card to a T5577 blank and read the blank?” — and it is a good question. Cloning to a physical blank produces a working credential that can be carried in a wallet, given to a colleague, dropped into an evidence bag, photographed on a desk. Emulation produces nothing that physically exists. The reasons emulation matters anyway:
Iteration during scope-of-engagement testing. A pentest scope sometimes includes “we want to know whether your access control system rejects a cloned card.” The operator captures the target card, then needs to test against several different reader models — the front door, the elevator, the secure-floor lock, the parking gate. Each test consumes maybe 30 seconds of emulation. Cloning to a physical blank for each test would consume a T5577 (or whatever blank type is appropriate) per test, and at €1–€3 per blank from a Lab401 pack, the cost adds up over a long engagement. More importantly, the operator does not have to carry the blanks; the iCopy-X plus the dump file is the entire toolkit.
No-physical-artifact engagements. Some engagement scopes specifically forbid producing physical credentials. The reasoning varies — sometimes the client does not want a duplicate badge to exist in case it is lost in the engagement; sometimes there are legal-discovery considerations about creating credentials that did not exist before the test; sometimes the engagement is being run by an in-house team and the goal is to show the security committee what could be done without actually doing it. Emulation produces no physical artifact. When the engagement ends, the dump file is deleted, and the credential effectively never existed except as a transient state in the device’s flash.
Format-guess iteration. When Auto Clone fails because the card’s format is unclear — for example, a non-standard HID Prox variant with an unusual facility-code field, or an EM4100 where the parity bits don’t quite line up — the operator can manually inspect the dump in Expert Mode (§4 below), modify the bit pattern to test a hypothesis about the format, re-emulate, and see whether the reader now accepts it. This is faster than burning a T5577 blank for each hypothesis, and at the end of the iteration cycle, when the format is understood, the final dump can be committed to a blank if a physical artifact is wanted.
Demonstrating a captured credential to a client without committing to a clone. The operator captures the building manager’s HID Prox card during a kickoff meeting (with the manager’s consent and the manager watching), then immediately demonstrates that the captured credential opens the front door — by emulating it on the iCopy-X against the front-door reader. The manager keeps their physical card, no duplicate is made, the demonstration takes maybe two minutes, and the engagement scope has been visibly validated without producing anything anyone has to track or destroy at the end.
Testing reader sensitivity and configuration. Sometimes the goal is not to clone a specific card but to understand how a reader is configured — does it accept multiple facility codes, what is the bit-rate tolerance, does it support iCLASS Standard Security or Elite, does it accept HID Prox alongside iCLASS. Emulating a range of known-format test patterns against the reader is faster than carrying a wallet of physical test cards.
8.2.4 LF emulation limitations — what makes it harder than reading
LF emulation is not always seamless. The fundamental issue is that the iCopy-X’s LF coil is substantially larger than the coil in a real card, and is embedded inside a plastic enclosure that puts the coil a few millimetres further from the reader’s antenna than a real card sitting flat against the reader. Both factors change how the LF reader and the emulated card couple to each other, and both can cause emulation to fail in cases where a real card would have worked.
Coil-axis alignment. A real card is a thin laminated plastic disc with the coil printed on it as a planar spiral. When the operator presses the card against the reader, the coil’s axis (the imaginary line normal to the spiral’s plane) lines up automatically with the reader’s coil axis because both are flat and the card is being held flat against the reader. The iCopy-X’s coil is also planar — it sits on the antenna PCB on the back face of the device — but the device’s shape is a small remote, not a thin card, and an operator who holds the device naturally will often tilt it relative to the reader. A 30-degree tilt reduces the effective coupling coefficient by cos(30°) ≈ 0.87; a 45-degree tilt by about 0.71; a 60-degree tilt by 0.5. The reader’s auto-gain control can compensate for moderate misalignment, but at some point the SNR at the reader drops below its decision threshold and the emulated card simply fails to be heard. The fix is mechanical: deliberately angle the iCopy-X to align its back-face coil axis with the reader’s coil axis (which is usually normal to the reader’s face), and hold it steady — operators new to the device often shake the device while waiting for the reader to beep, which oscillates the coupling enough to prevent the reader from getting a clean read.
Distance. A real card placed flush against the reader has its coil maybe 1–2 mm from the reader’s coil. The iCopy-X’s coil is a few millimetres inside the plastic enclosure, so even pressed flat against the reader, the effective separation is several millimetres more. LF coupling falls off rapidly with distance — roughly with the cube of the distance for a small-loop-to-small-loop near-field link. The practical consequence is that the iCopy-X has a smaller “read zone” than a real card; it needs to be brought closer to the centre of the reader’s antenna, and small offsets matter more.
Modulation depth. Real cards modulate the reader’s carrier by load-modulating their own coil — drawing more or less current depending on the bit being transmitted. The iCopy-X’s emulation does the same thing in principle, but its load-modulation depth is set by the device’s analog front end, not by a passive resistor network like a real card. Some readers — especially older or cheaper ones — calibrate their receiver assuming a fairly narrow range of modulation depths, and if the iCopy-X’s modulation is outside that window (too deep or too shallow), the reader may misread or refuse to read. There is no operator-side adjustment for this on the iCopy-X application UI; the workaround is to drop to Expert Mode (§4 below) and use the underlying Proxmark3 client’s lf simfsk / lf simask / lf simpsk commands, which expose modulation-depth parameters.
Dialect coverage. Not all LF tag dialects emulate equally well on the iCopy-X application UI. The pure-broadcast ones — EM4100, unencrypted HID Prox (H10301 and the common variants), Indala 26-bit, AWID, ioProx, Viking — emulate reliably. The challenge-response ones — most importantly HITAG 2 — require the SAM7 firmware to handle the reader’s challenge in real time, and the application UI’s emulation path is more limited than the Proxmark3 client’s. HITAG 2 emulation works for the simpler authentication modes but not for the full transponder-authentication mode where the reader expects the tag to respond to its specific encryption key. If a HITAG 2 emulation does not work from the application UI, Expert Mode (§4) gives access to the full lf hitag sim command suite which has more emulation modes and is the actively-maintained surface for HITAG attacks. The same caveat applies to HITAG S and the rarer encrypted LF dialects.
The practical heuristic is: if the LF dump emulates correctly the first or second time, it is a “good” emulation candidate and the operator can rely on it for the rest of the engagement. If it takes more than two or three attempts to get a successful read, the operator should consider cloning to a T5577 blank instead — the physical blank will couple to the reader the way a real card does, and the emulation problems disappear.
8.2.5 What “emulation failed” looks like on different readers
On a healthy reader with a successful emulation, the operator sees the reader’s normal “card accepted” indicator — usually a green LED and a beep, sometimes a lock click. On a failed emulation, the failure modes vary:
- Reader stays silent, no LED change. The reader did not detect any card in its field. The emulation is not coupling at all; check orientation, distance, and that the emulation actually started (the iCopy-X LCD should show EMU active).
- Reader beeps “denied” / red LED. The reader detected something but rejected it. Two possibilities: the emulation succeeded in transmitting the bit pattern but the bit pattern represents a card that is not authorised on this reader (the reader is doing access-control filtering on the UID — a legitimate result that confirms the emulation worked but the captured card does not have access to this door). Or the emulation succeeded partially but with bit errors, and the reader is seeing a malformed but recognisable card frame. The two cases are distinguishable by trying the emulation against a reader you know the captured card has access to — if that reader also says “denied”, the bit pattern is wrong and the emulation is failing for SNR reasons; if it accepts, the original failure was a legitimate access-control denial.
- Reader beeps once, then nothing (no LED change). Common with HID Prox readers; usually means the reader detected the LF carrier modulation but the frame structure was wrong — wrong number of bits, wrong parity, wrong synchronisation header. This usually means the captured dump itself is incomplete; recapture it.
- Reader reads it as a different card type / wrong UID. Sometimes the reader interprets the modulated bits as a different tag family — for example, reads an EM4100 emulation as an unknown 64-bit format. This is a coupling-quality issue: the bits getting through are valid LF modulation but the framing got garbled. Hold the device closer and steadier and try again.
The operator’s debugging arsenal in the application UI is limited; the iCopy-X is a push-button appliance and does not have a “show me the raw bits the reader is seeing” diagnostic on the LCD. For genuine diagnostic work, drop to Expert Mode (§4) and use the Proxmark3 client’s lf sniff to capture the actual modulation the reader is producing, then compare against the captured dump.
8.2.6 Emulation versus cloning — the practical bottom line
In a real engagement, the operator typically captures every target card once, decides upfront whether they need a physical clone, and then either emulates (no clone made) or clones immediately (T5577 or other blank produced). Iteration between the two modes is rare — the decision is usually obvious from the scope. The defaults work out like this:
- Default to emulation when the engagement scope forbids physical artifacts, when the operator is doing a quick demonstration or a multi-reader test, or when the technology emulates reliably (EM4100, HID Prox, Indala).
- Default to cloning when the engagement scope expects a tangible deliverable (the client wants the cloned card returned at the engagement’s end), when the operator needs to leave the cloned card in someone else’s hands (a colleague running a parallel test, a designated “intruder” wearing the badge), or when the technology emulates poorly (HITAG 2 in challenge-response mode, edge-case LF dialects).
Vol 9 covers blank-card selection in detail — which blanks to carry, why Lab401’s “Genuine” packs are worth the premium over AliExpress equivalents, and how to handle the cases where the blank type does not match the target card type (cross-format cloning).
8.3 Mode 7 — Emulation HF
8.3.1 The HF case is the workhorse
Where LF emulation is genuinely useful but limited by coupling geometry, HF emulation is the iCopy-X feature that justifies the whole device for many physical-pentest practices. The 13.56 MHz coupling is more forgiving than 125 kHz LF coupling — the wavelength is shorter, the near-field zone is tighter and better defined, and HF readers are designed to handle a wider range of antenna geometries because the standard NFC ecosystem includes phones, key fobs, stickers, and embedded tags as well as cards. The iCopy-X’s HF coil emulates a card more cleanly than its LF coil does, and the result is that HF emulation works reliably across the supported tag families.
The workflow is identical to LF emulation: Emulation HF menu → pick a saved HF dump → press OK → present the device to the reader. The LCD shows the EMU indicator with the HF tag family and UID. The SAM7 firmware sequences the bit pattern according to the ISO 14443A or ISO 14443B or ISO 15693 framing rules; the Spartan-3 manages the 13.56 MHz subcarrier load-modulation pattern. For tag families that involve real-time challenge-response (basically all of HF — the MIFARE Classic crypto, MIFARE Ultralight EV1 password-protect, NTAG signed reads, ISO 15693 secure modes), the SAM7 firmware uses the keys/data in the loaded dump to answer the reader’s queries correctly.
8.3.2 What emulates well — and what makes HF emulation different from cloning
MIFARE Classic 1K and MIFARE Classic 4K emulate reliably. The captured dump includes all 16 (1K) or 40 (4K) sectors with their Key A, Key B, access bits, and data blocks; the SAM7 firmware uses the Crypto1 cipher to respond to the reader’s AUTHENT_KEYA / AUTHENT_KEYB commands correctly. From the reader’s perspective, the iCopy-X looks like a normal MIFARE Classic card with the captured contents. Cross-link to Vol 5 for the MIFARE Classic protocol and the Crypto1 cipher; the practical short version is that if the dump has all sector keys (recovered via Sniff in Vol 7, or already known from a previous engagement), emulation is solid. If the dump has some sectors with unknown keys, emulation works for the recovered sectors and fails for the unrecovered ones — the reader will get a 0x04 “auth failed” response from those sectors, and depending on how it handles the failure may either continue with the readable sectors or abandon the read entirely. In practice this is the same behaviour as a real card with damaged sectors.
MIFARE Ultralight (the original 64-byte, no-crypto family) emulates trivially well — there is no authentication to worry about, just a static page-read response.
MIFARE Ultralight EV1 / EV2 / NTAG 21x family emulate well when the password (if set) is captured. The capture process (Read HF or Sniff) extracts the relevant data pages; if the card uses the password-protected read or write modes, the password has to be in the dump for emulation to succeed against a reader that exercises those modes. For the supermajority of NTAG-tagged consumer products and access control NTAGs that don’t use password protection at all, emulation is just a page-read replay.
iCLASS Legacy (the original HID iCLASS family, 2002-era) emulates well when the dump includes the credential block and the diversified key derivation can be applied — the iCopy-X has the standard diversification logic on board. Cross-link Vol 6 §2 for the iCLASS Legacy protocol. The catch is that iCLASS Legacy emulation requires the dump to have been captured with the keys recovered, which usually means the iCopy-X used the loclass-style attack during the original capture; an early-capture dump from before that attack completed will not emulate cleanly.
iCLASS Elite emulates partially — the iCopy-X supports Elite key recovery and emulation in firmware, but Elite has more variation in deployment configurations than Legacy, and some site-specific Elite deployments may not emulate cleanly without the operator manually inspecting the dump. Cross-link Vol 6 §3.
ISO 15693 (the long-range HF standard, used in library books, inventory tags, some access-control deployments) emulates well for the basic tag dialects (TI Tag-it HF, NXP iCODE SLI / SLIX in unprotected modes). Privacy-protected iCODE SLIX requires the privacy password to be in the dump, and the reader has to support the iCopy-X’s exact framing variation — most modern ISO 15693 readers are tolerant, but some older ones are not.
8.3.3 What does not emulate, and why
The hard limit on HF emulation is cards whose authentication depends on a secret the operator does not have. The iCopy-X is a perfectly capable cryptographic engine for the schemes it knows; it cannot conjure keys it doesn’t have. The non-starters:
MIFARE DESFire (EV1, EV2, EV3) — uses 3DES, AES-128, or AES-256 mutual authentication with site keys that are essentially never recoverable without insider access or a side-channel attack the iCopy-X does not implement. A DESFire dump from a Read HF operation contains the UID and the public application metadata; it does not contain the per-file keys, and without those, emulation cannot authenticate to a reader that uses any of the DESFire authentication modes (which is almost any DESFire deployment in production). Cross-link Vol 5 §6 for DESFire’s protocol, and Vol 11 for the comparison context — the Proxmark3 RDV4 is no more capable here, because the problem is cryptographic not architectural.
iCLASS SE / SEOS — without the iCS Decoder Tool add-on. The base iCopy-X firmware reads SE/SEOS as encrypted data it cannot decode; emulating that data back without decoding it produces gibberish from the reader’s perspective. With the iCS Decoder Tool installed and the SEOS-capable accessory antenna in use (Vol 6 §5), SEOS emulation works for the supported credential profiles. Without the iCS Decoder, SEOS is fundamentally out of scope on the iCopy-X.
Modern EMV contactless payment (Visa payWave, MasterCard PayPass, American Express ExpressPay, the Apple Pay / Google Pay token-bearing modes, the various transit-card EMV variants). These use per-transaction cryptograms and dynamic CVVs that the iCopy-X cannot replicate without the issuer’s per-card session keys; even if it could, attempting payment-card emulation is firmly outside the legal envelope of the tool (Vol 1 §6, Vol 12) and is not in scope for any authorised pentest practice. The iCopy-X firmware does not specifically prevent the operator from trying — there are no hard guardrails — but the underlying cryptography ensures it cannot succeed, and the operator should not be trying in the first place.
FeliCa (the Sony / JR-East transit-card family used in Japan and parts of South Asia) — the iCopy-X has limited FeliCa support. Read works for unencrypted FeliCa modes; emulation works for unprotected dumps but most production FeliCa deployments use the mutual-authentication modes which the iCopy-X does not emulate. Cross-link Vol 6 §6 for the FeliCa protocol context.
LEGIC Prime / Advant — partial support; depends heavily on which LEGIC variant. The iCopy-X firmware has been adding LEGIC support over the 2.0 firmware family. Operators encountering LEGIC in the field should check the current firmware release notes (Vol 10) before assuming emulation will work.
8.3.4 The multi-reader testing workflow — HF’s killer feature
The single most-used HF emulation workflow in a real pentest is multi-reader testing of a captured credential. The shape of it:
- Capture the target credential once, with full key recovery. For a MIFARE Classic 1K access card, this means running Sniff against the door reader to recover the relevant sector keys, then a Read HF to get the full dump (Vol 7 §5–6).
- Walk the facility with the iCopy-X in pocket. At each reader the operator is authorised to test against — front door, lobby door, elevator, server-room door, parking gate, after-hours entry — they pull the device out, navigate to Emulation HF, select the dump, present to the reader. Each test takes about 30 seconds.
- Note which readers accept the emulation and which deny it. The pattern of acceptance and denial reveals the access-control system’s segmentation: do all readers share a single key set, are there sector-level access controls per reader, are time-of-day restrictions in play.
- Write up the engagement report with the per-reader results, with the captured credential as a single artifact, no physical blanks produced, no badges left in the field.
Compared to the alternative — physical cloning to MIFARE Magic Gen2 blanks for each reader — this workflow saves blanks, saves time, leaves no physical trail, and is much easier to demonstrate to a client by showing them the iCopy-X working at each reader rather than asking them to inspect a wallet full of cloned cards. The iCopy-X’s portability is precisely what makes this workflow viable — a Proxmark3 RDV4 with a laptop tethered cannot be carried around a facility this way.
The trade-off, as always, is that emulation produces no take-home artifact for the client. Most engagement-close conversations cover this explicitly: does the client want a cloned card in the report, or just the demonstration. The default in most authorised practices is “demonstration, no clone” — the client’s security posture has already been validated, and a physical clone creates a new artifact that the client has to track and destroy.
8.3.5 HF emulation versus the ChameleonMini / ChameleonUltra
A side-note: there is a specific tool category — the ChameleonMini and ChameleonUltra by ProxGrind / RRG — that is only an HF emulation device, no card-cloning to physical blanks, no LF support, no Proxmark3 application-layer functions. It exists because some operators specifically want a pure emulator with a smaller form factor than the iCopy-X (key-fob-sized, USB-rechargeable, multiple slot storage for several captured cards). The iCopy-X covers everything the Chameleon family does on the HF side, plus LF, plus reading, plus key recovery, plus cloning. The Chameleon’s pitch is smaller form factor and dedicated-emulator polish; the iCopy-X’s pitch is “all of it in one device.” Vol 11 covers the comparison in detail.
For a Hack Tools operator considering whether to add a ChameleonUltra to a kit that already has an iCopy-X, the answer is usually “only if the form-factor matters and the operator does covert emulation work where pulling out a remote-sized device is awkward.” For the supermajority of authorised work, the iCopy-X covers the use case.
8.4 Mode 8 — Expert / Proxmark Mode
8.4.1 The escape hatch, and why it is here
Every appliance has an escape hatch. The iCopy-X’s is Expert Mode (also documented in some firmware versions as “Proxmark Mode” — the names are interchangeable in the community discussions, and the function is the same). Expert Mode drops the operator out of the appliance UI and exposes the underlying Proxmark3-RRG client running on the NanoPi NEO Linux side (Vol 2 §5 for the NanoPi NEO context). From the moment Expert Mode is engaged, the device stops being a push-button appliance and becomes a tethered Proxmark3 with its own internal Linux host — which is, structurally, what it always was; the application UI is what hid that lineage.
The reason Expert Mode exists at all is that no closed application UI can ever exhaust the full capability surface of a Proxmark3-class device. The Proxmark3 client has hundreds of commands across LF, HF, hardware-debug, scripting, and analysis surfaces; the iCopy-X application UI exposes maybe the most-used dozen of those commands as menu items. The remaining surface — lf t55xx detect and its dozens of options, hf mf nested with custom dictionaries, hf iclass loclass with arbitrary parameter sets, the entire script run subsystem, the FPGA bitstream-debug commands — is genuinely useful in edge cases and is not exposed in the appliance UI. Expert Mode is the operator’s reassurance that the iCopy-X never forecloses any capability the underlying silicon supports; it just hides it behind a menu when the appliance experience is what is wanted.
8.4.2 How Expert Mode is engaged
The specifics vary by firmware version, but the canonical entry path is a multi-button sequence from the main menu — typically a long-press combination such as holding two specific buttons for several seconds while a particular menu item is selected. The iCopy-X firmware update notes (Vol 10) document the current button sequence; the user manual in 05-resources/iCopy-X-User-Manual.pdf is the authoritative reference for the firmware revision the device shipped with.
Once engaged, Expert Mode has two distinct operational modes depending on whether a USB-C cable is connected to a host computer:
- Standalone Expert Mode — the device’s LCD displays a minimal text terminal exposing a subset of the Proxmark3 client commands. The 4-button keypad becomes a primitive input device for navigating command history and a small whitelist of pre-configured commands. This mode is rarely used in practice because the 4-button input is not ergonomically viable for typing arbitrary commands; it exists for diagnostic scenarios where a host computer is genuinely not available.
- USB-tethered Expert Mode — the device connects to a host computer via USB-C, and the operator runs the Proxmark3 client on the host. The iCopy-X presents itself to the host as a USB CDC ACM serial device (
/dev/ttyACM0on Linux, COM port on Windows), and the standard Proxmark3 client (pm3orproxmark3binary, version-matched to the iCopy-X firmware) is launched from the host’s shell. This is the workhorse Expert Mode workflow.
Most operators using Expert Mode are in USB-tethered mode. The standalone mode is essentially a diagnostic shim for situations where a laptop is genuinely unavailable.
8.4.3 The command surface — what Expert Mode actually exposes
USB-tethered Expert Mode exposes the full Proxmark3-RRG client command set running against the iCopy-X’s SAM7 + Spartan-3 RFID brain. The command set is large; the categories that matter for an operator who has dropped out of the appliance UI:
LF commands — the lf subtree, which has every LF tag dialect’s read/write/sim/clone command. The most useful in Expert Mode:
lf search— auto-detect any LF card present and identify the dialect. The appliance UI’s “Scan” mode is roughly equivalent but with less verbose output; Expert Modelf searchshows the raw signal traces, the frequency detection, the bit-rate analysis, and the dialect’s confidence score.lf t55xx detectand thelf t55xx configfamily — configure the T5577 blank’s modulation, bit rate, and configuration block in detail. The appliance UI hides this behind a “Clone to T5577” abstraction; Expert Mode lets the operator manually set the T5577’s configuration for non-standard target dialects.lf hid clone/lf hid sim/lf hid brute— the HID Prox-specific commands, including the brute-force facility-code search that the appliance UI does not expose.lf indala clone/lf indala sim— Indala-specific.lf hitag read/lf hitag sim— HITAG 1, HITAG 2, HITAG S. The HITAG family’s full command surface — including the cracking and emulation modes that the appliance UI either does not expose or exposes in a limited form.lf simfsk/lf simask/lf simpsk— generic LF emulation with modulation-depth, bit-rate, and modulation-scheme parameters exposed. This is the escape hatch for the LF emulation problems discussed in §2.4 above.
HF commands — the hf subtree:
hf 14a info— read ISO 14443A tag identification including ATQA, SAK, and the manufacturer block. Equivalent to the appliance UI’s HF read for ISO 14443A cards but with full verbose output.hf mf chk— check a list of MIFARE Classic keys against a card’s sectors. Used with a custom key dictionary (loaded from a.dicfile) — the appliance UI uses the built-in key dictionary; Expert Mode allows arbitrary key lists.hf mf nested/hf mf hardnested— the nested and hardnested attacks on MIFARE Classic. The appliance UI’s Sniff mode uses these attacks internally; Expert Mode exposes them directly with full parameter control, including the ability to attack specific sectors only or to use a known partial-key constraint.hf mf darkside— the original Crypto1 attack from the 2008 academic literature. Still useful for the rare cards that defeat nested/hardnested due to PRNG hardening but are vulnerable to darkside (cross-link Vol 5 §4 for the protocol context).hf iclass info/hf iclass dump/hf iclass loclass/hf iclass clone/hf iclass sim— the iCLASS-specific commands. The loclass attack (offline key recovery from captured macs) is exposed here in full; the appliance UI provides a constrained version.hf 15 info/hf 15 dump/hf 15 sim— ISO 15693.hf mfu info/hf mfu dump/hf mfu sim— MIFARE Ultralight family including EV1 / EV2 / NTAG.
Script and analysis surface — the script run subsystem allows arbitrary Lua scripts to drive the Proxmark3 client programmatically. The Proxmark3-RRG repository ships with a substantial library of pre-written scripts for common attacks and analysis tasks; the operator can also write their own. This is where batch operations live — clone 100 cards from a CSV of UIDs, check a recovered key against an arbitrary card database, format-convert between dump formats, automate dictionary attacks against a list of cards.
Hardware debug — the hw subtree exposes the FPGA bitstream version, the SAM7 firmware build, the current operating voltage, the antenna tuning status, and diagnostic information about the RF front end. Used to verify the device is healthy and to diagnose RF problems.
The proxmark.org wiki and the RfidResearchGroup/proxmark3 repository documentation are the canonical references for the full command surface; the iCopy-X-Community teardown repo (Vol 10) includes notes on which client version pairs with which iCopy-X firmware revision.
8.4.4 The setup workflow — USB networking and the client
Getting Expert Mode usable from a laptop involves connecting at two levels: a serial channel to the SAM7-based Proxmark3 backend, and (in some firmware versions) a TCP/IP channel to the NanoPi NEO Linux host that acts as the application processor and bus master. The teardown repo’s networking/ directory (iCopy-X-Community/icopyx-teardown/networking) documents both levels.
The serial channel is the workhorse. When the iCopy-X is in Expert Mode and USB-C connected to a host:
# Linux host
$ ls /dev/ttyACM*
/dev/ttyACM0
$ sudo proxmark3 /dev/ttyACM0
[=] Session log /home/operator/.proxmark3/logs/log_20260525.txt
[+] loaded from JSON file /home/operator/.proxmark3/preferences.json
[=] Using UART port /dev/ttyACM0
[=] Communicating with PM3 over USB-CDC
[usb] pm3 -->
From there, the operator types Proxmark3 client commands and they execute against the iCopy-X’s RFID brain. The user experience is identical to using a Proxmark3 RDV4 with the same client — same commands, same output formatting, same scripting interface. The iCopy-X identifies itself in the hw status output with a build string that includes the Lab401 firmware version and the upstream Proxmark3-RRG commit it was built from.
The TCP/IP channel is documented in the teardown repo’s networking notes and exists because the NanoPi NEO runs an OpenWrt Linux instance that can be reached over USB-OTG networking (the iCopy-X presents itself as both a USB-CDC serial device and a USB-Ethernet device on the same cable, on firmware revisions that have this enabled). Once the operator has SSH access to the NanoPi NEO Linux host, they can examine the application bundle’s Python and Node.js code, inspect the device’s microSD card filesystem, copy dumps and keys directly via scp, and run any custom shell scripts they want. This is more invasive than the serial channel — the operator is now poking around inside the device’s Linux root filesystem, not just exercising the RFID protocol surface — and is rarely needed for engagement work. It is the layer where serious forensic and reverse-engineering work happens, and is covered in Vol 10 §5.
8.4.5 The decision: when Expert Mode is worth it
Expert Mode has a real ergonomic cost. The operator has to carry a laptop, set up USB cabling, install or update the Proxmark3 client to the version matching the iCopy-X firmware, and accept that the engagement workflow now looks like a Proxmark3 RDV4 session rather than the push-button iCopy-X workflow. The portability advantage of the iCopy-X largely evaporates when Expert Mode is engaged.
Given that cost, the decision rule for “should I drop to Expert Mode” is:
Stay in the appliance UI when: the engagement is normal RFID cloning work with cards the iCopy-X recognises and handles cleanly, the operator is moving around a facility with no fixed workstation, the operator wants the fast push-button workflow that justifies owning the device in the first place. This is 90% of authorised physical-pentest work.
Drop to Expert Mode when: Auto Clone failed AND Read failed AND Sniff failed for a specific card; OR the card is a known-difficult dialect (HITAG 2 in cryptographic mode, edge-case ISO 15693, LEGIC) where the appliance UI’s coverage is incomplete; OR the operator needs to run a custom dictionary attack with a customer-specific key list; OR a batch operation across many cards is needed (clone 100 cards from a CSV); OR custom analysis scripts are involved (format conversion, key derivation, attack-result correlation across multiple captures).
Don’t drop to Expert Mode for routine variability. If a single card is just being a little finicky and needs to be retried with better orientation, that is normal iCopy-X behaviour; Expert Mode is not the answer. If Auto Clone fails once, try Auto Clone a second time before assuming the appliance UI cannot handle the card. The escape hatch is for genuinely-stuck-cards, not for marginal-coupling cards.
If Expert Mode also fails: the card is genuinely outside the iCopy-X’s capability — either cryptographically (DESFire, SEOS without iCS, payment cards, FeliCa with mutual auth) or operationally (the card has been damaged, the engagement scope does not include the card’s technology, the operator does not have authorisation for the required attack). The next step is either a Proxmark3 RDV4 bench session with the full lab setup, a Flipper Zero for non-RFID exploration if the engagement scope allows pivoting, or — for the cards that no current tool can handle — closing out the engagement with a clear documentation of the technology that was encountered and what would be required to attack it. Vol 11 covers the cross-tool decision matrix in detail.
8.4.6 A worked example — when Expert Mode actually wins
To make Expert Mode concrete: an engagement where the appliance UI cannot finish the job and Expert Mode genuinely closes the gap.
The scope: a corporate facility uses MIFARE Classic 1K cards for general access, with one specific sector (Sector 14) used as an anti-tearing counter for an employee cafeteria payment system. The pentest scope includes “verify that cloning the access card does not also clone the cafeteria balance, and that any attempt to modify the cafeteria sector is detected by the cafeteria reader.” The operator captures a target card with full Sniff-based key recovery; Auto Clone produces a working clone for the access-control sectors but the cafeteria reader denies the clone with a specific error code that suggests anti-tearing tamper detection.
In the appliance UI, the operator can read the dump, can emulate the dump, can clone the dump to a fresh MIFARE Magic Gen2 blank. None of these tell the operator why the cafeteria reader is rejecting the clone or what the anti-tearing logic is examining.
In Expert Mode, the operator can:
- Run
hf mf nestedagainst the cafeteria reader directly to see whether Sector 14 has additional access conditions beyond what was captured. - Run
hf 14a snoopagainst the genuine card-to-cafeteria-reader interaction to see the exact byte sequence the genuine card produces. - Compare the snoop output against the equivalent interaction with the cloned card to find the differing bytes.
- Run a Lua script that reads Sector 14 from a fresh Magic Gen2 blank, modifies it iteratively, and observes the reader’s response to each modification.
- Document the anti-tearing logic in the engagement report with the specific byte-level findings.
None of this is achievable in the appliance UI. All of it is straightforward in Expert Mode. The engagement deliverable is a substantive technical finding about the cafeteria system’s anti-tearing implementation, not just “we cloned the access card.” This is the kind of work Expert Mode is for — depth of analysis on a specific card or reader interaction that the push-button UI does not expose.
The same engagement, in a Proxmark3 RDV4 lab session, would have produced the same finding faster (because the operator would not have had to set up the laptop tethered to the iCopy-X mid-engagement). The lesson is that iCopy-X Expert Mode is for situations where the depth-of-analysis need emerged mid-engagement and the operator did not anticipate a lab session being required. If the operator knew at scope time that this level of depth would be needed, they would have brought the Proxmark3 RDV4. Expert Mode is the contingency for the surprises.
8.5 Import / Export — file movement and microSD layout
8.5.1 What gets imported and exported
The iCopy-X’s filesystem holds three classes of file that move in and out of the device routinely:
- Card dumps — the binary content of captured cards. LF dumps are typically small (a few hundred bytes for EM4100, a few KB for HITAG); HF dumps are larger (1 KB for MIFARE Classic 1K, 4 KB for MIFARE Classic 4K, varying for iCLASS depending on the cards’ application slots).
- Key dictionaries — text files listing candidate cryptographic keys, usually for MIFARE Classic Key A / Key B attacks. The standard format is one key per line, hex-encoded, 12 hex characters for MIFARE Classic keys (6 bytes). File extensions are
.dic(the Proxmark3 convention) or.keys(some tools). - Logs and traces — diagnostic output from Sniff runs, raw signal traces, error logs. Less routinely exchanged but useful when the operator wants to analyse a difficult card on a laptop with better tooling.
These files live on the device’s internal microSD card, in a defined directory structure (§5.4 below). The operator moves them in and out through one of two channels: the USB mass-storage mode where the device’s microSD appears as a removable drive to a connected host computer, or by physically removing the microSD card and reading it on a host with a microSD adapter.
8.5.2 Export workflow — getting data off the device
USB mass-storage export is the default. With the iCopy-X connected to a host via USB-C and a specific menu choice (“USB Storage Mode” or similar — the exact name varies by firmware) the device exposes its microSD partition as a USB Mass Storage Class device. On the host, this appears as a removable drive (a new mount point on Linux/macOS, a new drive letter on Windows). The operator opens the drive in their file manager, navigates to the appropriate directory, and copies the files to local storage.
The directory structure (see §5.4) makes it easy to grab all dumps from an engagement (copy the /dumps/ directory) or all logs (copy /logs/).
microSD physical export is the fallback for situations where USB connectivity is unavailable, or where the operator wants to image the entire microSD as a forensic backup. The iCopy-X’s microSD slot is accessible (in some firmware revisions through a small panel; the user manual covers the specifics) and the card can be removed and inserted into a host’s microSD reader. From there standard tools (dd on Linux, Win32DiskImager on Windows) can produce a full filesystem image, or the operator can navigate the FAT32 filesystem normally and copy files.
The microSD card ships from Lab401 pre-loaded with a 16 GB image including the firmware-update IPK package, the application bundle, and starter content. The operator should make a forensic backup of the as-shipped card before doing engagement work, so that if the card is corrupted or the device’s filesystem state becomes unrecoverable, the device can be restored to its as-shipped state. Vol 10 §3 covers the backup-and-restore workflow.
8.5.3 Import workflow — getting data into the device
Importing key dictionaries is the most common import use case. The operator has a customer-specific MIFARE Classic key dictionary — gathered from previous engagements with this customer, or from public sources like the standard mfc_default_keys.dic shipped with Proxmark3-RRG, augmented with site-specific keys. To load it into the iCopy-X:
- USB mass-storage mount the device’s microSD.
- Navigate to
/keys/directory. - Copy the
.dicfile in. The standard file naming convention is descriptive —customer_acme_2026.dic,parking_garage_keys.dic, etc. - Eject the USB mass-storage mount cleanly (very important — incomplete writes to the microSD can corrupt the filesystem; the iCopy-X firmware does not have a fsck-on-boot guard for this).
- From the iCopy-X’s menu, the imported dictionary becomes available as an additional key source for the Sniff and key-check operations (Vol 7 §5).
Importing dumps — typically dumps captured on a Proxmark3 RDV4 lab session that the operator wants to be able to emulate from the iCopy-X in the field. The dump format is binary, exactly as produced by the Proxmark3 client’s save commands. For MIFARE Classic, the standard is the 1024-byte (1K) or 4096-byte (4K) dump file with all sectors and key bytes in their canonical positions. Copy the dump into /dumps/ on the microSD, eject cleanly, navigate to Emulation HF or Emulation LF on the iCopy-X, and the imported dump appears in the list. This is the cross-tool exchange path that lets the iCopy-X be the field-ready front end of a lab-based Proxmark3 RDV4 workflow.
Importing dumps from cheap AliExpress handheld duplicators: rare in practice. The cheap duplicators produce proprietary dump formats that do not interoperate with the Proxmark3 ecosystem; converting them requires understanding the cheap-duplicator’s format (usually documented in some forum post, often not at all) and writing a small format-converter script. Most operators don’t bother — they re-capture the card on the iCopy-X.
8.5.4 The microSD layout — what lives where
The standard iCopy-X microSD layout, after the firmware has booted at least once and processed its initial configuration:
/                              -- microSD root (FAT32)
├── application/               -- the iCopy-X application bundle (Python/Node.js)
│                                 don't touch unless you know what you're doing
├── firmware/                  -- IPK firmware-update packages and update logs
├── keys/                      -- key dictionaries (.dic, .keys)
│   ├── mfc_default_keys.dic   -- the built-in default MIFARE Classic key dictionary
│   ├── iclass_default.dic     -- built-in iCLASS Legacy default keys
│   └── <user-imported>.dic    -- operator-added dictionaries
├── dumps/                     -- captured card dumps (binary, organised by type)
│   ├── lf/                    -- LF dumps
│   │   ├── em4100/            -- EM4100-format
│   │   ├── hidprox/           -- HID Prox
│   │   ├── indala/            -- Indala
│   │   ├── hitag/             -- HITAG family
│   │   └── ...
│   └── hf/                    -- HF dumps
│       ├── mfc_1k/            -- MIFARE Classic 1K (1024-byte binary)
│       ├── mfc_4k/            -- MIFARE Classic 4K (4096-byte binary)
│       ├── mfu/               -- MIFARE Ultralight family
│       ├── iclass/            -- iCLASS Legacy / Elite
│       └── ...
├── logs/                      -- diagnostic logs from Sniff runs, Auto Clone failures
│                                 binary trace files plus human-readable summary logs
├── traces/                    -- raw signal traces (large; rotate / clear periodically)
└── config/                    -- device configuration (UI preferences, last-used dumps)
The directory structure is a strong convention but not a hard contract — the iCopy-X firmware looks up dumps and keys by directory name, and an operator who reorganises the layout (e.g., adding per-engagement subdirectories) may find that the device does not see the moved files in the menu. For engagement-specific organisation, the cleaner approach is to keep the canonical layout and use descriptive filenames (acme_door_2026_05_25.mfd for a captured MIFARE Classic dump from an Acme engagement).
The /logs/ and /traces/ directories grow with use; if the microSD card starts to fill up, these are the first targets for cleanup. The /application/ directory should be left alone unless the operator is doing firmware-rebuild work (Vol 10).
8.5.5 File formats and cross-tool interchange
The file formats matter when the operator is moving data between the iCopy-X and other tools — a Proxmark3 RDV4 lab session, a Flipper Zero NFC capture, a research notebook.
MIFARE Classic dumps — the iCopy-X uses the canonical Proxmark3 binary format. 1024 bytes for 1K (16 sectors × 4 blocks × 16 bytes), 4096 bytes for 4K (32 small sectors + 8 large sectors, with the large sectors holding 16 blocks each). The keys live in the trailing blocks of each sector (the “sector trailer”), in the same positions a Proxmark3 dump uses. The file extension convention is .mfd (MIFARE dump) or .bin; the iCopy-X accepts both. Direct interchange with a Proxmark3 RDV4 capture is just file copy — both tools use the same binary layout.
The Flipper Zero by contrast uses a JSON-encoded text format for MIFARE Classic dumps (the Flipper format includes metadata like the device firmware version, the capture timestamp, the UID in addition to the raw sector data, and ASCII-encodes the binary as hex strings in a structured JSON). Converting between iCopy-X / Proxmark3 binary and Flipper JSON requires a small script; the Proxmark3-RRG repository includes a mfd_to_flipper.py utility, and the Flipper community has reverse-direction converters. In practice the conversion is rare — operators don’t typically use both tools on the same card in the same engagement.
HID Prox dumps — the iCopy-X stores the captured HID Prox tag as a binary file containing the raw Wiegand bit stream (typically 26-bit, 35-bit, 37-bit, or 48-bit depending on the format). The Proxmark3 client’s lf hid clone accepts the same binary; cross-tool interchange is trivial.
iCLASS dumps — the binary format follows the Proxmark3 client’s hf iclass dump output: a header block with the card identification, followed by the application data blocks, followed by the credential blocks. The iCopy-X and Proxmark3 RDV4 produce interchangeable files; the iCS Decoder Tool for SE/SEOS produces additional metadata that is iCopy-X-specific and does not roundtrip cleanly to a Proxmark3 RDV4 lab session.
Key dictionaries — universally the line-per-key hex format. A single dictionary file works on any Proxmark3-family tool. The standard mfc_default_keys.dic shipped with Proxmark3-RRG is the same file the iCopy-X ships with as its built-in default.
Logs and traces — proprietary binary trace formats from the SAM7 firmware. Not designed for cross-tool interchange. Useful for the operator’s own analysis on a laptop with the Proxmark3 client’s trace-decoder tools.
8.5.6 Practical interchange workflows
Two real workflows that recur in practice:
Workflow A — iCopy-X as the field front-end of a Proxmark3 RDV4 lab. The operator’s primary workbench is a Proxmark3 RDV4 lab where they do the slow research work — recovering keys from new card families, building customer-specific dictionaries, analysing failed captures. The iCopy-X is the field-ready front end: it gets the customer’s pre-built key dictionary loaded onto it before the engagement, captures cards in the field, and the captures are imported back to the lab for analysis after the engagement. Files move:
- Before engagement: lab Proxmark3 → laptop → microSD on iCopy-X →
/keys/customer_acme.dic. - During engagement: iCopy-X captures cards to
/dumps/. - After engagement: iCopy-X → laptop → lab Proxmark3 for analysis of failed captures and dictionary refinement.
Workflow B — iCopy-X as the standalone tool. The operator works entirely on the iCopy-X, with no separate lab. Captures happen in the field; analysis happens via Expert Mode (§4) when needed; the device’s own storage is the workflow’s only persistence. File interchange is minimal — occasional backups of /dumps/ to a personal laptop for engagement-end deliverables. This is the simpler workflow and is appropriate for operators whose practice is dominated by routine push-button work and who don’t have a Proxmark3 RDV4 lab.
Both workflows are valid. The right answer is “which one fits the operator’s practice.” A Hack Tools operator with both an iCopy-X and a Proxmark3 RDV4 should default to Workflow A — the two devices are complementary, not redundant (Vol 11 covers the comparison framing in detail).
8.6 The unified decision graph — when to leave the appliance UI
Pulling §2 through §5 together: the operator’s “stay in the appliance UI, or escape” decision tree, applied to the full range of operating modes covered across Vol 7 and this volume:
What is the task?

  Routine card cloning, recognised technology, healthy coupling
    --> Auto Clone (Vol 7). Done in <30 seconds.

  Card the appliance UI mis-identifies on Auto Clone
    --> Manual Read LF or Read HF (Vol 7) to get the dump,
        then Clone or Emulation as needed.

  Card with unknown sector keys (MIFARE Classic)
    --> Sniff (Vol 7) against the genuine reader, then Read +
        Emulation or Clone.

  Capture once, test against multiple readers without leaving artifacts
    --> Emulation LF or HF (§2-3 of this volume). No blanks consumed,
        no take-home credentials produced.

  Engagement scope forbids physical artifacts entirely
    --> Emulation only (§2-3). Document the engagement with the
        emulation demonstrations, not with physical clones.

  Card type the appliance UI does not fully handle
  (HITAG 2 challenge-response, edge-case ISO 15693, LEGIC variants)
    --> Try the appliance UI's Read + Emulation first.
        If those fail, drop to Expert Mode (§4) and use the
        Proxmark3 client's deeper command set.

  Custom dictionary attack with a customer-specific key list
  Custom batch operation across many cards
  Custom analysis script
    --> Expert Mode (§4). The appliance UI does not support
        scripted or batch work.

  Card the iCopy-X fundamentally cannot handle
  (MIFARE DESFire with site keys you don't have,
   iCLASS SE / SEOS without the iCS Decoder Tool,
   payment cards, FeliCa with mutual authentication)
    --> Expert Mode will not help — the limit is cryptographic,
        not architectural. The next step is to either escalate
        to a Proxmark3 RDV4 lab session (which will not get
        further on the cryptographic limits but may have
        different attack tooling available), acquire the iCS
        Decoder Tool if the limit is SEOS, or close out the
        engagement with a clear documentation of the technology
        encountered.

  Engagement workflow is split between field and lab
    --> iCopy-X for field capture and routine cloning;
        Proxmark3 RDV4 for lab analysis; file interchange
        via the microSD / USB mass-storage paths (§5).
The 90/10 rule is the load-bearing summary of this decision graph. In a healthy authorised physical-pentest practice, 90% of work never leaves the appliance UI. Auto Clone handles the common cases, manual Read handles the less-common cases, Sniff handles the MIFARE Classic key-recovery cases, Emulation handles the multi-reader-test cases. The push-button experience is what justifies the iCopy-X’s purchase over a laptop-tethered Proxmark3 RDV4 — and that experience is intact across the supermajority of engagements.
The 10% where the operator drops to Expert Mode is the long tail: difficult cards, custom attacks, batch operations, analysis depth that the UI does not expose. Expert Mode is genuinely useful for this 10%, but the operator should recognise that they have stepped out of the iCopy-X’s primary value proposition and into the Proxmark3 RDV4’s territory. The iCopy-X in Expert Mode is worse than a Proxmark3 RDV4 at this kind of work — the RDV4 has more polished tooling around the same client, a more robust USB connection, and an ecosystem of add-ons (the BlueShark BLE adapter, the LF and HF expansion antennas, the Wave reader for low-level analysis). Expert Mode exists for the operator who could not have predicted that the field engagement would need this depth, not for the operator who has decided up front that depth is needed.
A useful self-check: at the end of each engagement, the operator notes how many times they had to leave the appliance UI. If the answer is “never,” the iCopy-X was the right tool. If the answer is “once or twice for specific cards,” the iCopy-X was the right tool and Expert Mode was the appropriate escape hatch. If the answer is “most of the engagement was in Expert Mode,” the engagement should have been done on a Proxmark3 RDV4 from the start, and the planning that led to bringing the iCopy-X instead should be reviewed for the next similar engagement.
8.7 What this volume did not cover (and where to find it)
This volume covered the four modes that read-side Vol 7 did not — emulation in both bands, the Expert / Proxmark Mode escape hatch, and the import/export workflows that make the device interoperable with the wider Proxmark3 ecosystem. The deliberate omissions from this volume, with pointers to where they live:
- The iCS Decoder Tool for iCLASS SE / SEOS — this add-on is treated in detail in Vol 6 §5, including the licensing model, the accessory antenna, and the SEOS-specific emulation workflow. Emulation HF references SEOS in §3.3 above; the operational depth is in Vol 6.
- Blank card selection for cloning targets — Auto Clone-or-emulate decisions sometimes resolve to “actually do the physical clone.” The blank-card ecosystem (T5577 LF universal, MIFARE Magic Gen1a / Gen2 / Gen3 HF, iCLASS Legacy and SEOS-capable blanks, the differences between Lab401 “Genuine” packs and AliExpress alternatives) is the subject of Vol 9.
- The Proxmark3 client’s command surface in full — Expert Mode (§4 above) exposes the full Proxmark3-RRG client; the upstream documentation at https://github.com/RfidResearchGroup/proxmark3 is the canonical reference, and the proxmark.org wiki is the operational walkthrough. Vol 11 compares the iCopy-X’s Expert Mode to a standalone Proxmark3 RDV4 session.
- Firmware update workflow and the per-device IPK packaging — moving new firmware onto the device is the subject of Vol 10, and is a separate workflow from the Import/Export covered in §5 (which is for engagement data, not firmware).
- Legal envelope and engagement-scope discipline — the legal posture that surrounds every use of every mode covered in this volume lives in Vol 12, with the laminate-ready cheatsheet and the international-statute reference.
Vol 9 opens the card-stock ecosystem — what blanks to carry, what they cost, and why the Lab401 packs are worth their price for professional work. After Vol 9, the series moves into the operational-and-decision volumes: Vol 10 on firmware, Vol 11 on the cross-tool comparison, and Vol 12 on the legal and posture frame. The operating-modes pair (this volume plus Vol 7) is the load-bearing reference for daily engagement work; the rest of the series is the context that makes the operating-modes pair safely usable.
Comments (0)