M5Stack Cardputer Zero · Volume 8
M5Stack Cardputer Zero Volume 8 — OS Imaging, Boot & Recovery
Writing a Raspberry Pi OS image to microSD, the CM0 boot chain (u-boot → kernel → device-tree overlays), headless setup, card backup/clone, and re-imaging recovery
8.1 About this volume
Vol 8 covers how you get an operating system onto a Cardputer Zero, how that OS boots, and how you back it up and recover it. The Zero is a Raspberry Pi Compute Module 0 (CM0 / RP3A0 → BCM2710A1, quad Cortex-A53 @ 1.0 GHz, ARMv8-A aarch64, 512 MB LPDDR2) pocket Linux computer — the same silicon class as a Raspberry Pi Zero 2 W. It boots a real OS (Raspberry Pi OS / Debian, aarch64) from a microSD card. There is no firmware image to flash to on-board memory; there is no bootloader-mode USB handshake; there is no serial-port write cycle. You write a disk image to a card and put the card in the slot — exactly like provisioning any Raspberry Pi.
Corrected premise. Everything in this volume that previously described
esptool.py, M5Burner, browser WebSerial flashers,write_flash/read_flashoffsets, DTR/RTS boot-mode toggling, and “bricked-Zero recovery” was wrong for this device. Those describe an ESP32-class microcontroller. The Cardputer Zero is not a microcontroller — it is a Linux single-board computer (SBC). The correct mental model throughout is “provision a Pi,” not “flash an MCU.”
Why earlier drafts described esptool flashing. The earliest Cardputer Zero notes were written before the product shipped, by analogy to the other members of the Cardputer family — the original Cardputer (K132) and the Cardputer ADV are genuinely ESP32-S3 handhelds that you flash with M5Burner/esptool. “Zero” was read as “budget ESP32 variant,” so the whole flashing workflow was inherited from the ADV deep dive. The Kickstarter launch (2026-05-26) confirmed the opposite: the “Zero” refers to the Pi CM0, not a stripped-down tier. The boot/provisioning paradigm is therefore completely different, and this volume is rewritten from scratch around it. (See Vol 1 for the corrected hardware confirmation and Vol 7 for the Linux-native development story that replaces the old Arduino/PlatformIO chapter.)
The real software-siblings for this volume are not the ESP32 Cardputers but the Linux handhelds in the Cyberdecks project — the Clockwork uConsole (Pi CM4) and PicoCalc. Their SD/boot chapters describe the same dd/Raspberry-Pi-Imager → boot-partition config.txt → device-tree-overlay workflow. See ../../Cyberdecks/.
8.2 The paradigm: SD-card image, not a firmware flash
On an ESP32 device the firmware is the flash contents; you erase and rewrite the on-chip SPI flash over a serial bootloader. On the Cardputer Zero the OS is the contents of the microSD card, and that card is a standard block device. The consequences are worth stating plainly because they invert almost every habit from the ESP32 volumes:
Table 1 — On an ESP32 device the firmware is the flash contents; you erase and rewrite the on-chip SPI flash over a serial bootloader. On the Cardputer Zero the OS is the contents of the microSD card, and that card is a standard block device. The consequences are worth stating plainly because they invert almost every habit from the ESP32 volumes
| Question | ESP32 model (wrong for the Zero) | CM0 Linux model (correct) |
|---|---|---|
| Where does the OS live? | On-chip SPI flash (e.g. 8 MB) | On the microSD card (≥8 GB) |
| How do you install it? | esptool.py write_flash over USB-serial | Write a .img to the card with an imager |
| What tool? | M5Burner / esptool / WebSerial | Raspberry Pi Imager / m5stack-imager / dd / balenaEtcher |
| Boot-mode handshake? | DTR/RTS pulse into download mode | None — the SoC ROM reads the card’s boot partition |
| Can you “brick” it? | Yes, if you corrupt the bootloader region | No — worst case you rewrite the SD card |
| Backup the device? | read_flash 0 0x800000 | dd / Win32DiskImager image the card |
| Update a single setting? | Rebuild + reflash firmware | Edit a file on the running Linux filesystem |
| First boot resizing? | n/a | rootfs auto-expands to fill the card |
   ESP32 Cardputer (ADV/original)          Cardputer Zero (CM0 Linux)
   ────────────────────────────            ──────────────────────────
   host ──USB-CDC──▶ ROM bootloader        host ──imager──▶ microSD card
                       │                                      │
                  on-chip SPI flash                    insert card ─▶ slot
                  (firmware image)                            │
                       │                              SoC ROM ─▶ boot part.
                  app runs on MCU                             │
                                                      u-boot ─▶ Linux kernel
                                                              │
                                                      Debian aarch64 userland
Tip. Keep a small stack of microSD cards. Because the OS lives on removable media, the fastest “reset to known-good” is to swap in a second card you imaged earlier — no host, no cable, no tools. Treat cards the way you’d treat ESP32 firmware slots, except they’re physical and you can label them.
8.3 Imaging-method decision tree
   How do you want to put an OS on a card?
                    │
        ┌───────────┴───────────────┐
        │                           │
   GUI, guided,                 CLI / scriptable /
   beginner-safe                fleet / reproducible
        │                           │
   ┌────┴─────┐                ┌─────┴─────────────┐
   │          │                │                   │
 want M5     want the         Linux/macOS        Windows,
 defaults    upstream Pi       comfortable        no WSL
 baked in    tool              with block         handy
   │          │                devices             │
   ▼          ▼                  │                  ▼
 m5stack-   Raspberry            ▼              balenaEtcher
 imager     Pi Imager          dd               (GUI, cross-
 (M5-       (preconfigure                        platform, no
 oriented)  SSH/Wi-Fi/                            block-device
            hostname in                           fluency
            the wizard)                           needed)
All four paths produce the identical result: a bootable Cardputer Zero microSD. They differ only in ergonomics and in whether headless settings (SSH, Wi-Fi, hostname) are pre-injected by the imager (Raspberry Pi Imager and m5stack-imager) or set by hand afterward (dd, balenaEtcher — see §6).
Table 2 — 3. Imaging-method decision tree
| Tool | Best when | Headless preconfig | Notes |
|---|---|---|---|
| Raspberry Pi Imager | You already use it for Pis; want the wizard | Yes (gear/Ctrl-Shift-X: SSH key, Wi-Fi, hostname, locale) | Point it at a local .img/.img.xz via “Use custom” |
m5stack-imager (CardputerZero/m5stack-imager) | You want M5’s curated image list + Zero-aware defaults | Yes (M5-oriented wizard) | Raspberry-Pi-Imager-style tool tuned for M5 Linux devices |
dd (Linux/macOS) | Scripting, fleet provisioning, CI | No (edit boot partition after) | Total control; total responsibility — pick the right of= |
| balenaEtcher | Windows without WSL; want a foolproof GUI | No | Validates the write; refuses system disks |
8.4 Where the image comes from — CardputerZero/pi-gen
The Cardputer Zero OS image is not a generic Raspberry Pi OS download — it is a Raspberry Pi OS derivative built by CardputerZero/pi-gen, M5Stack’s fork of the official Raspberry Pi OS image builder (RPi-Distro/pi-gen). That fork bakes in the Zero-specific pieces so the device boots usable out of the box:
- the CM0 kernel + modules from
dianjixz/cm0-firmware, - the device-tree overlays from
m5stack/m5stack-linux-dtoverlaysthat bring up the 320×170 ST7789v3 LCD, the 46-key matrix keyboard, the ES8389 audio codec, etc., - the
u-bootpayload andcircle-boot-splashbare-metal splash from theCardputerZeroorg, - the
cardputer-zero-ossystem profile (the appliance config that makes a stock Debian behave like a Cardputer Zero), and - the small-screen
cardputer-zero-shellWayland UI and default apps (Vol 7 covers the shell + app SDK in depth).
You consume the output of pi-gen — a flashable .img (commonly distributed .img.xz-compressed) — exactly as you’d consume an official Raspberry Pi OS release. You only need to run pi-gen yourself if you want a customized image (extra packages pre-installed, a fleet-standard config, a read-only rootfs variant for drop-box duty — see §9.4).
   CardputerZero/pi-gen  (image builder, fork of RPi-Distro/pi-gen)
        │  pulls in ▼
        ├── dianjixz/cm0-firmware ............ kernel + modules (CM0)
        ├── m5stack/m5stack-linux-dtoverlays . LCD / keyboard / audio overlays
        ├── CardputerZero/u-boot ............. bootloader
        ├── CardputerZero/circle-boot-splash . boot splash
        ├── CardputerZero/cardputer-zero-os .. appliance system profile
        └── cardputer-zero-shell + default-apps  small-screen Wayland UI
        │  emits ▼
   cardputer-zero-<date>.img.xz   ◀── this is what you write to the card
Note — “first flash on a brand-new unit.” The Full model ships with a bundled 32 GB microSD preloaded with the image — power it on and it boots, no host PC required. The Lite model ships without a card: your first task is to image a card yourself (≥8 GB) per §5. This is the Linux-SBC analog of “comes pre-flashed from the factory” vs “flash it yourself before first use.” Verify exact bundled-card size and preload state on receipt.
8.5 Writing the image to a card
8.5.1 Card requirements
Table 3 — 5.1 Card requirements
| Requirement | Value | Why |
|---|---|---|
| Minimum capacity | ≥ 8 GB | Raspberry Pi OS rootfs + headroom; 16–32 GB recommended for real work |
| Card class | A1/A2, UHS-I, name-brand | Random-IOPS rating (A1/A2) matters far more than sequential class for a running OS; counterfeit/no-name cards are the #1 corruption source |
| Format before write | None needed | The imager writes a full partition table; pre-formatting is irrelevant |
Tip. For a device that runs Linux off the card 24/7 (drop-box duty), buy an A2-rated card from a reputable vendor. Endurance (“High Endurance”/industrial) cards are worth it if the Zero is logging continuously — the rootfs sees real write traffic, unlike an ESP32 whose SD is optional scratch storage.
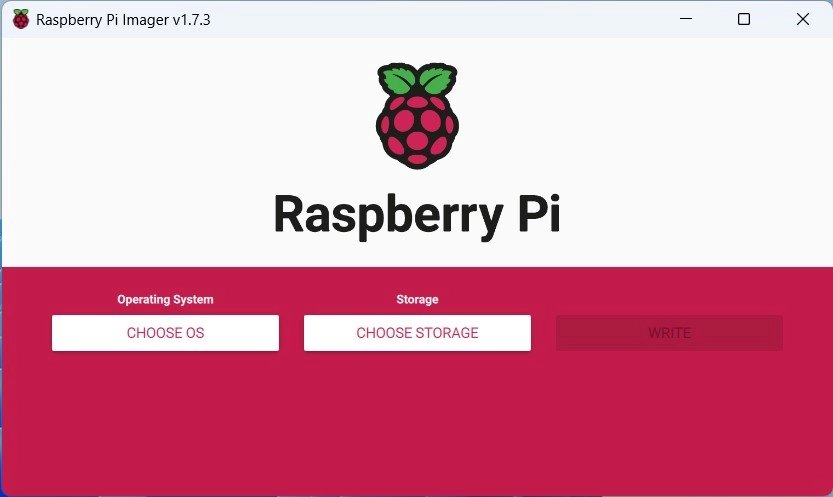
8.5.2 Raspberry Pi Imager / m5stack-imager (guided)
- Launch the imager.
- Choose OS → “Use custom” → select the downloaded
cardputer-zero-*.img.xz(or pick it from m5stack-imager’s curated list). - Choose Storage → select the microSD (double-check the device — see the gotcha in §10).
- Open the settings/advanced panel (Raspberry Pi Imager: the gear icon, or Ctrl-Shift-X) and preconfigure headless options before writing — hostname, enable SSH (paste your public key), Wi-Fi SSID + PSK + country, locale/timezone, default user. These are written into the boot partition so the device is reachable on first boot with no monitor/keyboard.
- Write → verify → eject.
8.5.3 dd (Linux/macOS, scriptable)
# 1. Identify the card device. INSPECT CAREFULLY — the wrong target destroys a disk.
lsblk                       # Linux: find the ~8-32 GB removable device, e.g. /dev/sdX
diskutil list               # macOS: find /dev/diskN (use the RAW node /dev/rdiskN to write)

# 2. Unmount (do not eject) so dd can take the whole device
sudo umount /dev/sdX*       # Linux
diskutil unmountDisk /dev/diskN   # macOS

# 3. Decompress-and-write in one pipe (xz image), with progress
xzcat cardputer-zero-2026-05.img.xz | sudo dd of=/dev/sdX bs=4M conv=fsync status=progress
#   macOS: of=/dev/rdiskN   (raw node is ~10x faster)

# 4. Flush and verify the kernel re-reads the new partition table
sync
sudo partprobe /dev/sdX     # Linux
Danger.
ddis unforgiving:of=/dev/sdaon most Linux hosts is your system disk. Confirm the size and removable flag (lsblk -o NAME,SIZE,RM,MODEL) before every write. There is no undo.
8.5.4 balenaEtcher (Windows GUI)
Select image → select target → Flash. Etcher refuses to target system disks and validates the write afterward, which makes it the safest choice on a Windows host without WSL. It cannot preconfigure headless settings — do that by hand on the boot partition after writing (§6.2).
8.6 First boot, rootfs expansion, and headless setup
8.6.1 First boot expands the rootfs
The pi-gen image is sized to its contents, not to your card. On first boot the standard Raspberry Pi OS first-boot routine (init_resize / the resize service) grows the root partition to fill the whole card and reboots once. This is automatic and is exactly the Pi behavior — expect one extra reboot and a slightly longer first power-up. After that the full card capacity is available to the rootfs.
8.6.2 Headless setup via the boot partition (the Pi way)
If you did not preconfigure with the imager (i.e. you used dd or Etcher), you can still set the Zero up headlessly by writing two files to the boot partition — the small FAT partition that any host (Windows/macOS/Linux) mounts when you reinsert the freshly-written card. This is identical to Raspberry Pi OS headless provisioning:
# Mount the boot partition (it auto-mounts on most desktops as "bootfs")

# 1. Enable SSH: an empty file named "ssh" on the boot partition turns on sshd
touch /path/to/bootfs/ssh

# 2. Preconfigure Wi-Fi + a user (Bookworm-era Pi OS uses these files / userconf):
#    - wpa_supplicant.conf for Wi-Fi (older flow), or NetworkManager profile
#    - userconf.txt for the first user (username:hashed-password)
cat > /path/to/bootfs/wpa_supplicant.conf <<'EOF'
country=US
ctrl_interface=DIR=/var/run/wpa_supplicant GROUP=netdev
update_config=1
network={
    ssid="YOUR_SSID"
    psk="YOUR_PASSPHRASE"
}
EOF

# 3. (optional) edit config.txt / overlays — see §7
On the next boot the Zero joins Wi-Fi and starts sshd; reach it at ssh <user>@cardputer-zero.local (mDNS) or by IP. From there it is a normal Debian aarch64 box — apt, systemctl, the works (Vol 7 for the dev environment; Vol 9 for the security-tooling and drop-box workflows that this enables).
Tip. Because the Zero has a real RJ45 (10/100) Ethernet jack plus USB-A host and 2× USB-C, you have more headless on-ramps than a Pi Zero: plug in Ethernet and SSH over the wire with zero Wi-Fi config, or attach a USB keyboard to the USB-A port and use the device directly. The on-screen 46-key keyboard + 320×170 LCD also give you a local console without any of that.
8.7 The boot chain — u-boot, kernel, device-tree overlays
8.7.1 Stages
   SoC ROM (BCM2710A1)
        │  reads the FAT boot partition on the microSD
        ▼
   bootloader firmware (bootcode/start*.elf, Pi-style)
        │
        ▼
   u-boot  (CardputerZero/u-boot)
        │  + circle-boot-splash shown on the LCD
        ▼
   Linux kernel + modules  (dianjixz/cm0-firmware)
        │  device tree + overlays applied (m5stack-linux-dtoverlays)
        ▼
   Debian aarch64 userland  (Raspberry Pi OS, cardputer-zero-os profile)
        │
        ▼
   cardputer-zero-shell (Wayland) / SSH / console
The ROM-in-SoC stage is fixed in hardware and reads the card’s boot partition; everything after it lives on that FAT partition and the ext4 rootfs, so it is all rewritable by re-imaging or by editing files. There is no separate flash region to corrupt.
8.7.2 config.txt and device-tree overlays select the hardware
Just like a Raspberry Pi, the Cardputer Zero’s peripherals are enabled by device-tree overlays referenced from config.txt on the boot partition. The overlays come from m5stack/m5stack-linux-dtoverlays and bring up the Zero-specific hardware that isn’t part of a stock Pi:
Table 4 — Just like a Raspberry Pi, the Cardputer Zero's peripherals are enabled by device-tree overlays referenced from config.txt on the boot partition. The overlays come from m5stack/m5stack-linux-dtoverlays and bring up the Zero-specific hardware that isn't part of a stock Pi
| Peripheral | Brought up by | Notes |
|---|---|---|
| 1.9″ IPS LCD (ST7789v3, 320×170) | SPI display overlay | PWM backlight; the small-screen UI is sized to 320×170 |
| 46-key matrix keyboard | keyboard/matrix overlay | Distinct from the ESP32 Cardputers’ 56-key layout |
| Audio (ES8389 codec + AW8737A amp) | I²S/codec overlay | 1 W speaker + MEMS mic + 3.5 mm TRRS |
| IMU (BMI270 + BMM150) | I²C overlay | Full model only |
| RTC (RX8130CE) | I²C overlay | |
| Cap EXT bus (SPI/UART/I²C/USB/GPIO) | bus overlays | Drives Cap LoRa / Cap CC1101 under Linux (Vol 9) |
Editing config.txt to enable/disable an overlay is the Linux equivalent of changing a build flag — but it requires no rebuild and no reflash: edit the text file on the boot partition (from the device or from any host that mounts the card), reboot, done.
# /boot/firmware/config.txt — illustrative; confirm exact overlay names on receipt
dtoverlay=cardputer-zero-lcd
dtoverlay=cardputer-zero-keyboard
dtoverlay=cardputer-zero-audio
# dtparam / dtoverlay lines select peripherals exactly as on a Raspberry Pi
Note. The exact overlay filenames ship in
m5stack-linux-dtoverlaysand theconfig.txtthat pi-gen bakes in — verify the precise names against the as-shipped boot partition on receipt rather than trusting the illustrative names above.
8.8 Backup / clone the card (the “factory backup” analog)
The Linux analog of the old ESP32 “factory backup” is imaging the microSD card to a file. Capture a known-good card image before you customize, and you can restore the exact state — or clone it onto a second card for a fleet — at any time.
8.8.1 Why image the card
- Roll back after an experiment that breaks the system.
- Clone a hardened/configured card across multiple Zeros (fleet/teaching kits).
- Capture the as-shipped state of a Full model’s bundled 32 GB card before you touch it.
- Offline archive of a working drop-box build.
8.8.2 Image the card to a file
# Linux — clone the whole card to a compressed image
sudo dd if=/dev/sdX bs=4M conv=fsync status=progress | xz -T0 > cardputer_zero_backup_$(date +%Y%m%d).img.xz

# macOS — use the raw node /dev/rdiskN for speed
sudo dd if=/dev/rdiskN bs=4m | xz -T0 > cardputer_zero_backup_$(date +%Y%m%d).img.xz
On Windows, use Win32Diskd Imager (“Read” mode writes the card to a .img) or balenaEtcher’s clone workflow — the GUI analog of dd if=….
Tip — shrink before you archive. A raw clone of a 32 GB card is 32 GB even if only 3 GB is used. On Linux,
pishrink.shtruncates the image to the used size (and re-enables first-boot auto-expand), turning a 32 GB clone into a few-GB.img.xzthat re-expands to fill whatever card you later write it to.
8.8.3 Restore / clone
Restoring is just §5 with your backup as the source image. Write it to any ≥8 GB card; the first boot re-expands the rootfs. Keep at least one known-good image off-device (host PC + NAS/cloud), labeled with date and the Zero variant (Lite/Full) it was built for.
8.9 Recovery — re-image, and surviving SD corruption
8.9.1 You cannot “brick” it the ESP32 way
There is no bootloader region in on-chip flash to corrupt, so the ESP32 failure mode (“bricked, needs serial recovery or RMA”) does not exist here. The worst realistic case is a bad SD card, and the fix is to rewrite or replace the card. If the system won’t boot, you re-image — you do not recover a flash chip.
8.9.2 Recovery procedure (a non-booting Zero)
   Zero won't boot / corrupt system
              │
   ┌──────────┴───────────┐
   │ Have a known-good     │  yes ─▶ swap that card in ─▶ boots. Done.
   │ spare card (§8)?      │
   └──────────┬───────────┘
              │ no
              ▼
   Re-image the original card (§5) from your
   backup image (§8) or a fresh pi-gen image (§4)
              │
              ▼
   Mount the card on a host first if you want to
   salvage files from the old rootfs (it's just ext4)
Because the card is a standard block device, before you overwrite it you can mount it on any Linux host (or WSL) and copy off captures, configs, or logs from the old ext4 rootfs — something an ESP32 brick never allows.
8.9.3 The real failure mode: SD corruption from unsafe power-off
The genuine risk on a Linux SBC is filesystem corruption from yanking power while the rootfs is mounted read-write — interrupted writes leave a dirty ext4 journal or, worse, a damaged superblock. Mitigations, in order:
- Shut down cleanly:
sudo poweroff(or the shell’s shutdown action), then wait for the activity to stop before unplugging. The Zero is a computer, not an appliance you can hard-cut. - Use a name-brand A2/endurance card — cheap counterfeits corrupt far sooner under sustained writes.
- Keep the battery healthy (3.7 V / 1500 mAh, BQ27220 gauge) so a momentary supply dropout doesn’t equal an unclean shutdown; recommend a 5 V/2 A source.
fsckon next boot: if you do get a dirty unmount, boot, and let/force anfsckon the rootfs; minor journal damage usually self-heals.
8.9.4 Read-only rootfs for drop-box duty
For a Zero deployed as an unattended drop box (Ethernet + Wi-Fi + battery, left running, possibly power-cut by whoever finds it), the durable answer is a read-only rootfs (overlayfs / raspi-config’s overlay option, or a pi-gen-built read-only variant). With the root filesystem mounted read-only and writes redirected to a tmpfs overlay, an abrupt power-off cannot corrupt the card — the OS comes back identical every boot. Put only the data you intend to keep on a small writable partition (or exfiltrate over the network). This is the recommended posture for any deploy where you can’t guarantee a clean shutdown; the operational-security implications are covered in Vol 11.
8.10 Common imaging gotchas
Table 5 — 10. Common imaging gotchas
| Symptom | Cause | Fix |
|---|---|---|
| Imager wrote to the wrong disk | Picked the system/USB-HDD device, not the card | Always re-check size + removable flag (lsblk -o NAME,SIZE,RM,MODEL); prefer Etcher/Imager which hide system disks |
| Card won’t boot, blank LCD | Image not fully written / ejected before flush completed | Re-write; always sync/eject and wait; verify the write (Imager/Etcher do this automatically) |
| Boots once then “resizing…” forever / loops | First-boot rootfs expand interrupted (power loss mid-resize) | Re-image; don’t power-cut during the first boot’s auto-expand (§6.1) |
ssh refused on a headless card | Forgot the ssh file / imager SSH toggle | Add empty ssh file to boot partition (§6.2), or re-image with the imager’s SSH option enabled |
| Wi-Fi never joins | Wrong country= / SSID/PSK typo / 5 GHz-only AP | On-module radio is 2.4 GHz b/g/n only; set the right country and use a 2.4 GHz SSID, or use Ethernet/USB-A Wi-Fi adapter |
| Frequent corruption / won’t boot after a while | Counterfeit or worn card; repeated unsafe power-off | Switch to a name-brand A2/endurance card; shut down cleanly (§9.3); consider read-only rootfs (§9.4) |
| LCD/keyboard/audio dead after a custom image | Missing/misnamed device-tree overlay in config.txt | Restore the pi-gen config.txt/overlays; verify overlay names from m5stack-linux-dtoverlays (§7.2) |
| Clone image is huge (full card size) | Raw dd copies the whole device, used or not | Run pishrink.sh before archiving (§8.2) |
8.11 Resources
- CardputerZero pi-gen (image builder, the source of the OS image): https://github.com/CardputerZero/pi-gen
- m5stack-imager (M5-oriented imaging tool): https://github.com/CardputerZero/m5stack-imager
- cardputer-zero-os (appliance system profile): https://github.com/CardputerZero/cardputer-zero-os
- cm0-firmware (kernel + modules for the CM0, by dianjixz): https://github.com/dianjixz/cm0-firmware
- m5stack-linux-dtoverlays (device-tree overlays — LCD/keyboard/audio/etc.): https://github.com/m5stack/m5stack-linux-dtoverlays
- CardputerZero u-boot + circle-boot-splash: https://github.com/CardputerZero/u-boot · https://github.com/CardputerZero/circle-boot-splash
- Raspberry Pi Imager: https://www.raspberrypi.com/software/
- balenaEtcher: https://etcher.balena.io/
- PiShrink (shrink card clones before archiving): https://github.com/Drewsif/PiShrink
- Raspberry Pi headless-setup docs (the same boot-partition flow applies): https://www.raspberrypi.com/documentation/computers/configuration.html
- Linux-handheld siblings (same SD/boot paradigm): Cyberdecks project —
../../Cyberdecks/
End of Vol 8. Next: Vol 9 covers use cases + recipes — the Zero-specific Linux workflows for recon, drop-box duty, RF via the Cap EXT bus + USB-A, and the Chameleon Ultra over BLE.
Comments (0)