Parrot OS · Volume 2
Parrot OS Volume 2 — The ThinkPad T480 Host Platform
Hardware walkthrough, the recommended modifications BOM, BIOS prep for Linux, and the considered no-buy list
2.1 Why the T480 was a good buy
The Lenovo ThinkPad T480 (released January 2018) is widely considered the last classic ThinkPad before the T-series moved away from user-serviceable design. The T490 (2019) dropped the rear-slot battery; the T14 (2020+) dropped the swappable Wi-Fi card and welded the RAM down to a single SODIMM. The T480 was the last T-series with:
- Two RAM SODIMM slots (max 32 GB total).
- An M.2 2280 NVMe slot for the primary drive plus an M.2 2242 WWAN slot that takes an M.2 2242 SATA SSD via a passive adapter — i.e., two simultaneous internal SSDs.
- A user-replaceable M.2 2230 Wi-Fi card.
- Two batteries — a built-in 24 Wh “internal” cell plus a hot-swappable rear-slot pack (Lenovo offers 24, 48, or 72 Wh in the rear slot, with the higher-capacity variants protruding slightly from the back of the chassis).
- A real keyboard — the seven-row 2018-era ThinkPad keyboard with the proper TrackPoint, three physical trackpoint buttons above the touchpad, deep key travel.
- Full port complement — USB-C (with Thunderbolt 3), 2× USB-A 3.0, HDMI 1.4, full RJ-45 Ethernet, microSD, smartcard slot, audio combo jack.
- TPM 2.0 (Infineon) chip for hardware-backed disk encryption and Secure Boot key storage.
- Standard ThinkPad serviceability — flip the laptop, remove ~7 screws, the entire bottom comes off in one piece. The Lenovo Hardware Maintenance Manual is published openly.
The combination — upgradeable, dual-storage, dual-battery, real keyboard, Linux-friendly, cheap on the refurb market in 2026 — is why the T480 is the recommended “first hackbook” in dozens of community-curated lists. Refurbished T480 prices in 2026 fall in the $200-$400 range depending on the base spec (i5 vs i7, 8 GB vs 16 GB shipped, 256 GB vs 512 GB shipped, FHD vs WQHD panel, battery health).
The specific unit was bought as i5-8250U / 8 GB / 256 GB / FHD / Win 11 Pro, the most common refurb config. The modifications in § 3 below take it to i5-8250U / 32 GB / 1-2 TB NVMe + second SATA SSD / FHD / AX200 Wi-Fi / 6-cell 72 Wh rear battery — a configuration that competes credibly with modern $1500 ultrabooks for the daily-driver pentest workload, at total cost in the $500-700 range including the laptop.
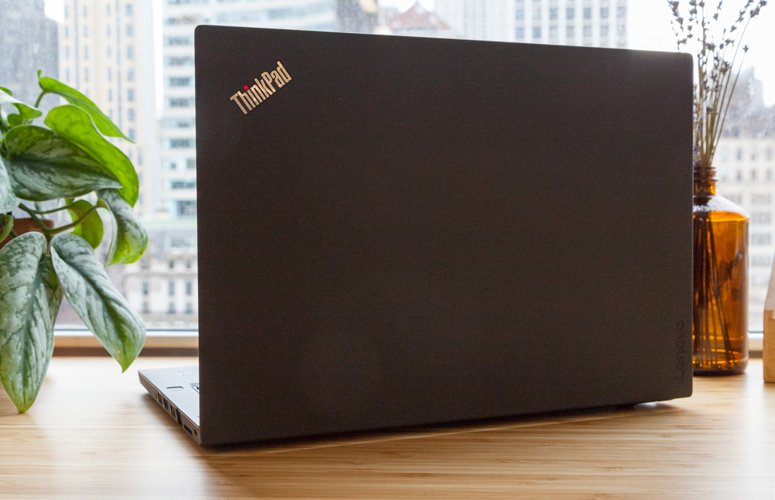
[FIGURE SLOT — Vol 2, § 1] Stock product photo of a Lenovo ThinkPad T480 (open, three-quarter view). Source: Lenovo press kit, or
node commons.js fetch "ThinkPad T480" "<figs path>"— Commons has multiple T480 photos. Caption when filled: “Figure 2.1 — The Lenovo ThinkPad T480 (2018). The last classic ThinkPad — two RAM slots, dual-storage (M.2 NVMe + M.2 SATA via WWAN slot), dual battery, user-replaceable Wi-Fi. Photo: File:[Name].jpg by [author], [license].“
2.2 The T480 in detail — the specific configuration
Table 1 — 2. The T480 in detail — the specific configuration {#t480-detail}
| Subsystem | Configuration | Notes |
|---|---|---|
| CPU | Intel Core i5-8250U (Kaby Lake Refresh, 4 cores / 8 threads, 1.6 GHz base / 3.4 GHz turbo, 6 MB L3 cache, 15 W nominal TDP, configurable up to 25 W cTDP-up) | Released Aug 2017. The U-class chip means soldered to the motherboard — not socketable. The 8250U is the mid-range option; the lineup also includes i5-8350U (vPro version), i7-8550U, i7-8650U (vPro), Intel UHD 620 integrated graphics on all. |
| GPU | Intel UHD 620 integrated (Gen9.5) | Hardware-accelerated H.264 / H.265 / VP9 decode. No discrete option in this variant; the T480 with discrete NVIDIA MX150 was a separate SKU. |
| Chipset | Intel Mobile 100 Series (Sunrise Point-LP) | |
| RAM | 8 GB DDR4-2400 SODIMM (1 of 2 slots populated) | Max 32 GB (2 × 16 GB). DDR4-2400 is the spec; DDR4-2666 modules will work but downclock to 2400. |
| Primary storage | 256 GB M.2 2280 NVMe PCIe Gen 3 ×4 | Likely Samsung PM981a or similar OEM drive. PCIe Gen 3 ×4 = ~3.5 GB/s max — most modern NVMe drives saturate this. |
| Secondary storage slot | M.2 2242 WWAN slot (unpopulated) | Re-purposable as SATA M.2 SSD via passive adapter (§ 3.3). Some T480 variants ship with a WWAN card here; this unit did not. |
| 2.5” SATA bay | NONE on the T480 | The T480 dropped the 2.5” bay that the T470 still had. The dual-storage path on T480 is M.2 NVMe + M.2 2242 SATA. |
| Display | 14” FHD 1920 × 1080 IPS, 250 nit, non-touch | Also available: WQHD 2560 × 1440 IPS (300 nit) — desirable upgrade if a known-good panel can be sourced. |
| Keyboard | Lenovo ThinkPad 6-row, backlit (most refurb T480s ship backlit; verify by pressing Fn+Space) | Spill-resistant. TrackPoint center “nub.” Three trackpoint buttons + a multi-touch glass touchpad. |
| Wi-Fi | Intel Dual Band Wireless-AC 8265 (2×2 ac + BT 4.2) | M.2 2230. Replaceable. iwlwifi-driver supported in Linux. Monitor mode is partial — sometimes works for scans, often fails for injection. § 3.4 upgrade path. |
| Ethernet | Intel I219-LM Gigabit | RJ-45, full-height connector (no dongle). Linux driver: e1000e. |
| Bluetooth | Bluetooth 4.2 (on the 8265 card) | Replaceable with the Wi-Fi card. |
| TPM | Infineon SLB 9670 TPM 2.0 (firmware TPM in BIOS settings can be switched between Intel PTT and discrete TPM) | Hardware-backed. Required for BitLocker on Windows 11 by default and for Secure Boot key storage. |
| Fingerprint reader | Synaptics (Match-in-Sensor variant on most refurb T480s) | Linux support via fprintd and libfprint v1.94+ — works for Synaptics SiNgo / Goodix variants. Verify against libfprint HCL after install. |
| Smart card reader | Yes (ISO 7816 contact reader) | Useful for PIV / CAC cards, GPG smart cards (Yubikey 5 NFC works in-slot as well). |
| Microphones | Dual digital microphone array | Privacy: Fn+F4 mutes mic in firmware. |
| Webcam | 720p HD (some SKUs with ThinkShutter sliding cover) | Linux: UVC-compliant, works out of the box. |
| Speakers | Dolby Audio Premium stereo | Adequate for video calls; not for music. |
| Battery (internal) | 24 Wh non-swappable | Soldered to motherboard via standard battery connector but accessible — replaceable in ~30 min with the bottom cover off. |
| Battery (rear slot) | 24 Wh shipped on this unit (likely; refurb units vary) | Upgrade target: 72 Wh 6-cell (§ 3.5). Hot-swappable — Lenovo’s “Power Bridge” tech keeps the internal battery running while you swap the rear. |
| USB-C / Thunderbolt 3 | 1 × USB-C with TB3 (40 Gbps), Power Delivery (charge laptop), DisplayPort over USB-C | Can charge from a 65 W+ USB-C PD charger. |
| USB-A 3.0 | 2 × USB-A 3.0 (one is “always-on” for charging when off) | |
| HDMI | HDMI 1.4 | Up to 4K @ 30 Hz. For 4K @ 60 Hz, use USB-C DisplayPort. |
| microSD | UHS-I microSD slot | |
| Audio jack | 3.5mm combo TRRS | |
| Docking | Mechanical-dock connector on bottom (compatible with Lenovo ThinkPad Pro Dock, Ultra Dock, Workstation Dock — the T470/480/580 generation docks) | Also fully usable via USB-C / Thunderbolt 3. |
| OS | Windows 11 Pro (pre-installed) | TPM 2.0 + UEFI + Secure Boot capable — Win 11 requirements met natively. |
| Weight | 1.59 kg (3.5 lb) with the 24 Wh rear battery; 1.75 kg with the 72 Wh 6-cell | The 72 Wh battery adds a “hump” at the back of the chassis. |
| Footprint | 336 × 232 × 19.95 mm |
[FIGURE SLOT — Vol 2, § 2] Annotated T480 bottom-view diagram showing the access screw positions, the RAM bay, the M.2 2280 slot, the M.2 2242 WWAN slot, the Wi-Fi card location, the internal battery, and the rear-slot battery release latch. Source: Lenovo Hardware Maintenance Manual page 73 (the FRU exploded view). Caption when filled: “Figure 2.2 — T480 bottom-cover removed, annotated. Source: Lenovo T480 Hardware Maintenance Manual, p.73.”
2.3 The modifications BOM
This is the complete recommended modification path for the T480 to take it from refurb baseline to daily-driver-pentest-comfortable. Pricing in 2026 USD (street prices on Amazon / Newegg / eBay; LCSC / AliExpress for adapters):
Table 2 — This is the complete recommended modification path for the T480 to take it from refurb baseline to daily-driver-pentest-comfortable. Pricing in 2026 USD (street prices on Amazon / Newegg / eBay; LCSC / AliExpress for adapters)
| Item | Why | Part suggestion | Est. cost | Difficulty |
|---|---|---|---|---|
| RAM upgrade 8 → 32 GB | Daily-driver headroom; lab VMs | 2 × Crucial CT16G4SFD824A (16 GB DDR4-2400 SODIMM) or Kingston KVR24S17D8/16 | $60-90 | Easy (15 min) |
| Primary NVMe upgrade 256 GB → 1-2 TB | Engagement data storage; Win+Parrot+swap fits comfortably | Samsung 970 EVO Plus 1 TB MZ-V7S1T0B/AM, Crucial P3 2 TB CT2000P3SSD8, WD Black SN770 1 TB | $60-130 | Easy (15 min) |
| Second SSD via WWAN slot | Dedicated forensics / triage / scratch drive | Kingfast / KingSpec M.2 2242 SATA 256-512 GB plus a $5-10 WWAN-to-M.2-SATA adapter | $40-80 | Medium (30 min — adapter shape varies) |
| Wi-Fi card upgrade | Reliable monitor mode + Wi-Fi 6 | Intel AX200 (M.2 2230, Wi-Fi 6 ax, BT 5.2) or AX210 (Wi-Fi 6E, BT 5.3) | $20-35 | Easy (10 min — single screw, one connector pair) |
| Rear battery upgrade | All-day runtime | Genuine Lenovo 01AV423 (72 Wh, 6-cell) or quality 3rd-party (Green Cell, Patona) | $30-70 | Trivial (slide-out) |
| Internal battery replacement (if old) | Fresh internal cell pairs with new rear for ~96 Wh total | Lenovo 01AV463 (24 Wh, 3-cell, internal) | $30-50 | Medium (bottom cover off) |
| Optional add-ons | ||||
| Thermal paste replacement | Better sustained turbo if 8-year-old paste | Arctic MX-4 / Thermal Grizzly Kryonaut, 2 g | $8-15 | Medium (heatsink off) |
| NVMe heatsink | Reduce thermal throttling under sustained writes | M.2 2280 low-profile (1-2 mm) copper or aluminum, NOT the tall RGB-gamer kind (won’t fit) | $5-15 | Trivial |
| WQHD panel swap | 2560 × 1440 IPS upgrade | Lenovo FRU 01YN132 (WQHD 14” IPS, 300 nit) — secondhand from eBay or AliExpress | $80-180 | Hard (bezel + EDP cable) |
| Second-hand WWAN card | Cellular fallback connectivity (rare, niche) | Sierra EM7565 (LTE Cat-12) — uses the M.2 2242 WWAN slot instead of the second SSD | $40-80 | Mutually exclusive with the second-SSD adapter |
| KB backlight (if not already lit) | Most refurb T480s already have backlit KB | Stock backlit keyboard FRU 01YR512 | $25-50 | Hard (palmrest removal) |
| Totals | ||||
| Minimum recommended (RAM + NVMe + AX200 + battery) | ~$170-280 | |||
| With second SSD + thermal paste + heatsink | ~$230-360 | |||
| Maxed-out | ~$500+ |
The remainder of § 3 expands each line.
2.3.1 RAM — 8 GB → 32 GB DDR4-2400 SODIMM
What: Replace the single 8 GB SODIMM with two 16 GB DDR4-2400 SODIMMs (or two 16 GB DDR4-2666; they’ll downclock to 2400 but work).
Why: Modern pentest workflow comfortably consumes RAM. Burp Suite Java heap is 512 MB minimum, 2 GB typical when actively spidering. Firefox-with-100-tabs is 4-6 GB. A Windows 7 lab VM in VirtualBox is 2 GB. A second Kali / Parrot VM for the “victim” side of a lab is another 2-4 GB. MATE desktop is 1.5-2 GB. Add it up: a real pentest scenario on Parrot will pressure 16 GB and is comfortable at 32 GB.
How:
- Power off, unplug, remove the rear-slot battery, flip laptop.
- Loosen the seven captive screws on the bottom cover (they don’t fully come out — captive).
- Lift the bottom cover off (start from the rear, hinge it forward).
- The two SODIMM slots are stacked under a black plastic / mylar flap near the CPU.
- Press the side clips outward on the existing 8 GB stick; it’ll pop up at a 30° angle. Pull it out.
- Insert each new 16 GB stick at a 30° angle, push down until both clips click.
- Re-seat bottom cover, screws back in, batteries back in, power on, F1 to enter BIOS, confirm 32768 MB visible.
Verification on Linux post-install:
sudo dmidecode -t memory | grep -E "Size|Speed|Locator"
free -h
The two slots should each report Size: 16384 MB and Speed: 2400 MT/s.
Compatibility list (verified-working SODIMMs):
- Crucial CT2K16G4SFD824A (2 × 16 GB kit)
- Kingston KVR24S17D8/16 (single, buy two)
- Samsung M471A2K43DB1-CRC (OEM)
- HyperX HX424S15IB/16 (single, buy two — note: brand renamed to “Kingston Fury” in 2021)
Avoid: RGB-decorated DDR4 SODIMMs (don’t exist for the laptop form factor, but if you see one, it’s fake). ECC SODIMMs (T480 doesn’t support ECC; they may post but won’t run as ECC).
2.3.2 Primary NVMe — 256 GB → 1-2 TB M.2 2280
What: Replace the 256 GB OEM NVMe with a 1 TB or 2 TB consumer NVMe.
Why: 256 GB is tight for dual-boot. Windows 11 takes 60-80 GB after updates and a few apps. Parrot Security takes 30 GB minimum. Engagement data, pcaps, VM images quickly fill the rest. 1 TB is comfortable; 2 TB is generous.
Critical timing decision: Do the NVMe swap BEFORE installing Parrot OS. If you install Parrot on the 256 GB drive then later swap to the 1 TB drive, you have to clone the partition table and resize — a clone-then-grow operation that’s doable but tedious. If you swap first, the Parrot installer creates the partitions on the larger drive from the start.
The right order is:
- Swap RAM (§ 3.1).
- Clone Windows 11 from the 256 GB OEM drive to the new 1 TB drive. Use Macrium Reflect Free, Clonezilla, or Lenovo’s own Migration tool. Some refurbishers include a recovery USB; failing that, Windows 11 has built-in “Create a recovery drive” on a 16+ GB USB — image the OEM drive before you start.
- Physically swap the drive.
- Verify Windows boots from the new drive (it will, because the cloned BCD/BootMgr just works on an NVMe-to-NVMe swap).
- Use Windows’ Disk Management to not expand the C: partition — leave the unallocated space at the end of the disk for Parrot.
- Then continue to Vol 4 for the Parrot install.
How (the physical swap):
- Bottom cover off (as in § 3.1).
- The M.2 2280 slot is at the front-right (looking at the bottom). A single Phillips screw holds the drive down at the end opposite the slot.
- Remove the screw, pull the drive out at the slot end (it’ll pop up at 30°).
- Insert the new drive at 30°, press down, re-tighten the screw.
- Bottom cover back on.
Verification: Boot, F1 → BIOS → Config → Storage. The new drive’s model name should appear.
Post-install Linux verification:
sudo nvme list
lsblk -d -o NAME,SIZE,MODEL
Recommended drives (2026):
Table 3 — Recommended drives (2026):
| Drive | Capacity | Cost (street) | Notes |
|---|---|---|---|
| Samsung 970 EVO Plus | 1 TB | $80-100 | Reliable, well-understood, good Linux support |
| Samsung 980 (DRAM-less) | 1 TB | $70-90 | Slightly slower writes; saves $10 |
| Crucial P3 | 2 TB | $120-140 | Cheap-per-TB; QLC so write endurance is lower |
| WD Black SN770 | 1 TB | $80-100 | DRAM-less but fast |
| WD Blue SN580 | 1-2 TB | $80-150 | DRAM-less, good thermals |
| Sabrent Rocket Q | 2 TB | $120-160 | QLC; cheap; verify warranty terms |
Drives to AVOID: PCIe Gen 4 drives that get hot (Samsung 980 Pro, WD Black SN850X) — the T480’s slot is Gen 3 ×4 so the extra speed is wasted, and they thermal-throttle badly in the unventilated slot. Stick with Gen 3 drives.
Heatsink note: § 3.6 covers an optional low-profile heatsink. Don’t use a tall RGB-gaming heatsink — it won’t fit under the bottom cover.
2.3.3 Second SSD via the WWAN slot — M.2 2242 SATA
What: Use an inexpensive adapter to convert the empty M.2 2242 WWAN slot into a second M.2 SATA SSD slot, giving the T480 two simultaneous internal drives.
Why: A dedicated forensics / triage / scratch drive that is separate from the OS drive. Mount it on Linux as /mnt/forensics, drop captured artifacts there, never let the OS drive fill up. Also a clean place to host VM images so the OS partition stays fast.
The trick: The WWAN slot on the T480 is M.2 2242 (Key B+M) and electrically supports PCIe 1 lane + USB 2.0 + SATA. Most WWAN cards use PCIe + USB. SATA support is present on the slot but the BIOS has a SATA-via-WWAN flag that defaults to enabled on the 2018 vintage — so a SATA M.2 2242 SSD plugged in works as a SATA drive.
The adapter (sometimes called the “T480 WWAN to M.2 SATA adapter”) is a tiny FFC ribbon-and-PCB that converts the WWAN slot’s pinout to a standard M.2 SATA pinout. Common sellers: Modkid, NewmodeUS, various AliExpress / eBay listings under “T480 WWAN to NGFF SATA.” Cost $5-15.
[FIGURE SLOT — Vol 2, § 3.3] WWAN-to-M.2-SATA adapter installed in a T480, with a 512 GB Kingfast SSD mounted. Source: NewmodeUS product page screenshot, or a photo taken post-install. Caption when filled: “Figure 2.3 — WWAN-slot SATA adapter (NewmodeUS NMU-T480-SATA) with a Kingfast 512 GB M.2 2242 SATA SSD seated. Adds a second internal drive without sacrificing the M.2 2280 NVMe slot.”
How:
- Bottom cover off.
- Locate the WWAN slot (small M.2 slot near the Wi-Fi card).
- Plug the adapter into the WWAN slot, secure with the included screw.
- Plug the M.2 2242 SATA SSD into the adapter, secure with the adapter’s screw.
- Bottom cover back on.
- Boot to BIOS, confirm the SSD appears under Storage. If not, BIOS → Config → Network → WAN must be enabled (counter-intuitive — the slot has to be “enabled as WAN” for the bus to be powered).
Recommended drives: Cheap M.2 2242 SATA. Kingfast, KingSpec, Patriot P210 in M.2 2242, Transcend MTS400. 256-512 GB is the sweet spot for a forensics scratch drive. Don’t expect NVMe speeds — this is a SATA III interface, so ~500 MB/s top.
Mutually exclusive with: an actual cellular WWAN card (Sierra EM7565, Quectel EM05, etc.). Pick one. For the daily-driver-pentest scenario, the second SSD wins.
2.3.4 Wi-Fi card — 8265 → Intel AX200 / AX210
What: Replace the stock Intel 8265 Wi-Fi/BT card with an Intel AX200 (Wi-Fi 6, BT 5.2) or AX210 (Wi-Fi 6E, BT 5.3).
Why two reasons:
-
Modern Wi-Fi. 8265 is Wi-Fi 5 (ac), 2×2 stream, 866 Mbps theoretical max. AX200 / AX210 is Wi-Fi 6 (ax) / 6E (ax with 6 GHz), 2×2 stream, 2.4 Gbps theoretical max. On modern Wi-Fi 6 routers you’ll measurably see 2-3× throughput improvement.
-
Linux monitor mode. This is the bigger reason for a pentest workstation. The stock 8265’s
iwlwifidriver supports monitor mode partially —iwconfig wlan0 mode monitorworks, captures of in-range traffic work, but packet injection (aireplay-ng, deauth attacks, fake AP) is unreliable to broken on most kernel + firmware combinations. The AX200/AX210 has the same partial story — Intel never officially supports injection — BUT the AX200 has the unofficial-but-workingiwlwifiwithdisable_11ax=1andpower_save=Nplusiwlwifi.bt_coex_active=0tweak that lets reliable injection happen on most engagements.For guaranteed injection, the right card is a TP-Link TL-WN722N v1 (Atheros AR9271, USB) or an Alfa AWUS036ACS — both with mature
mac80211injection support. But those are USB external adapters, not internal replacements. The AX200/AX210 internal upgrade plus a USB external Wi-Fi for the monitor-mode-injection use case is the most flexible combination.
How:
- Bottom cover off.
- Wi-Fi card is the M.2 2230 card with two tiny coax pigtails (gray and black antenna connectors).
- Carefully detach the two antenna connectors (use a fingernail or a non-conductive prying tool — they’re tiny U.FL connectors, easy to bend).
- Remove the single screw holding the card.
- Pull card out at 30°.
- Insert new AX200/AX210 at 30°, press down, screw in.
- Reconnect the two antenna pigtails (the connectors are symmetric — either antenna to either side is fine, but for Wi-Fi 6 dual-stream the convention is gray → MAIN, black → AUX).
- Bottom cover back on.
Compatibility note: Some T480 firmware versions had a Wi-Fi whitelist that blocked non-Lenovo cards. By 2018-2019 Lenovo had dropped the whitelist on the T-series under community pressure; T480 firmware 1.10 and later (most refurb units in 2026 are 1.43+) does not enforce a whitelist. If a card refuses to boot (“0xnnnnnnnn unauthorized Wi-Fi card”), update BIOS to current via fwupd (§ 5).
Linux post-install verification:
ip link show
lspci -k | grep -A2 -i wireless
dmesg | grep -i iwlwifi
iw dev wlan0 info
iwlwifi should report the AX200/AX210 model and the firmware version. The card’s official pci-id is 8086:2723 (AX200) or 8086:51f0 (AX210).
Bluetooth: No driver change needed; the BT side is on the same card, handled by the kernel’s standard Bluetooth stack.
2.3.5 Batteries — internal + rear-slot 6-cell 72 Wh
What: Refurbished laptops usually ship with degraded batteries. Refresh both:
- Internal: Lenovo 01AV463 (24 Wh, 3-cell) — replaces the soldered-but-accessible internal cell.
- Rear slot: Lenovo 01AV423 (72 Wh, 6-cell) — replaces or upgrades the rear-slot pack.
Why: Lenovo’s “Power Bridge” architecture is unique to the older T-series: the internal battery keeps the system running while you swap the rear battery hot. With a fresh 24 Wh internal + a 72 Wh rear, you have 96 Wh total — a real “all-day” battery, and the option to carry a second 72 Wh rear in a bag for “two-days-on-one-charge” use. The 6-cell rear protrudes ~7 mm from the back of the chassis (the “battery hump”); not pretty, but utility wins.
Battery health check (Windows):
powercfg /batteryreport /output "$env:USERPROFILE\battery.html"Opens an HTML report showing design-capacity vs full-charge-capacity. If the internal battery is at <70% of design (i.e., 16 Wh actual on a 24 Wh design), replace.
Battery health check (Linux post-install):
upower -i /org/freedesktop/UPower/devices/battery_BAT0
upower -i /org/freedesktop/UPower/devices/battery_BAT1
BAT0 is conventionally the internal; BAT1 the rear. Each reports energy-full vs energy-full-design. <70% ratio = replace.
How (rear battery): slide the rear-battery latch left, pull battery out, slot the new one in until the latch clicks. Three-second job.
How (internal battery): bottom cover off, disconnect the battery connector from the motherboard (small white plug), unscrew the internal battery from its mounting (3-4 screws), lift it out, place new one, screw down, reconnect.
Calibration: New batteries — charge to 100%, use until system shuts down, charge to 100% again. Lenovo’s Vantage app on Windows (or tlp on Linux) reads battery firmware-reported full-charge correctly after one cycle.
2.3.6 Optional: thermal paste, NVMe heatsink, screen, keyboard backlight
Thermal paste replacement. If sustained workloads (compiling, hashcat) make the fan ramp constantly and the i5-8250U thermal-throttles to its base 1.6 GHz, the factory paste (8 years old in 2026) is likely dried out. Replacement procedure:
- Bottom cover off.
- Disconnect the heatsink fan power connector.
- Remove the four numbered screws on the heatsink (loosen in numerical reverse — 4, 3, 2, 1 — to avoid uneven pressure).
- Lift heatsink off (it’s spring-loaded; pull straight up).
- Wipe old paste off CPU die and heatsink with 99% IPA + lint-free cloth.
- Apply ~rice-grain-size dot of new paste (Arctic MX-4, Thermal Grizzly Kryonaut, or Noctua NT-H2).
- Re-seat heatsink, tighten screws in numerical order (1, 2, 3, 4), reconnect fan.
- Bottom cover back on.
Expected improvement: 5-15 °C lower under load; less thermal throttling.
NVMe heatsink. A low-profile (1-2 mm) M.2 2280 heatsink stuck to the new NVMe drive reduces thermal throttling under sustained writes. Important constraint: must be low enough to fit under the T480’s bottom cover. Avoid tall RGB / fin-array heatsinks. Examples that fit: Sabrent thin heatsink, EZDIY-FAB ultra-thin, generic 1.5 mm copper shim.
WQHD panel swap. The T480 originally shipped with three panel options: HD 1366×768 (skip), FHD 1920×1080 IPS (this unit’s panel), or WQHD 2560×1440 IPS. Sourcing the WQHD panel as a secondhand part (eBay) allows dropping in a higher-res, brighter (300 nit vs 250) panel for $80-180. The procedure is non-trivial (bezel removal, EDP cable swap, sometimes a new EDP cable required since WQHD uses 40-pin where FHD uses 30-pin) and is best left as a “year 2” upgrade.
Keyboard backlight. Most refurb T480s already ship backlit (verify with Fn+Space — backlight cycles off/dim/bright). If not, the backlight requires a full keyboard replacement, which on a T480 means palmrest removal (significant disassembly, easy to break clips). Probably not worth it.
2.4 BIOS preparation for Linux dual-boot
Before installing Parrot OS, set the T480 BIOS to a Linux-friendly state. Press F1 at boot (or Enter then F1) to enter BIOS Setup. The settings to change:
Table 4 — Before installing Parrot OS, set the T480 BIOS to a Linux-friendly state. Press F1 at boot (or Enter then F1) to enter BIOS Setup. The settings to change
| BIOS path | Setting | Recommended value | Why |
|---|---|---|---|
| Config → Network → Wake on LAN | Disabled | If unused, save power | |
| Config → USB → USB UEFI BIOS Support | Enabled | (default) | Needed for booting USB installers |
| Config → USB → Always-On USB | Disabled | Unless you actually charge devices from it | Saves battery |
| Config → Keyboard/Mouse → Fn and Ctrl Key swap | Swap | Optional preference | The bottom-left key becomes Ctrl (standard layout) |
| Config → Display → Boot Display Device | LCD | Default | |
| Config → Power → Intel Rapid Start Technology | Disabled | Linux doesn’t use this | |
| Config → Power → Sleep State | Linux S3 | If available (some BIOS revisions) | S3 = traditional suspend; Modern Standby (S0ix) is buggy on Linux |
| Config → CPU → Intel Hyper-Threading | Enabled | (default) | 8 logical cores |
| Config → CPU → Intel Virtualization Technology (VT-x) | Enabled | REQUIRED for KVM and VirtualBox | |
| Config → CPU → Intel VT-d | Enabled | Needed for IOMMU + PCI passthrough | |
| Config → Thunderbolt 3 → Thunderbolt BIOS Assist Mode | Enabled | Allows hot-plug TB devices | |
| Config → Thunderbolt 3 → Security level | User Authorization | Prompts on plug-in | |
| Security → Memory Protection → Execution Prevention | Enabled | (default) NX bit | |
| Security → Virtualization → Intel Virtualization Technology | Enabled | (mirror of CPU setting) | |
| Security → I/O Port Access | All enabled unless threat model demands | Disabling Wireless/Bluetooth/USB is per-engagement choice | |
| Security → Secure Boot → Secure Boot | Enabled | Parrot ships signed shim+grub | |
| Security → Secure Boot → Platform Mode | User | Required to enroll MOK if needed | |
| Security → Password → Supervisor Password | SET | BIOS-edit lockout — anyone with physical access can wipe TPM, change boot order, etc. | |
| Security → Password → Power-on Password | Optional | Prompts password at every boot — annoying daily, useful if laptop carries sensitive data on travel | |
| Security → Fingerprint → Predesktop Authentication | Enabled if you want fingerprint at boot | Linux-side fingerprint via fprintd is separate | |
| Security → TPM | Enabled, “Discrete TPM 2.0” | Hardware TPM > firmware TPM | |
| Startup → UEFI/Legacy Boot | UEFI Only | (default on new T480s; some refurbs may have CSM enabled — disable) | |
| Startup → CSM Support | Disabled | Pure UEFI, required for Secure Boot | |
| Startup → Boot Order | (1) USB HDD, (2) USB CDROM, (3) ATA HDD0, (4) ATA HDD1 during install; restore to internal-disk-first after install | Allows USB-first boot for installation | |
| Startup → Boot Mode | Quick (default) or Diagnostic | Diagnostic shows POST messages — useful while debugging boot |
Save and exit with F10.
One thing NOT to disable: Secure Boot. Parrot 6.x ships signed shim and grub binaries that work under Microsoft’s UEFI CA. Disabling Secure Boot is unnecessary and removes a real defense against bootkits. Keep it on. Vol 3 § 4 covers what happens at the firmware level when Secure Boot is enabled and you boot Parrot.
2.5 Firmware updates via fwupd/LVFS
The T480’s BIOS (UEFI firmware), embedded controller firmware, TPM firmware, NVMe firmware, and even the dock firmware are all maintainable from Linux via the fwupd daemon and the LVFS (Linux Vendor Firmware Service). This is one of Linux’s quiet superpowers — Lenovo, Dell, and several other vendors publish firmware updates to LVFS, and you don’t need to boot Windows to flash them.
Post-install fwupd workflow:
# Already installed on Parrot by default; verify version
fwupdmgr --version

# Refresh the LVFS metadata cache
sudo fwupdmgr refresh --force

# Show what's installed and what updates are available
fwupdmgr get-devices
fwupdmgr get-updates

# Apply available updates (reboot may be required for some)
sudo fwupdmgr update
T480 firmware updates relevant in 2026:
- UEFI BIOS — Lenovo’s
r0p(T480) BIOS family. By 2025-2026 the latest is in the 1.50 range; refurb units often arrive on 1.30-1.40. Update closes Spectre/Meltdown/MDS-class CVEs. - Embedded controller — handles keyboard, fan, battery management.
- TPM 2.0 firmware — Infineon SLB 9670 firmware. CVE-2017-15361 (“ROCA”) affected older firmware on the same chip; latest firmware is patched.
- Thunderbolt 3 controller — Intel Alpine Ridge or Titan Ridge depending on T480 sub-model.
- Intel ME (Management Engine) — non-fwupd; updated via Lenovo’s Windows-only utility or via a more involved CSE pack flash. Important security updates.
Reboot required for most BIOS updates. fwupd queues them in the UEFI Capsule, the next boot applies them. Power AC adapter must be connected. Don’t interrupt.
LVFS reporting: opt in (sudo fwupdmgr enable-remote lvfs) so the T480 device + firmware combination shows up in LVFS statistics — helps Lenovo prioritize Linux firmware support.
2.6 What the T480 cannot be modified into — the no-buy list
For completeness, things that look like they should work but don’t:
- CPU upgrade: i5-8250U is BGA-soldered. Not socketed. Hardware-impossible swap to i7-8650U without solder rework station.
- Discrete GPU retrofit: T480 with discrete NVIDIA MX150 was a separate SKU at original sale. The motherboard is different. Cannot add discrete GPU to an iGPU-only T480.
- NVMe in the WWAN slot: the slot is PCIe ×1 (one lane) — even if a passive WWAN-to-NVMe adapter existed (it doesn’t, in a working form), the link would be 1 GB/s instead of 4 GB/s. M.2 SATA in WWAN slot is the only second-drive option.
- Two NVMe drives: only one M.2 2280 PCIe ×4 slot. The second slot is M.2 2242 SATA via the WWAN port adapter (§ 3.3).
- Ethernet 2.5 G or 5 G: I219-LM is 1 GbE only. Replace via USB-C → 2.5 GbE dongle if needed.
- 5 GHz ham radio TX: just to be clear — adding an AX210 doesn’t make the laptop a transmitter at unlicensed frequencies in any meaningful sense beyond Wi-Fi 6E’s intended use.
- Built-in OLED panel: only the LCD options (HD, FHD IPS, WQHD IPS) are FRU-replaceable. No OEM OLED for T480.
- Touch on FHD panel: the touch FRU exists for the FHD-Touch variant, but adding touch to a non-touch unit requires the touch-LCD panel and the touch-bezel — practically a full top-half replacement.
- More than 32 GB of RAM: chipset limit. Two slots × 16 GB max each = 32 GB hard ceiling. Modules >16 GB don’t post on the 8th-gen mobile chipset.
2.7 Comparison with adjacent ThinkPads
For context when considering a second laptop:
Table 5 — For context when considering a second laptop
| Model | Year | Why interesting | Why maybe not |
|---|---|---|---|
| T470 | 2017 | Has a 2.5” SATA bay and M.2 NVMe slot. Otherwise similar to T480. | Older Skylake CPU (6th gen) — slower, more CVEs. |
| T480 (this unit) | 2018 | Sweet spot — modern enough, fully upgradeable. | (current unit) |
| T480s | 2018 | Lighter (1.35 kg), thinner. | RAM soldered + 1 SODIMM slot (max 24 GB). No rear-slot battery. NOT Power Bridge. |
| T490 | 2019 | Modern, but rear battery removed (sealed internal only). USB-C Power Bridge to externals. | Sealed battery; less serviceable. |
| T14 Gen 1-3 | 2020-22 | AMD Ryzen options (Gen 1 5650U is excellent for the price). | Single SODIMM + soldered RAM; no second M.2 slot reliably; sealed battery. |
| T14 Gen 4 | 2023 | Modern, decent. | Same as Gen 1-3 limitations. |
| P14s / P15s | 2020+ | Workstation siblings with NVIDIA Quadro options. | Heavier, similar serviceability limitations. |
| X1 Carbon Gen 6-11 | 2018+ | Ultralight; nice display. | Soldered RAM, single M.2 slot, sealed battery, less serviceable. |
| X230 / X240 / T420 / W520 | 2011-13 | The “classic ThinkPad” with the 7-row keyboard. Coreboot/libreboot candidates. | Old CPUs (Sandy/Ivy Bridge); slow for modern workloads; some have no AES-NI. |
In 2026: the T480 is genuinely the right call. The only “upgrade” worth considering is a T14 Gen 4 AMD with 32 GB soldered if/when the T480 finally dies — and at that point the 5+ years of T480 service will have paid for the laptop many times over.
2.8 Cheatsheet additions for Vol 12
To roll into Vol 12 § 7:
- BIOS entry: F1 at boot (or Enter then F1).
- One-time boot menu: F12 at boot.
- Lenovo battery report (Windows):
powercfg /batteryreport. - Battery health (Linux):
upower -i /org/freedesktop/UPower/devices/battery_BAT0(andBAT1). - Firmware updates (Linux):
sudo fwupdmgr refresh && fwupdmgr get-updates && sudo fwupdmgr update. - Verify RAM (Linux):
sudo dmidecode -t memory | grep Size. - Verify NVMe model (Linux):
sudo nvme list. - Verify Wi-Fi card (Linux):
lspci -k | grep -A2 -i wireless. - T480 service manual: Lenovo PDF, p/n SP40R17263.
- fwupd LVFS opt-in:
sudo fwupdmgr enable-remote lvfs. - Total cost reference: ~$200-400 refurb T480 + $170-280 minimum mods + $230-360 with second-SSD = ~$430-760 fully kitted.
Comments (0)