PWNagotchi · Volume 4
PWNagotchi Volume 4 — Cases & Enclosures, with a section on Motorola Advisor pager-case builds
The wild case ecosystem — 3D-printed brick, clamshell, pocket; vendor pre-builts; and the iconic donor-shell case-mods, anchored by the Motorola Advisor
A Pwnagotchi is not a board-on-a-desk project. The whole point is that you carry it — on a backpack, in a jacket pocket, hung from a lanyard, set on a windowsill. The case is the device. Three things are non-negotiable:
- The e-ink panel must be supported along its full perimeter. EPD glass cracks at the edges under torque. A “panel sticking out of a slot” case is wrong.
- The case must not detune the 2.4 GHz antenna. PETG/PLA/ABS are all fine; metal cases and carbon-fiber-loaded filaments are not (see Vol 2 §2.1).
- The battery has to be safe. A 1S LiPo in a rigid case + a soft bump = puncture risk. Use a hard-shell pouch or wrap the cell in Kapton tape; never put the cell flush against a sharp PCB edge.
Beyond those three, the case is purely aesthetic — and the Pwnagotchi community has made that an art form.
4.1 The 3D-printed case ecosystem
Thingiverse / Printables host dozens of community Pwnagotchi case designs. The four lineages that dominate:
4.1.1 The “brick” — the canonical case
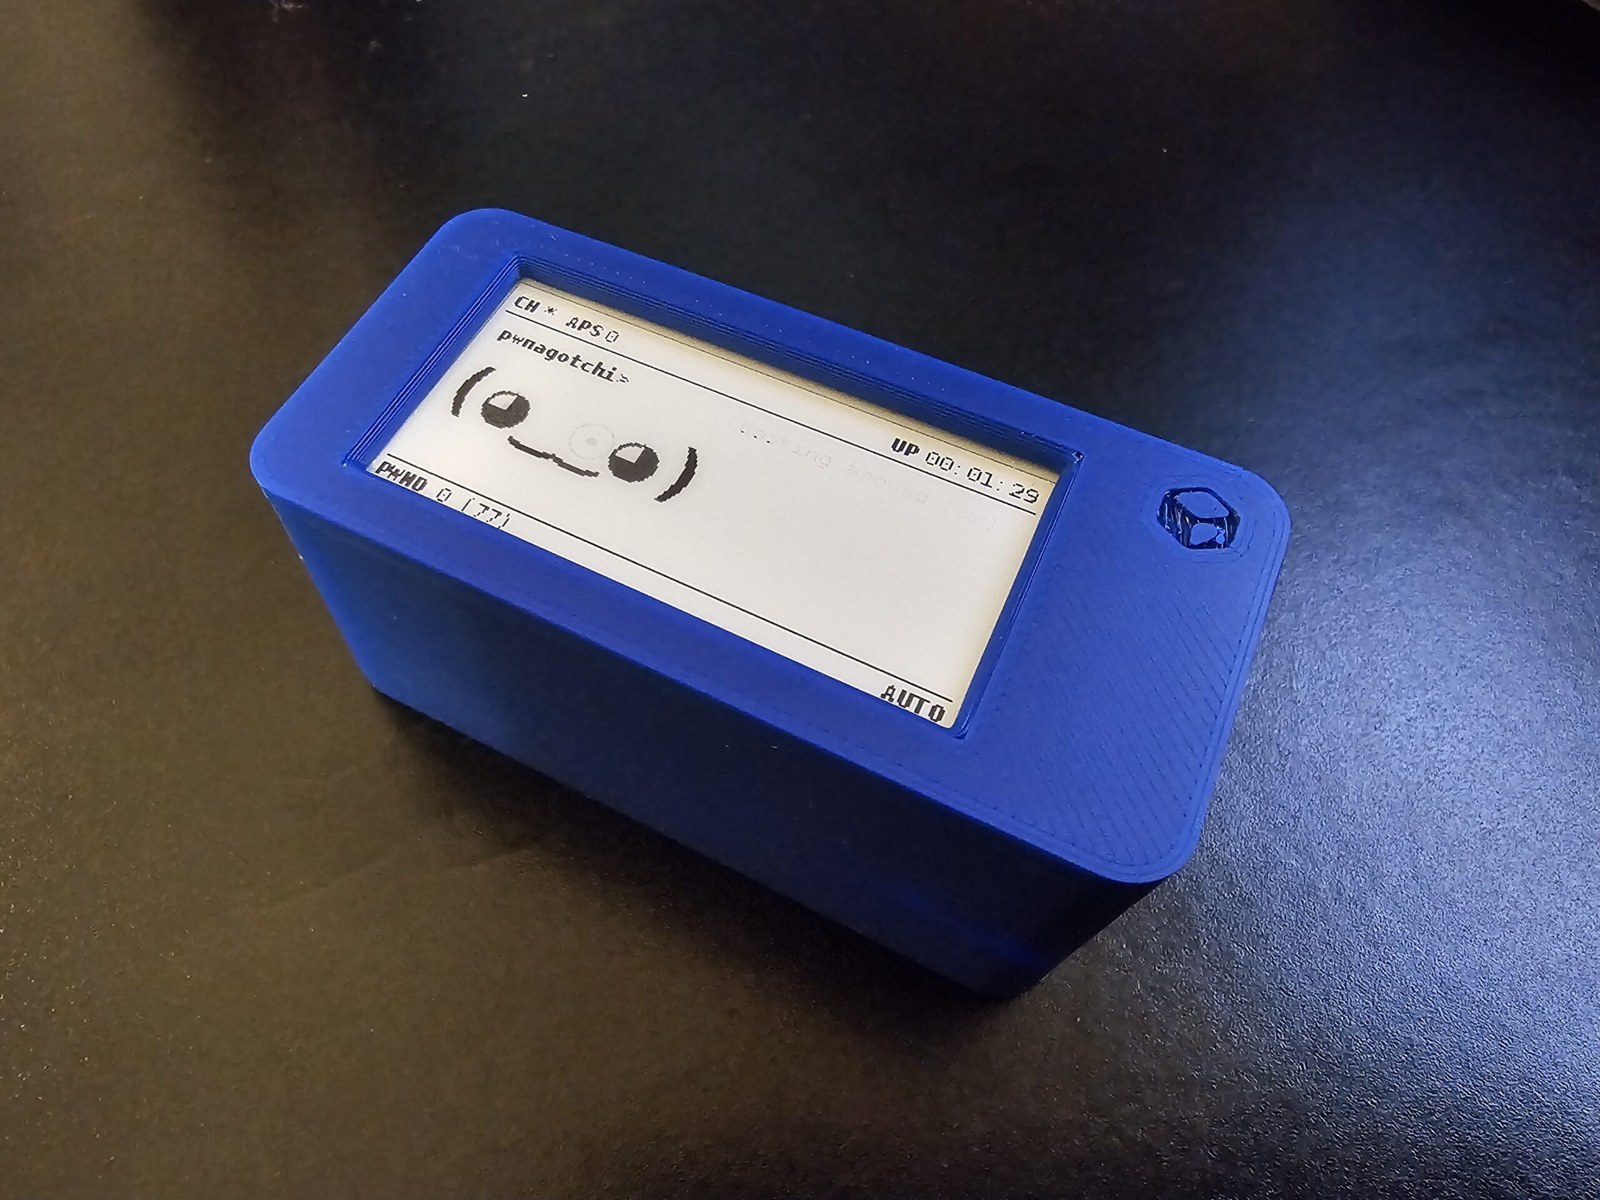
A simple two-piece (or three-piece) PETG box, ~75×35×18 mm, with a window for the e-ink panel on the top face and slots for the micro-USB ports on the side. Designed for Pi Zero W + Waveshare 2.13” v4 + 1200 mAh LiPo. This is the commonest shape among the published designs.
   ┌─────────────────────────────────┐   ← top face (lid)
   │  ┌──────────────────────────┐  │
   │  │                          │  │  ← e-ink window (cutout)
   │  │      [face renders       │  │     ~50×30 mm
   │  │       here]              │  │
   │  │                          │  │
   │  └──────────────────────────┘  │
   │  ●                          ●  │  ← screw holes (M2.5)
   └─────────────────────────────────┘
   │      [Pi Zero W + LiPo]         │   ← body (base)
   │                            ┌────┤
   │                            │µUSB│  ← side cutout, power-only port
   │                            └────┤
   └─────────────────────────────────┘
Printables search: “pwnagotchi case waveshare 2.13”. The official installation page (https://pwnagotchi.ai/installation/) points to @ohaithear’s “10 Pwnagotchi Cases” collection and to Thingiverse designs by @DorkfeastTeam and @elkentaro for the Pi Zero + Waveshare stack, plus @3MUl0R’s case for the Inky pHAT. Dunbar3DTech publishes an assembly guide for its own line, covering PiSugar and UPS-Lite variants and a slim “Slimagotchi” build (https://dunbar3d.tech/guides/pwnagotchi/). Print in PETG, 0.2 mm layers, 30% infill, no supports needed if the e-ink window is oriented up.
Build time: ~3-4 hr print + 30 min assembly.
4.1.2 The clamshell
A flip-open variant — e-ink panel on the lid, Pi Zero + battery on the base, hinged along one long edge. Closed it looks like a small notebook; open it shows the face. Adds protection (the panel is covered when not in use) at the cost of one-handed operation and a more involved hinge that wears out.
Print difficulty: moderate (the hinge needs print-in-place clearances or separately printed hinge pins).
4.1.3 The pocket / wearable
A slim variant designed to hang from a lanyard or fit into a shirt pocket. Often integrates a USB-C charge port on the bottom edge (requires a separate breakout board). The most “device-like” of the open-source cases. Print difficulty: high (thin walls, tight tolerances around the e-ink panel).
4.1.4 Themed and character cases
Some designs wrap the standard internals in a character shell rather than a plain box. One example is the “rotom” case on Printables (model 1512416), a rounded, Tamagotchi-styled shell for a Pi Zero 2 W and a Waveshare 1.3” display. These are mostly aesthetic; the electronics are the same as in the brick.
Figure 2.1 — A 3D-printed brick case on a working Pwnagotchi. Photo: IT Audit Labs, “Meet Pwnagotchi: the AI pet that hunts Wi-Fi handshakes” (https://itauditlabs.com/meet-pwnagotchi-the-ai-pet-that-hunts-wifi-handshakes/).
4.2 Vendor pre-built and case-only sellers
For users who don’t want to print, several sellers offer cases (case-only or case + assembled device):
Table 1 — For users who don't want to print, several sellers offer cases (case-only or case + assembled device)
| Seller | What | Notes |
|---|---|---|
| PiSugar Kitchen (CN, on Tindie) | “Pwnagotchi Complete Pack” — Pi Zero W or Zero 2 W, Waveshare 2.13” V3/V4, PiSugar 1200 mAh battery, printed case, flashed microSD | About $115. The maker of the PiSugar battery boards. |
| Tindie (US, marketplace) | Multiple sellers offering case-only or kit form | Quality varies wildly. Read seller reviews. |
| Etsy | A few hobbyist case sellers | Mostly the 3D-printed brick in custom colors. |
| The Pi Hut (UK) | Pi Zero W + Inky pHAT kit (DIY-oriented) | Not Pwnagotchi-specific but a clean bundle. |
| AliExpress | ”Pwnagotchi case” listings | Buyer beware — frequently the wrong panel revision or no panel at all. |
The pre-built market exists primarily for users who want a Pwnagotchi as a gift or aesthetic object rather than a project. For a serious build, print or buy a case-only kit and assemble.
4.3 Case-mod tradition — Pwnagotchi inside other things
The Pwnagotchi’s small footprint and clearly-defined I/O (USB-C/micro-USB power, optional GPIO buttons, e-ink display) make it a natural target for donor-shell case-mods — taking a different consumer-electronics shell and fitting a Pwnagotchi inside. Notable examples from the community:
Table 2 — The Pwnagotchi's small footprint and clearly-defined I/O (USB-C/micro-USB power, optional GPIO buttons, e-ink display) make it a natural target for donor-shell case-mods — taking a different consumer-electronics shell and fitting a Pwnagotchi inside. Notable examples from the community
| Donor shell | Builder / notable | Why this shell |
|---|---|---|
| Motorola Advisor pager (1990s) | L.P. (“Pagergotchi”, real shell); cyberspacemanmike and VmalakaiV (printed replicas) | Cultural irony — the Hackers-film pager repurposed as a present-day Wi-Fi capture tool. Section 6 covers these builds. |
| Altoids tin (large classic) | Noted in the official installation docs | ”A RPi0W+Waveshare screen also fits in a large classic Altoid tin” (https://pwnagotchi.ai/installation/). Cheap and pocketable; the metal tin shields the antenna somewhat and the lid must be insulated from the boards. |
| Off-the-shelf project enclosure | Noted in the official installation docs | The same page lists an Amazon project enclosure that “works if you drill a hole in the side” — the no-printer route. |
Other donor shells turn up in community chatter, but these are the ones with a checkable source. Of these, only the Motorola Advisor has full public write-ups and design files (§6).
4.4 The Raspberry Pi 3 + project-box variant
If you went with a Pi 3 (Vol 2 §9 footnote — Pi Zero unobtainable), the case story is different: generic Pi 3 project boxes (Bud Industries, Hammond) take a Pi 3 with an e-ink HAT cleanly. The result is a bench-top Pwnagotchi rather than a portable. Not within scope of this volume; the design pattern is “industrial project box, label-maker, plug it in.”
4.5 The Motorola Advisor pager case-mod
Putting a Pwnagotchi inside a Motorola Advisor is a real and recurring community idea. Its pull is partly cultural — the Advisor is the pager carried in the 1995 film Hackers — and partly practical: the Advisor’s face carries a four-line LCD window close in size to a 2.13” e-ink panel, and its body is roughly the size of a Pi Zero brick. No single build is “the” canonical one. Three documented approaches exist, described in §6.2.
4.5.1 The donor — Motorola Advisor pager
The Motorola Advisor was introduced in 1990 and was among the first pagers to offer alphanumeric messaging: a four-row display of up to 20 characters per row, in a body of about 18.5 × 55 × 81 mm running on a single AA cell (IEEE Spectrum, Consumer Electronics Hall of Fame: https://spectrum.ieee.org/the-consumer-electronics-hall-of-fame-motorola-advisor-pager). It is a slab-shaped pager worn in a belt-clip holster, not a clamshell. A 1993-dated unit torn down by Gough Lui (https://goughlui.com/2016/01/15/tech-flashback-motorola-advisor-pocsag-5121200bps-pager/) shows the layout that matters for a case-mod: green “read” and red “function” buttons plus directional keys on the front face (elastomer pads), a power button on the top edge, the LCD soldered to a main logic board, a separate crystal-locked POCSAG receiver board with a ferrite-rod antenna, a vibration motor, and a shell whose halves separate without screws once the bottom panel is slid off. (Gough Lui’s unit took a AAA cell, so battery size should be checked on the specific unit in hand.)
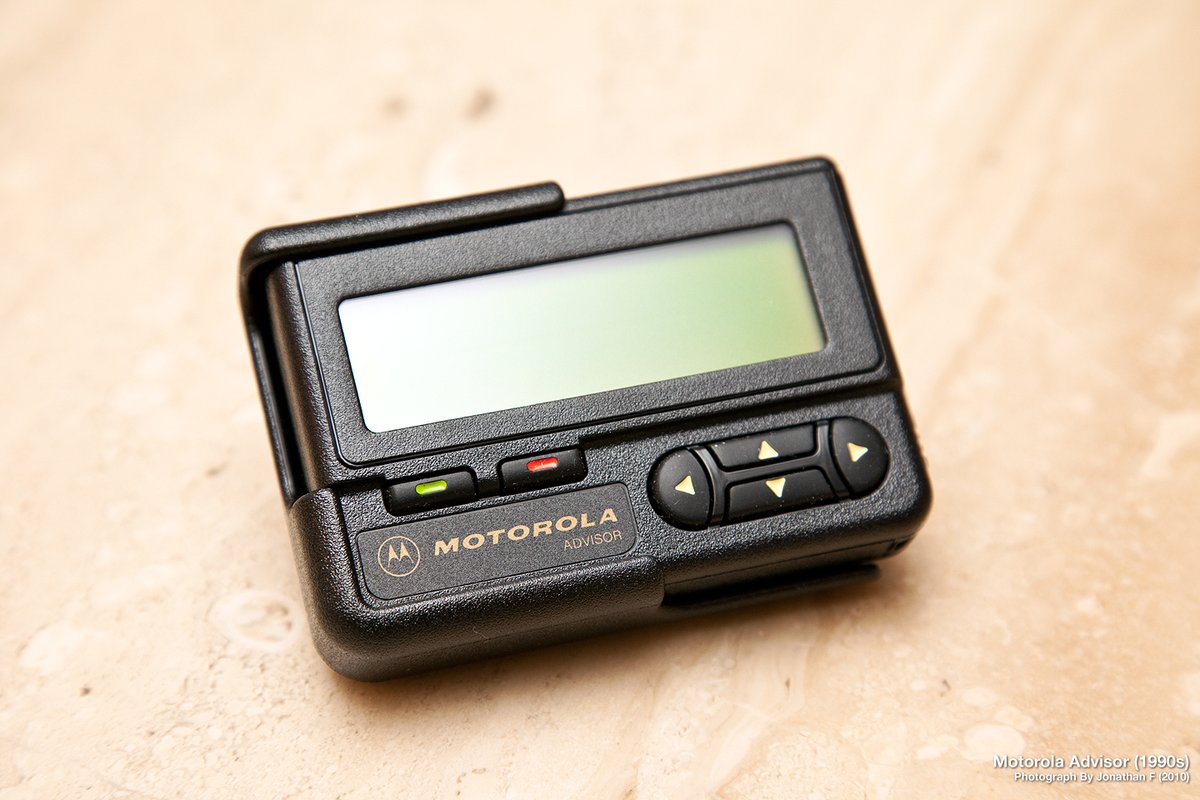
Figure 6.1 — File:Motorola Advisor Pager (5005137730).jpg by rfdigitalwpg. License: CC BY 2.0. Via Wikimedia Commons.
4.5.2 Documented builds
“Pagergotchi” — L.P. (@last_person), April 2022. A real Advisor bought on eBay, fitted with a Raspberry Pi Zero W, a Waveshare 2.13” V2 e-ink HAT and a 680 mAh LiPo (write-up: https://medium.com/@last_person/detour-pagergotchi-b5c277fc534). The author credits a Twitter post by n0ty3p for the idea. The work was mechanical: the original LCD popped out, internal tabs and posts were trimmed with a hobby knife so the Pi could lie flat, a slot was cut in an internal wall so the battery connector could be reached through the ordinary battery door, and a bezel modelled in Tinkercad (five or six print iterations) closed the gap around the e-ink panel. The Pi was hot-glued, the bezel superglued, and the battery held with foam. Reported runtime was about two hours per charge with no low-battery shutdown; total effort about 8–10 hours. The original front buttons were not wired up — a small PCB under them for I/O was listed as a future improvement, alongside a slimmer “slimagotchi” rebuild.
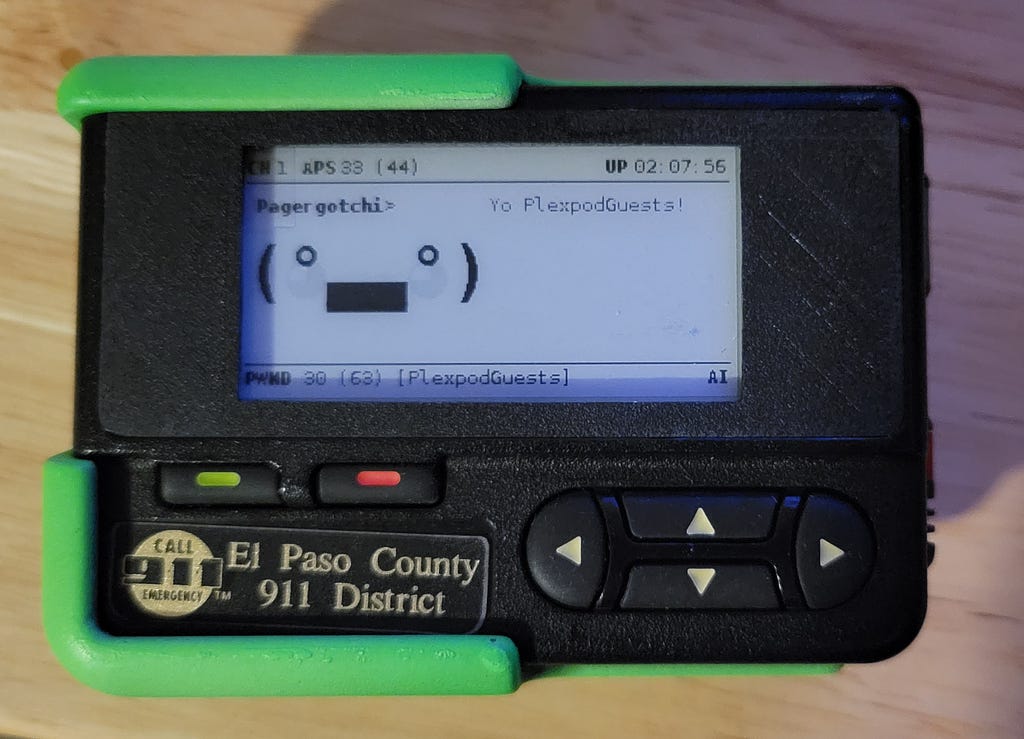
Figure 6.2 — “Pagergotchi” by L.P. (@last_person). Photo: L.P., “Detour — Pagergotchi”, Medium, 2022-04-07 (https://medium.com/@last_person/detour-pagergotchi-b5c277fc534).
“Hackers Pwnagotchi Pager Case” — cyberspacemanmike, 2024. Not a donor pager but a fully 3D-printed replica of the Hackers pager, sold as a paid digital download (v2.3 at the time of writing) with an extra compartment for buttons or a vibration motor and pilot holes for M3 bolts or heat-set inserts (https://cyberspacemanmike.com/product/hackers-pwnagotchi-pager-files/; video: https://www.youtube.com/watch?v=7PIO3v3kbv4). A print by the YouTuber Talking Sasquatch on a Bambu Lab FDM printer with a 0.08 mm nozzle took about 18 hours (https://cyberspacemanmike.com/2024/04/17/hackers-pwnagotchi-pager-case-on-talking-sasquatch/).
“Motorola Advisor Pwnagotchi Case (Slimagotchi)” — VmalakaiV, Thingiverse. A free printed case, remixed in Tinkercad from an existing Advisor case model by 0xRM and explicitly inspired by cyberspacemanmike’s design (https://www.thingiverse.com/thing:6721135). The bezel is resized for a Waveshare V4 2.13” panel, the backplate extended for a battery, the buttons separated from the case and a USB-C opening added. The listed bill of materials is a Pi Zero 2 W, Waveshare V4 2.13” panel in “slimagotchi” form (extra connectors removed, pins cut short), an 18650 cell in a holder, a TP4056-class charge board (listed as “TC4056”) soldered to the Pi’s 5 V/GND pads, a magnetic USB charging connector, and a green acrylic window. The designer reports needing vertical printing with supports, sanding and filing, screws in place of the clip-in backplate, and — as a known gap — no power switch.
4.5.3 Design considerations for a pager-case build
These follow from the documented builds and the Advisor’s construction; they are not a tested recipe.
- Real shell vs printed replica. A real Advisor gives the authentic object but costs internal trimming, and the e-ink panel must be shimmed behind a window sized for a different display. A printed replica removes the trimming and leaves room for a larger cell, at the cost of print and finishing effort.
- Panel fit. All three builds use a Waveshare 2.13” panel behind the display window, with a printed bezel to close the gap. The panel revision matters for the driver (Vol 3); the bezel has to be sized to the specific revision.
- Thickness. Interior depth is the binding constraint. A stacked charge HAT under the Pi is unlikely to fit; the documented builds use a bare LiPo or an 18650 with a small separate charge board, and the slimagotchi approach (trimming the HAT’s header) buys further depth.
- Power. None of the documented builds has a proper battery-management board with low-voltage cutoff or a power switch, and both shortcomings are called out by their authors. A build that adds either improves on them.
- Buttons. In the real-shell build the original buttons are passive; wiring them to Pi GPIO is an open item, not a solved one.
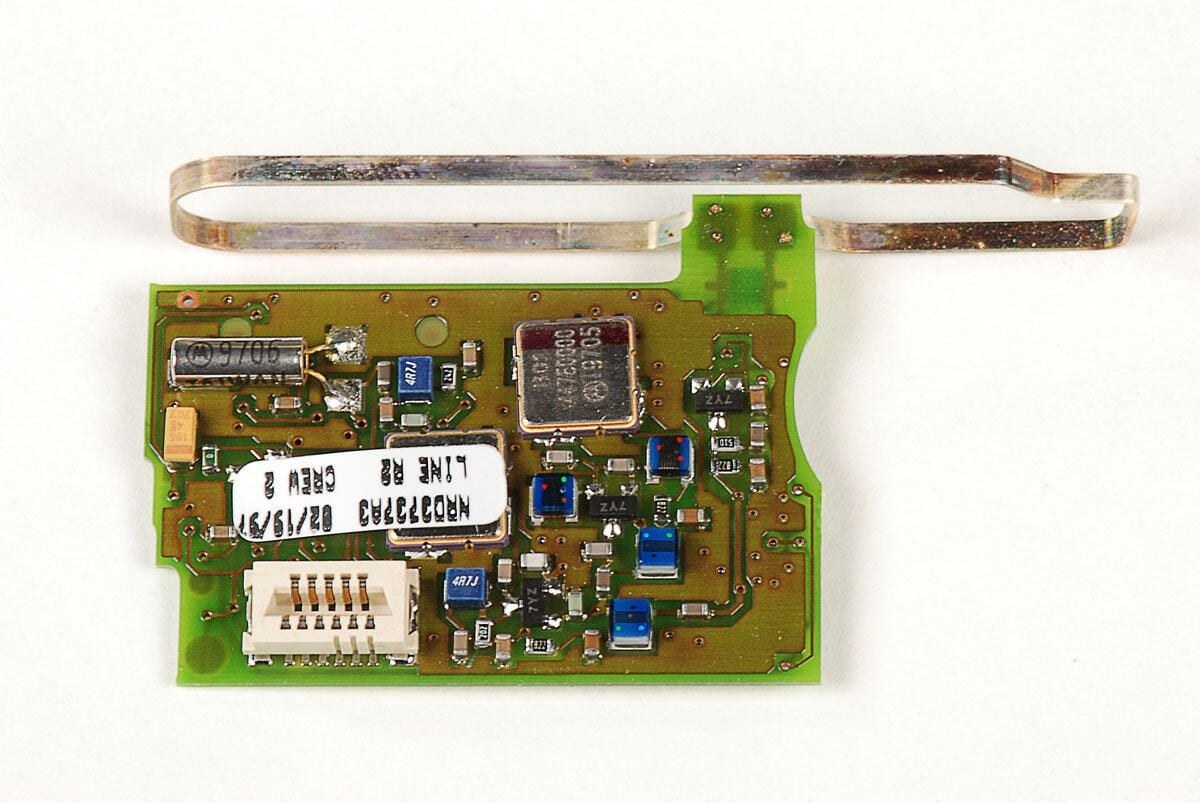
Figure 6.3 — Receiver board and loop antenna from a Motorola Advisor Gold teardown. Photo: TechRepublic, “Motorola Advisor Gold Pager (1997) Teardown” (https://www.techrepublic.com/pictures/motorola-advisor-gold-pager-1997-teardown/).
4.5.4 Sourcing an Advisor
Used Advisors turn up on eBay; the Pagergotchi donor came from there. Dead units are suitable for a real-shell build, since the electronics come out. Advisor-family variants (Advisor Gold, Advisor II and others) differ in body shape, so a printed bezel or case designed for one variant should be checked against the unit actually bought.
4.5.5 Why the pager case keeps recurring
The Advisor pairs a recognisable piece of 1990s wireless hardware — and a film prop — with a modern Wi-Fi capture tool, and its display window happens to suit a 2.13” e-ink panel. That combination is why the idea has been built at least three separate ways, from a gutted real pager to a printed replica.
4.6 Case-selection decision matrix
Table 3 — 7. Case-selection decision matrix
| User priority | Recommended case |
|---|---|
| Cheapest possible | Print the canonical brick yourself (PETG, ~$5 of filament) |
| Best aesthetics | Motorola Advisor pager case (§6) |
| Maximum portability | Pocket / wearable 3D-print, with USB-C charge |
| Maximum protection | Clamshell — e-ink covered when closed |
| Gift / display | Vendor pre-built from Tindie (e.g. PiSugar’s Complete Pack) |
| Color e-ink (large) | Custom case sized for Pimoroni Inky Impression 4” (community designs exist on Printables) |
| First build, want it tonight | Brick |
| Want the cultural payoff | Advisor pager case (§6) — budget 8–10 h of fitting for a real shell |
4.7 Case BOM extras
Beyond the case itself, two small additions improve every build:
- M2.5 brass heat-set inserts — for any 3D-printed case. Screwing self-tapping screws into PETG holes works for ~3-5 disassemblies before the threads strip. Heat-set inserts (Voron / e3D types) are $0.10 each and permanent. ~6-8 per case.
- A small piece of double-stick foam tape — to mount the LiPo securely inside the case. A loose LiPo rattles and risks tab fatigue at the connector.
4.8 Cheatsheet updates from this volume
Items to roll into Vol 12 (laminate-ready cheatsheet):
- “Default case: 3D-printed brick, PETG, sized for Pi Zero + Waveshare 2.13” v4.” (§2.1)
- “Use brass heat-set inserts for screw holes — PETG strips.” (§8)
- “Advisor pager case: real gutted shell (Pagergotchi) or printed replica (cyberspacemanmike / Thingiverse 6721135); Waveshare 2.13” behind the display window; thin LiPo or 18650 + small charger — no stacked HAT.” (§6)
- “Never put cell flush against PCB edges — Kapton-tape or hard-shell pouch.” (§1)
Comments (0)