PWNagotchi · Volume 2
PWNagotchi Volume 2 — Hardware Substrate: Pi Zero W, Pi Zero 2 W, and the Radio
Why this specific compute board, what the differences between revisions are, and how the USB-OTG-only layout drives the cabling story
The Pwnagotchi software targets the Raspberry Pi Zero W family. Three revisions are practically relevant in 2026:
Table 1 — The Pwnagotchi software targets the Raspberry Pi Zero W family. Three revisions are practically relevant in 2026
| Board | SoC | CPU | RAM | Wi-Fi | BLE | Form factor | Notes for Pwnagotchi |
|---|---|---|---|---|---|---|---|
| Raspberry Pi Zero W (2017) | BCM2835 | 1× ARM1176JZF-S (ARMv6) @ 1 GHz | 512 MB LPDDR2 | Cypress CYW43438, 2.4 GHz 802.11n | BT 4.1 | 65×30 mm | Original target board. Slow under modern Bookworm; still works. |
| Raspberry Pi Zero WH (2018) | BCM2835 | same as above | 512 MB | same | same | same + soldered 40-pin header | Functionally identical to Zero W; just spares you the soldering. Recommended if buying. |
| Raspberry Pi Zero 2 W (2021) | BCM2710A1 (same as Pi 3 in a custom package) | 4× ARM Cortex-A53 (ARMv8 64-bit) @ 1 GHz | 512 MB LPDDR2 | Cypress CYW43436, 2.4 GHz 802.11n | BT 4.2 | 65×30 mm (pin-compatible with Zero W) | Recommended. Pi-3-class CPU at Zero-W power. Bookworm 64-bit image. AI mode actually works in real time. |
The mainline (evilsocket) Pwnagotchi image was built for the original Zero W running 32-bit Raspbian Buster. The jayofelony fork ships both a Buster armhf image (for the original Zero W) and a Bookworm arm64 image (for the Zero 2 W). The arm64 image on the Zero 2 W is the recommended modern combination.
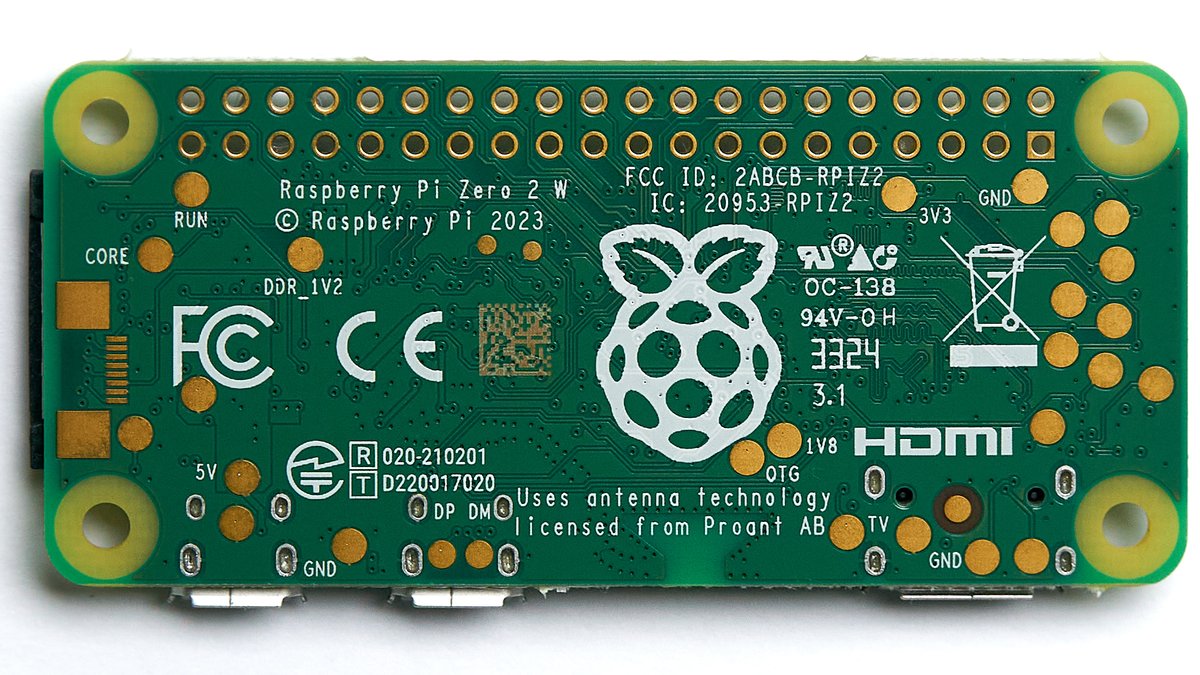
Figure 1.1 — File:Raspberry Pi Zero 2 W — 2024 — 0012.jpg by Anil Öztas. License: CC BY 4.0. Via Wikimedia Commons.
Why not a Pi 3 / Pi 4 / Pi 5?
The Pwnagotchi software runs perfectly well on bigger Pis. The constraint is form factor + power. The bigger boards:
- Don’t fit in any of the canonical 3D-printed cases (which are sized to the 65×30 mm Zero footprint).
- Pull 600 mA-2 A continuous instead of 150-300 mA — a small LiPo gives you 1-3 hours instead of 4-12.
- Have full-size USB and Ethernet, neither of which the e-ink-attached Pwnagotchi needs.
For a bench / lab Pwnagotchi (always plugged in, no portability concern, you’re using it as an RL research vehicle) a Pi 4 is fine. For anything that needs to be carried, the Zero family is the right answer. The Mike J. Kelly Motorola Advisor mod specifically requires the Zero form factor — the original Advisor case has no room for a larger board.
2.1 The radio — Cypress CYW43438 / CYW43436
Both the Pi Zero W and Pi Zero 2 W use a Cypress (now Infineon) CYW43-family Wi-Fi+BT combo chip — 43438 on the original Zero W, 43436 on the Zero 2 W. From the Pwnagotchi’s perspective they are interchangeable:
- 2.4 GHz only. Both lack 5 GHz. The Pwnagotchi is therefore a 2.4 GHz appliance. The 2.4 GHz band is also crowded, which is partly a feature for handshake harvesting (more clients) and partly a curse (more noise).
- 802.11b/g/n. No ac, no ax. This is fine for capture; the Pwnagotchi doesn’t need throughput.
- Monitor mode is non-obvious. The Broadcom driver (
brcmfmac) does not enable monitor mode by default. The jayofelony image patches the firmware (brcmfmac43436-sdio.binand friends) with a community-maintained “monitor-capable” build that adds thenl80211monitor interface support. The mainline upstream still does not ship this; do not flash a stock Raspberry Pi OS image and expect the Pwnagotchi to work. - TX power is moderate. Stock 17-20 dBm into the on-board PCB antenna. For range, see §5 (external USB Wi-Fi adapters).
The brcmfmac firmware patch is one of the most fragile points of a Pwnagotchi install. Every Bookworm minor release that lands a brcmfmac-firmware apt update has the potential to overwrite the patched firmware and silently disable monitor mode. The jayofelony image pins the firmware package; if you run apt upgrade carelessly post-install you will brick monitor mode. The fix_brcmf plugin (Vol 9 §5) handles re-patching on next reboot.
2.1.1 Antenna geometry
The PCB antenna on the Pi Zero W lives at the corner opposite the mini-HDMI port. It is a quarter-wave PIFA (Planar Inverted-F) etched directly onto the PCB. For Pwnagotchi use, two practical notes:
- Do not sit the Pi Zero on a metal surface. The antenna detunes badly. The 3D-printed brick cases all keep the bottom face ~5 mm above any potential ground plane; the Motorola Advisor mod has a similar ~3 mm air gap built into Kelly’s STLs.
- The case material matters less than you’d think. PETG, PLA, ABS — all of them attenuate 2.4 GHz by ~0.5-1 dB. Metal cases (rare) are obviously bad; carbon-fiber-loaded filaments (which conduct) are also bad. Don’t use them.
For 5 GHz capture (which the on-board radio cannot do) the standard answer is a USB Wi-Fi adapter on a powered hub. See §5.
2.2 USB-OTG-only — the cabling story
The Pi Zero family has a single USB OTG (On-The-Go) port for data, plus a second physical micro-USB connector for power-only. This is the most-common Pwnagotchi-newcomer trap:
   Pi Zero W (top view)                       Pi Zero 2 W (top view)
   ┌────────────────────────────┐             ┌────────────────────────────┐
   │ [40-pin GPIO header]       │             │ [40-pin GPIO header]       │
   │                            │             │                            │
   │ ┌──┐ ┌──┐                  │             │ ┌──┐ ┌──┐                  │
   │ │µH│ │µU│  ← inner: USB    │             │ │µH│ │µU│  ← inner: USB    │
   │ └──┘ │SB│    OTG (data)    │             │ └──┘ │SB│    OTG (data)    │
   │      └──┘                  │             │      └──┘                  │
   │      ┌──┐                  │             │      ┌──┐                  │
   │      │µU│  ← outer: PWR    │             │      │µU│  ← outer: PWR    │
   │      │SB│    only (no data)│             │      │SB│    only (no data)│
   │      └──┘                  │             │      └──┘                  │
   │                            │             │                            │
   │ [microSD]                  │             │ [microSD]                  │
   └────────────────────────────┘             └────────────────────────────┘

   PWR jack:    feeds the 5V rail.            (Same layout. Cypher: the inner
   Data OTG:    on first boot, the Pi          USB jack is *both* power + data;
   enumerates as a USB Ethernet                the outer is power-only. Plug
   gadget — your workstation sees              both into a host at the same
   it as a network interface on                time and you risk a USB power
   10.0.0.0/24.                                contention.)
The reason this matters:
- The OTG port lets you SSH into the Pi from a workstation over USB with no Wi-Fi configured. This is the default install workflow (§4 below).
- You can also use the OTG port to expose the Pi to a USB Wi-Fi adapter (the Pi becomes the host); but for a Pwnagotchi this is rare — the on-board Wi-Fi is the capture interface.
- The power-only port is the operational power supply once the device is deployed (LiPo with a PowerBoost, or PiSugar 3 on top of the GPIO header).
If you accidentally try to power the Pi from the OTG port and use the power-only port for SSH, you’ll get a Pi that boots intermittently and a workstation that sees no enumeration. The micro-USB orientation matters; learn it once.
2.3 The first-boot workflow
The default Pwnagotchi install workflow is:
- Flash the jayofelony image to a microSD with Raspberry Pi Imager.
- Before unmounting, mount the boot partition on your workstation and:
- Drop in an empty file named
sshto enable the SSH service. - Add a
wpa_supplicant.confif you want the Pi to also join a control Wi-Fi network on boot (optional; not needed for the USB-OTG-as-Ethernet workflow).
- Drop in an empty file named
- Insert the microSD into the Pi Zero, attach the e-ink HAT to the 40-pin header.
- Plug a known-good data micro-USB cable from the Pi’s OTG port to your workstation. (Do not plug a separate power supply into the power-only port — the workstation’s USB will provide enough current.)
- Wait ~90 seconds. The Pi boots; the OTG-Ethernet gadget enumerates; your workstation gets a new network interface on
10.0.0.0/24. - SSH in:
ssh pi@10.0.0.2, passwordraspberry. (jayofelony defaults differ; consult the README.)
Once inside, edit /etc/pwnagotchi/config.toml to set the gotchi’s name, optional Wi-Fi whitelist (your own networks, which the Pwnagotchi should ignore), and any plugin parameters. systemctl restart pwnagotchi to apply.
2.4 The optional external USB Wi-Fi adapter
A Pwnagotchi with the stock on-board radio captures only what’s reachable by ~17-20 dBm at the PCB antenna. For range, sensitivity, or 5 GHz, the canonical upgrade is a USB Wi-Fi adapter plugged into a powered OTG-to-USB-A adapter:
Table 2 — A Pwnagotchi with the stock on-board radio captures only what's reachable by ~17-20 dBm at the PCB antenna. For range, sensitivity, or 5 GHz, the canonical upgrade is a USB Wi-Fi adapter plugged into a powered OTG-to-USB-A adapter
| Adapter | Chipset | Band | Why this one |
|---|---|---|---|
| Alfa AWUS036ACH | Realtek RTL8812AU | 2.4 + 5 GHz | Long-time favorite. ~28 dBm TX, removable RP-SMA antenna, well-supported by aircrack-ng rtl8812au driver. |
| Alfa AWUS036ACM | MediaTek MT7612U | 2.4 + 5 GHz | Newer; better driver upstream support (in-tree mt76 kernel driver in Bookworm). Lower TX (~20 dBm). |
| Alfa AWUS036NHA | Atheros AR9271 | 2.4 GHz only | The “boring but works” choice. ath9k driver upstream, monitor mode works out of the box. |
| TP-Link TL-WN722N v1 | Atheros AR9271 | 2.4 GHz only | $15. Beware v2/v3 which use Realtek RTL8188EU and have flakier monitor support. |
The Pi Zero’s OTG port can deliver ~500 mA at 5 V — barely enough for these adapters under sustained TX. Use a powered hub for any external adapter use. The standard chassis trick is a 5V boost off the LiPo into a small USB-A breakout, with the hub powering both the Pi (back-feed via the OTG) and the adapter. Vol 4 §3.2 has a parts list for a self-contained “Pwnagotchi + external Wi-Fi adapter” build.
For most Pwnagotchi use cases, the on-board radio is fine. Add the external adapter only if you have a specific reach/sensitivity/5-GHz requirement.
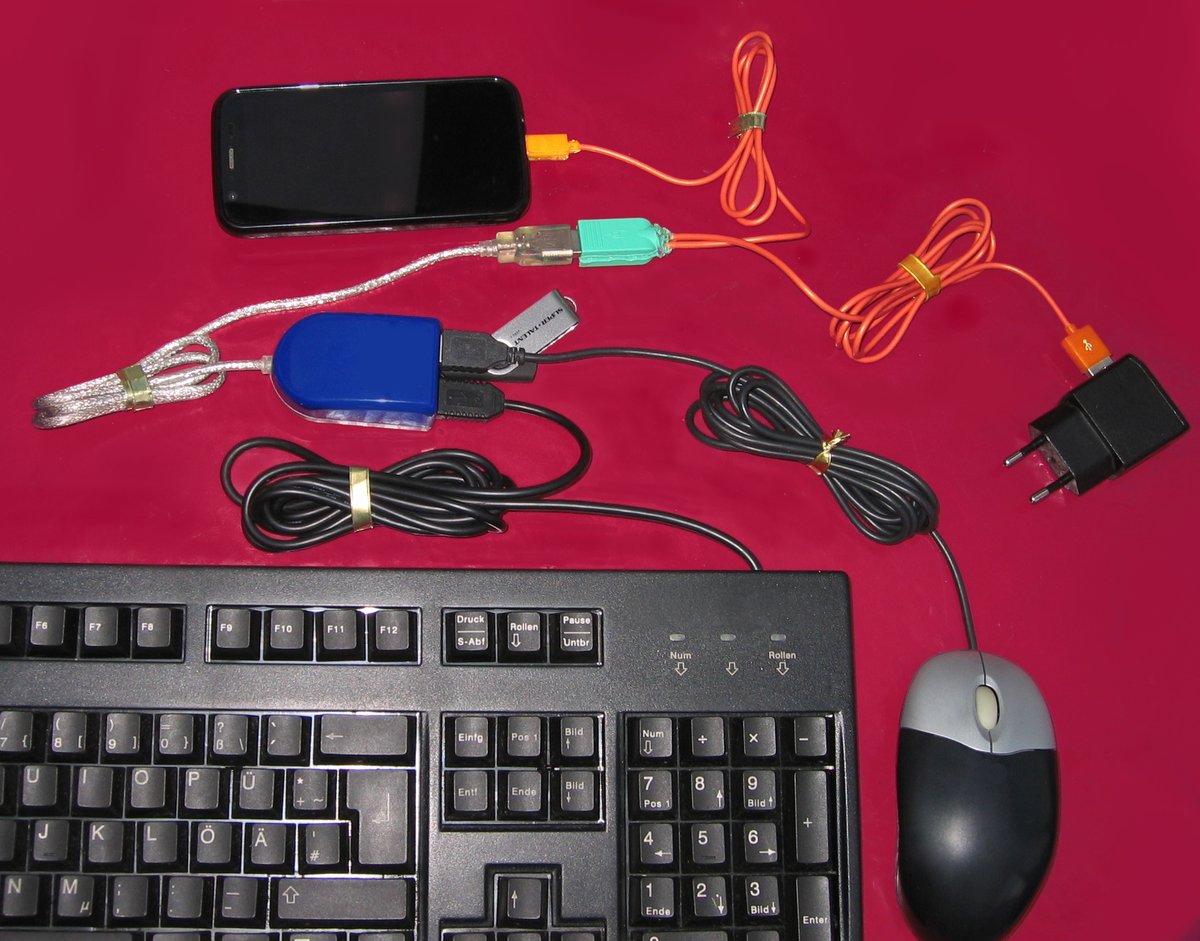
Figure 5.1 — USB OTG cable. Via Wikimedia Commons.
2.5 Power posture
A bench Pwnagotchi (always plugged in) needs nothing more than a 5V/2A USB-A power supply. A portable Pwnagotchi needs a LiPo + boost converter + protection subsystem; there are two common patterns.
2.5.1 Pattern A — Adafruit PowerBoost 1000C / Sparkfun LiPo charger + booster
A PowerBoost is a small board that takes a single-cell LiPo (3.0-4.2 V), boosts to a regulated 5.0 V at up to 1 A, and includes USB-mini charging + battery-protection. Wiring:
   LiPo (1S, 1200-2500 mAh)  ──→  PowerBoost 1000C  ──→  Pi Zero 5V/GND
                                     │
                                     └── USB-mini in (charge port; appears flush at case edge)
Pros: cheap (~$15), reliable, easy to mount. Cons: no software-visible state-of-charge (the PowerBoost has a low-battery LED but no I²C / GPIO signaling).
2.5.2 Pattern B — PiSugar 3
The PiSugar 3 is a single-board solution: LiPo + boost + charger + RTC + state-of-charge sensor + soft-shutdown button, all on a HAT-shaped PCB that mounts directly to the underside of the Pi Zero. The 40-pin GPIO header passes through; you stack the e-ink HAT on top.
   ┌─────────────────┐
   │  e-ink HAT      │  ← Waveshare 2.13" v4 or Inky pHAT etc.
   ├─────────────────┤
   │  Pi Zero 2 W    │  ← 40-pin header
   ├─────────────────┤
   │  PiSugar 3      │  ← LiPo on the bottom face
   └─────────────────┘
Pros: cleanest stack, software battery readout (I²C), real-time clock survives power loss (the Pi Zero has no RTC of its own). Cons: ~$30 each, the stack is taller (~20 mm vs ~12 mm for PowerBoost-in-case).
The PiSugar maintainers ship a Pwnagotchi plugin (pisugar, see Vol 9 §3) that surfaces battery percentage on the e-ink face and triggers an orderly shutdown at 10% remaining. Strongly recommended if you can spare the height.
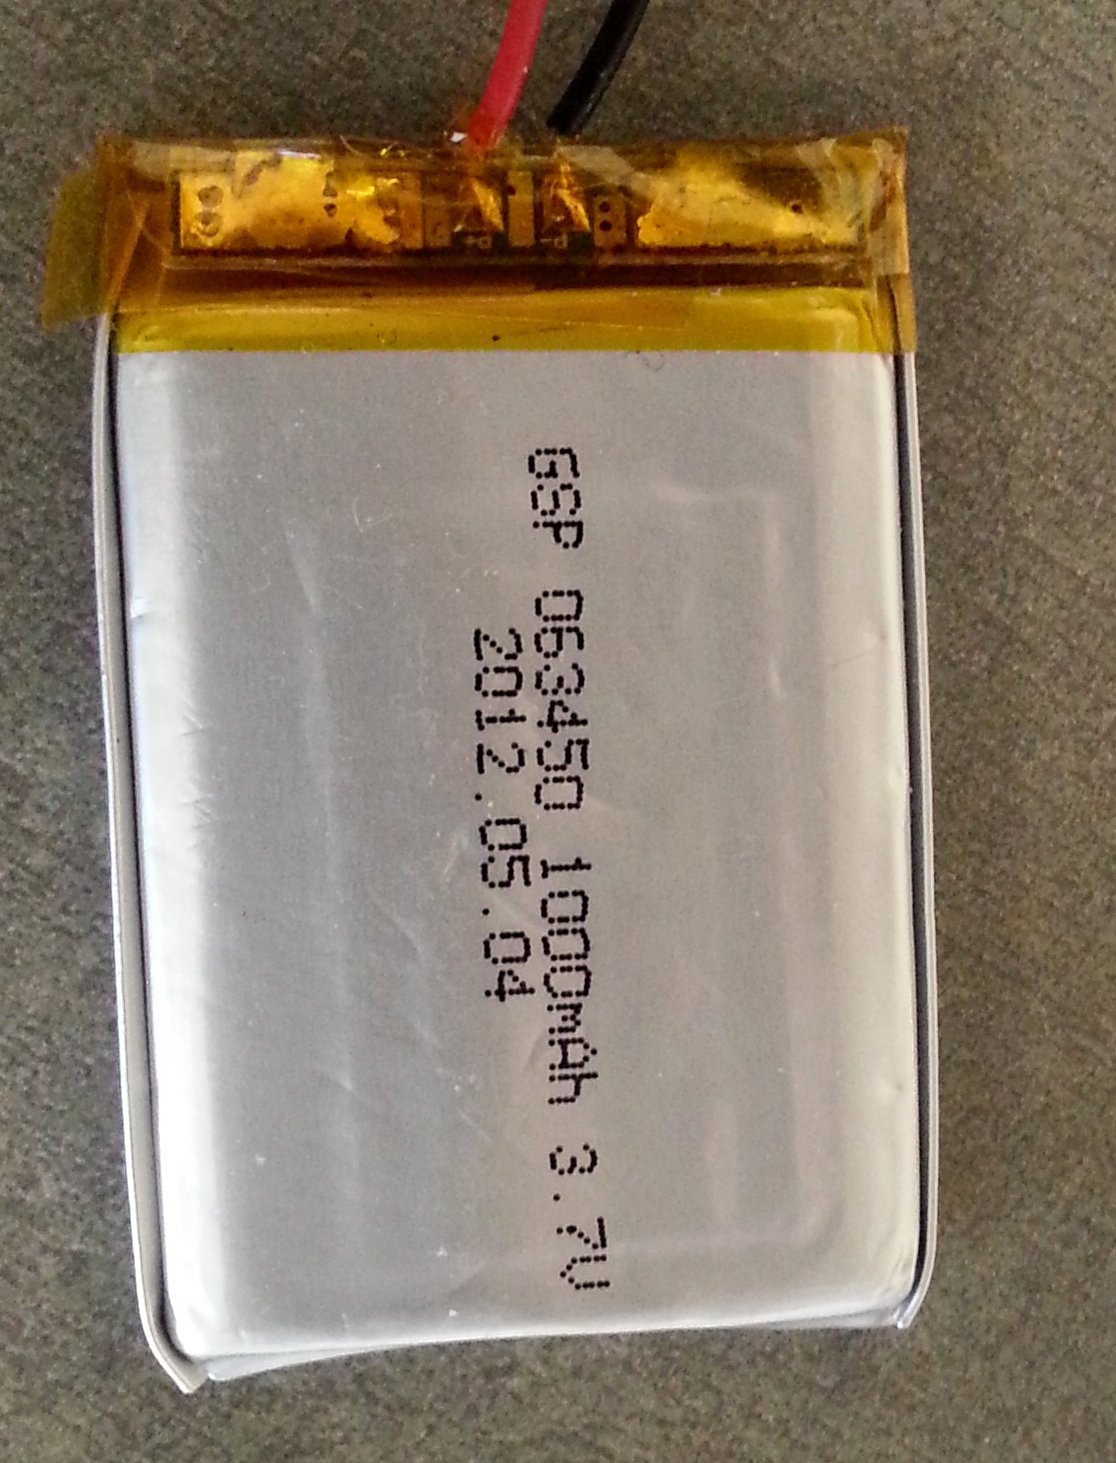
Figure 6.1 — A LiPo pouch cell. Via Wikimedia Commons.
2.6 The microSD — quietly important
Pwnagotchi writes to the microSD constantly: bettercap logs, handshake .pcap files, the A2C agent’s saved model weights, the pwngrid peers database, the systemd journal. A poor-quality microSD will (a) fail in 6-18 months and (b) bottleneck capture.
Recommended classes:
- SanDisk High Endurance (orange label) or Samsung PRO Endurance (red label) — both marketed for dashcam / continuous-write workloads. 32 GB or 64 GB is plenty. ~$10-15.
- Avoid no-name microSDs (“Anker MOTOMOTO 256 GB Class 10!!!” — these are routinely fake-flashed garbage).
- The jayofelony image enables
fstrimweekly via/etc/cron.weekly/fstrim— leave it on, it materially extends SD life.
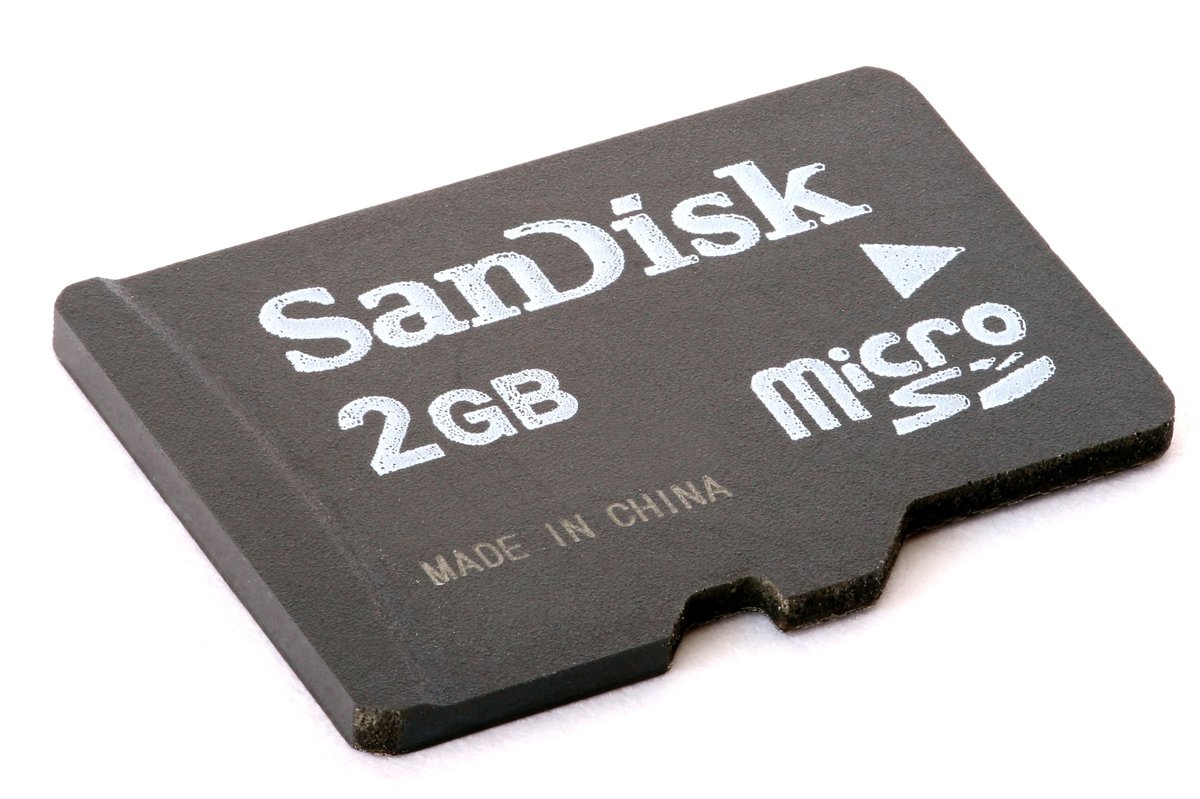
Figure 7.1 — A microSD card. Via Wikimedia Commons.
2.7 The complete BOM, summarized
For the recommended starter build (Path A from Vol 1):
Table 3 — For the recommended starter build (Path A from [Vol 1](/pwnagotchi/vol-1/))
| Item | Part | ~Price | Notes |
|---|---|---|---|
| Compute | Raspberry Pi Zero 2 W | $15 | Zero 2 W; not original Zero W |
| Pre-soldered header | (optional — Pi Zero 2 WH variant or solder yourself) | +$5 | If you can’t solder, get pre-soldered |
| Display | Waveshare 2.13” e-paper HAT v4 | $22 | v4 specifically; v1/v2/v3 use different drivers (see Vol 3) |
| Battery | 1200 mAh LiPo (503048 form factor) w/ JST PH | $8 | Larger if you need >8 hr runtime |
| Charger / booster | PiSugar 3 OR PowerBoost 1000C + JST adapter | $30 / $15 | PiSugar gives RTC + SOC; PowerBoost is cheaper |
| microSD | SanDisk High Endurance 32 GB | $10 | Avoid generic flash |
| Case | 3D-printed brick (Thingiverse, PrusaSlicer to PETG) | $5 (self-print) / $15 (order) | PETG > PLA for heat |
| Power supply (for bench) | 5V/2A USB-A | $8 | Optional if you only run on battery |
| Total | $98 - $103 | Roughly $80 if you skip pre-soldered header + use PowerBoost |
For the Mike J. Kelly Motorola Advisor mod, add:
- Motorola Advisor pager (eBay) — $5-25
- 3D-printed Kelly inserts (PETG) — $3-5
- Patience for the rocker-button-to-GPIO wiring — a weekend
2.8 The Raspberry Pi 3 footnote
If you cannot source a Pi Zero W or Pi Zero 2 W (occasional shortages happen — the original Zero W had a multi-year supply shortage from 2020-2023), the Pwnagotchi software runs on a Raspberry Pi 3 B / 3 B+ with the same image. You lose the Pi Zero form factor (Pi 3 is 85×56 mm — twice the footprint) and gain wired Ethernet and a real USB host. Vol 4 §5 has the “Pi 3 in a project box” build variant for completeness.
Figure 9.1 — Raspberry Pi 3 Model B. Via Wikimedia Commons.
2.9 Cheatsheet updates from this volume
Items to roll into Vol 12 (laminate-ready cheatsheet):
- “Use Pi Zero 2 W + Bookworm 64-bit arm64 image.” (§1)
- “Inner micro-USB = OTG (data); outer = PWR-only.” (§3)
- “
brcmfmacmonitor-mode firmware is patched in jayofelony image; do notapt upgradecasually.” (§2)- “External USB Wi-Fi adapter requires powered hub — Pi Zero OTG cannot supply 500+ mA reliably.” (§5)
- “PiSugar 3 > PowerBoost 1000C if you can spare the height — adds battery telemetry + RTC.” (§6)
- “Use SanDisk High Endurance / Samsung PRO Endurance microSD — Pwnagotchi writes hard.” (§7)
Comments (0)